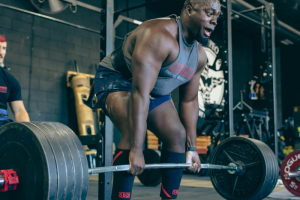
Building a strong, defined chest at home doesn't require expensive equipment or a gym membership—just your body weight and a few household items can deliver serious results.
The best home chest workout combines progressive push-up variations, water bottle exercises for added resistance, and resistance band movements that target your chest from multiple angles.
Keep reading for the complete step-by-step program that will transform your chest training, including the exact exercises, rep schemes, and 8-week progression plan that builds real muscle and strength.
Master the Push-up Foundation: Your Gateway to Chest Development
The push-up serves as your primary chest-building tool at home because it allows infinite progression while targeting every area of your pectorals.
Getting the basics right from day one determines whether you'll build real strength or plateau within weeks.
Perfect Your Standard Push-up Form
Position your hands shoulder-width apart with fingers spread wide for stability.
Your elbows should track at a 45-degree angle to your torso—not flared out to 90 degrees, which stresses your shoulders unnecessarily.
This angle maximizes chest activation while protecting your joints.
Movement timing makes the difference between effective training and wasted effort:
- Lower yourself over 2-3 seconds with complete control
- Pause briefly at the bottom position
- Drive up explosively in 1-2 seconds
- Exhale forcefully during the pushing phase
Your body should form a straight line from head to heels throughout the entire movement.
Engage your core as if someone's about to punch your stomach—this prevents the common mistake of letting your hips sag or pike upward.
The Progressive Push-up System
Start where your current strength allows and advance systematically through these variations:
Incline Push-ups (Beginner Level)
Use your couch, chair, or any stable elevated surface. The higher the surface, the easier the movement becomes. This variation reduces the percentage of your body weight you're pushing, making it perfect for building initial strength and perfecting form.
Standard Push-ups (Intermediate Level)
Once you can perform 15 clean incline push-ups, transition to floor-level push-ups. This represents the foundation that everything else builds upon.
Decline Push-ups (Advanced Level)
Place your feet on a chair or bench while keeping your hands on the floor. This variation shifts more weight onto your arms and targets your upper chest more effectively. The higher your feet, the more challenging the exercise becomes.
Target Different Areas with Specialized Variations
Diamond Push-ups for Inner Chest Development
Form a diamond shape with your thumbs and index fingers touching. This hand position shifts emphasis to your triceps and the inner portion of your chest. Start with 3-4 sets of 8-15 reps, expecting these to feel significantly harder than standard push-ups initially.
Wide-Grip Push-ups for Maximum Chest Activation
Place your hands 6-8 inches wider than shoulder-width. This broader stance requires more force production from your pectoralis major while reducing tricep involvement. The trade-off is slightly less range of motion, but greater chest isolation.
Rep and Set Guidelines by Experience Level
Beginners: 3 sets of 8-12 reps with 60-90 seconds rest Intermediate: 3-4 sets of 10-15 reps with 60 seconds rest
Advanced: 4-5 sets of 12-20 reps with 45-60 seconds rest
Progress by adding reps first, then sets, then advancing to harder variations. When you can complete the upper end of your target rep range for all sets, it's time to increase difficulty.
Avoid These Form-Killing Mistakes
Partial range of motion cuts your results in half. Your chest should nearly touch the ground on every rep—anything less leaves gains on the table.
Speed rushing through reps might boost your ego, but controlled movement builds more strength and size. If you can't maintain the 2-1-2 tempo, reduce your reps or use an easier variation.
Inconsistent hand placement from set to set changes the exercise stimulus. Mark your hand positions or use visual cues to maintain consistency across all training sessions.
Push-ups aren't just a beginner exercise—they're a progression system that can challenge you for years when applied intelligently.
Transform Household Items into Effective Training Tools
You don't need to invest in expensive weights when everyday items can provide the resistance needed for serious chest development.
The key lies in understanding how to use these tools progressively and safely to match your growing strength.
Build Your Water Bottle Weight System
A single gallon of water weighs exactly 8.75 pounds—perfect for adding meaningful resistance to your chest exercises.
This weight challenges your muscles beyond bodyweight alone while remaining manageable for most fitness levels.
Progressive Loading Strategy:
- Start small: 500ml bottles (approximately 1 pound each)
- Build up: 1-liter bottles (2.2 pounds each)
- Level up: Gallon jugs (8.75 pounds each)
- Advanced option: Fill empty gallon containers with sand for 12-15 pounds
The beauty of water bottles lies in their adjustability. Partially fill larger containers to find your perfect resistance level, then gradually add more liquid as you get stronger.
Master the Water Bottle Floor Press
Lie flat on your back with knees bent and feet planted firmly on the ground.
Position the water bottles beside your torso before lying down—trying to grab them from an overhead position puts unnecessary strain on your shoulders.
Setup sequence:
- Lie between two water bottles placed at chest level
- Grab both bottles with a firm, secure grip
- Press them straight up over your chest
- Lower with control until your upper arms touch the floor
- Drive upward while squeezing your chest muscles
Focus on the squeeze at the top of each rep.
This isometric contraction maximizes chest activation and helps you feel the muscle working throughout the entire range of motion.
Aim for 3-4 sets of 8-15 reps with this movement.
Execute Water Bottle Flyes for Chest Isolation
Flyes provide the stretch and isolation that pressing movements can't deliver.
Start with lighter bottles since this exercise challenges your chest in a lengthened position where you're naturally weaker.
Lie flat with arms extended, holding bottles directly above your chest.
Lower the bottles by opening your arms in a wide arc, following your shoulder's natural movement pattern.
Stop when your hands reach shoulder level—going deeper risks shoulder injury without additional benefit.
The key is maintaining a slight bend in your elbows throughout the movement.
Straight arms place dangerous stress on your elbow joints, while overly bent arms turn the exercise into a press.
Find that middle ground where you feel a deep stretch across your chest.
Maximize Resistance Band Training
High-tension resistance bands with door anchors simulate expensive cable machines at a fraction of the cost.
They provide variable resistance that increases as the band stretches, matching your strength curve better than fixed weights.
Door Anchor Setup: Position the anchor point at chest height for horizontal pressing movements.
Double-check that your door closes securely and the anchor sits firmly in the door frame—a loose setup leads to equipment failure and potential injury.
Execute Banded Push-ups for Variable Resistance
Loop the resistance band across your upper back and thread your hands through the handles before assuming your push-up position.
The band adds resistance that peaks at the top of the movement where your chest muscles are strongest.
This creates a different challenge than regular push-ups.
You'll fight against increasing resistance as you press up, then get assistance as you lower down.
The result is greater muscle activation throughout the entire range of motion.
Standing Chest Press Technique:
- Anchor band at chest height
- Step forward to create initial tension
- Press both handles forward with arms parallel to the ground
- Control the return with the same deliberate pace
- Maintain tension in the band throughout all phases
Perform 3 sets of 12-20 reps, focusing on smooth, controlled movements rather than explosive speed.
Safety and Durability Guidelines
Water bottle considerations:
- Check bottles for cracks or weak points before each use
- Replace bottles showing wear signs immediately
- Secure your grip completely before starting any movement
- Use bottles with wide mouths for easier handling
Resistance band maintenance:
- Inspect bands for nicks, cuts, or thinning areas
- Store bands away from sharp objects and extreme temperatures
- Replace bands annually with regular use
- Never stretch bands beyond 3 times their resting length
General safety protocol: Test all equipment at low intensities before pushing hard.
A bottle splitting during a heavy set or a band snapping mid-rep can cause injury and derail your training progress.
Your household items can deliver professional-level training results when used intelligently and maintained properly.
Advanced Progressions That Challenge Even Strong Athletes
When standard push-ups become easy, most people make the mistake of simply adding more reps.
Real strength athletes know that progression means increasing difficulty, not just volume.
These advanced techniques will challenge your chest development in ways that translate to genuine functional power.
Explosive Power Through Plyometric Push-ups
Plyometric push-ups transform the familiar movement into a power-building exercise that develops the fast-twitch muscle fibers responsible for explosive strength.
The goal isn't just to push up—it's to generate enough force to launch your hands off the ground.
Start with clap push-ups, where you explode up with enough power to clap your hands before catching yourself.
This requires generating roughly 1.5 times your normal push-up force in a fraction of the time.
Land softly with slightly bent arms to absorb the impact and protect your joints.
Progression sequence for explosive development:
- Standard explosive push-ups: Drive up forcefully without leaving the ground
- Clap push-ups: Generate enough power for a single hand clap
- Double-clap push-ups: Clap twice before landing
- Clap behind back: Advanced coordination and power requirement
Limit plyometric work to 3-4 sets of 5-8 explosive reps.
Quality matters more than quantity—sloppy reps with poor landing mechanics lead to injury without strength gains.
Master Single-Arm Push-up Progressions
The single-arm push-up represents the pinnacle of bodyweight chest strength, requiring exceptional unilateral power and core stability.
Most athletes attempt this progression too early and develop compensatory movement patterns that limit their progress.
Systematic progression pathway:
- Elevated single-arm push-ups: Place your working hand on a sturdy chair or couch while keeping the non-working arm behind your back. This reduces the load while teaching the movement pattern.
- Negative single-arm push-ups: Start at the top position and lower yourself slowly over 5-8 seconds using only one arm. Use both arms to return to the starting position.
- Assisted single-arm push-ups: Keep your non-working hand on a basketball or medicine ball for minimal assistance while performing the full movement.
- Full single-arm push-ups: The complete movement with no assistance.
Expect this progression to take months, not weeks. Your supporting muscles need time to adapt to the unique stability demands that single-arm work creates.
Manipulate Tempo for Maximum Muscle Tension
Time under tension directly correlates with muscle growth, making tempo manipulation one of your most powerful progression tools.
Instead of rushing through reps, you deliberately control each phase to maximize the training stimulus.
Effective tempo prescriptions:
- 3-1-3 tempo: 3 seconds down, 1 second pause, 3 seconds up
- 5-2-1 tempo: Extended eccentric with pause for strength building
- 2-0-X tempo: Controlled lowering with explosive concentric
The eccentric (lowering) phase offers the greatest opportunity for strength development since your muscles can handle more load while lengthening.
A 5-second negative push-up challenges your chest more than three regular-speed reps.
Increase Range of Motion for Complete Development
Standard push-ups limit your range of motion to the point where your chest touches the floor.
Push-up handles, thick books, or yoga blocks allow you to descend several inches deeper, engaging muscle fibers that partial range exercises miss entirely.
This increased stretch activates more muscle fibers while improving flexibility and shoulder mobility.
The deeper range of motion also increases the work your muscles must perform on each rep, making every movement more challenging.
Setup considerations:
- Ensure your elevated surface is stable and won't shift mid-set
- Start with 2-3 inch elevation before progressing to greater depths
- Maintain the same form standards despite the increased difficulty
Circuit Training for Metabolic Challenge
Advanced athletes need conditioning that matches their strength levels.
Circuit training combines multiple chest exercises with minimal rest to create a metabolic challenge that builds both strength and endurance.
Sample advanced chest circuit:
- Decline push-ups × 8-12 reps
- Diamond push-ups × 8-10 reps
- Wide-grip push-ups × 10-15 reps
- Standard push-ups × 15-20 reps
Complete all four exercises with no rest between movements, then rest 2-3 minutes before repeating for 3-4 total rounds.
This format maintains high intensity while testing your ability to perform under fatigue.
Build Strength Through Isometric Holds
Isometric contractions at specific joint angles develop strength in positions where you're typically weakest.
Pause techniques and static holds transform any push-up variation into a strength-building challenge.
Effective isometric protocols:
- Bottom-position holds: Pause 2-5 seconds at the bottom of each rep
- Mid-range pauses: Hold halfway down for 3-8 seconds
- Top-position squeezes: Contract your chest maximally for 2-3 seconds at the top
These techniques work especially well with declined push-ups or single-arm progressions where the additional challenge creates significant strength adaptations.
Strategic Progression Guidelines
When to advance: You should complete all prescribed sets and reps with perfect form before moving to a harder variation.
Rushing progressions leads to form breakdown and increased injury risk.
How to transition: Spend 1-2 weeks alternating between your current level and the next progression.
For instance, perform regular push-ups on Monday and decline push-ups on Wednesday until the harder variation feels manageable.
Volume management: Advanced progressions require fewer reps but more sets.
Drop your rep range by 20-30% when introducing new techniques, then build back up over several weeks.
The key to long-term progress lies in patience with progressions and consistency with challenging variations that match your current strength level.
Programming Your Workouts for Maximum Results

Random training produces random results.
Your chest development depends on systematically manipulating training variables to create consistent overload while allowing adequate recovery.
Smart programming turns good exercises into transformative results.
Match Training Frequency to Your Recovery Capacity
Your training frequency should reflect your experience level, recovery ability, and life demands.
Beginners need fewer sessions to stimulate growth, while advanced athletes require higher frequencies to maintain progress.
Beginner (0-6 months): 2-3 chest sessions per week Your muscles adapt quickly to new stimuli, making frequent training unnecessary.
Focus on mastering movement patterns and building base strength before increasing frequency.
Intermediate (6-24 months): 3-4 chest sessions per week
Your body adapts to training stress more efficiently, allowing for increased frequency without overreaching. This stage offers the fastest strength and size gains.
Advanced (2+ years): 4+ chest sessions per week Your muscles resist change, requiring more frequent stimulation to continue progressing. Vary intensities across sessions to prevent overtraining.
Younger athletes typically handle higher frequencies better than older trainees, who benefit from additional recovery time between intense sessions.
Optimize Weekly Volume for Your Experience Level
Volume represents your total training workload—the primary driver of muscle growth and strength development.
Too little volume limits progress, while excessive volume impairs recovery and performance.
Weekly set targets by experience:
- Beginner: 6-9 hard sets per week
- Intermediate: 10-14 hard sets per week
- Advanced: 14-20 hard sets per week
A “hard set” means reaching within 2-3 reps of failure with good form.
Easy sets don't count toward your weekly volume target, regardless of how many you perform.
Distribute this volume across your training sessions rather than cramming everything into one workout.
Three sessions of 4-5 sets each produces better results than one session of 12-15 sets followed by days of recovery.
Target Specific Adaptations Through Rep Range Selection
Different rep ranges create different physiological adaptations.
Match your rep selection to your primary training goal while incorporating variety to develop well-rounded strength.
Strength Focus (6-8 reps): Use your most challenging push-up variations—decline push-ups, weighted variations, or single-arm progressions.
This range builds maximum force production and neural efficiency.
Hypertrophy Focus (8-15 reps):
The sweet spot for muscle growth using standard and diamond push-ups with controlled tempo.
This range optimizes mechanical tension and metabolic stress.
Endurance Focus (15-30 reps): Higher rep training with incline push-ups or lighter resistance builds muscular endurance and work capacity.
Include this range to support recovery and movement quality.
Most effective programs combine all three ranges throughout the week, emphasizing your primary goal while maintaining the others.
Apply Progressive Overload Without Adding Weight
Home training requires creative approaches to progressive overload since adding weight plates isn't always practical.
Multiple methods ensure continuous progress regardless of equipment limitations.
Progression hierarchy (easiest to hardest):
- Increase repetitions: Add 1-2 reps per set each week until reaching the top of your target range
- Add sets: Progress from 3 to 4 to 5 sets over several weeks
- Advance exercise variation: Move from incline to standard to decline push-ups
- Manipulate tempo: Slow down the eccentric phase by 1 second every 2 weeks
- Reduce rest periods: Decrease rest by 10-15 seconds weekly while maintaining performance
Apply one progression method at a time.
Changing multiple variables simultaneously makes it impossible to identify which factor drives your progress.
Optimize Recovery Between Sets and Sessions
Recovery timing directly impacts your ability to maintain intensity and volume throughout each workout and across training sessions.
Between-set rest periods:
- Strength training (6-8 reps): 2-3 minutes for complete phosphocreatine replenishment
- Hypertrophy training (8-15 reps): 60-90 seconds for optimal muscle-building stimulus
- Endurance training (15+ reps): 45-60 seconds to maintain metabolic stress
Between-workout recovery: Allow 48-72 hours between intense chest sessions targeting the same muscle groups.
Light movement and stretching on off days promotes blood flow without interfering with adaptation.
Your soreness level provides useful feedback—mild soreness indicates effective training, while severe soreness suggests excessive volume or inadequate recovery.
Structure Long-term Progress Through Periodization
Periodization prevents plateaus by systematically varying training stress over time.
Each phase builds upon the previous one while targeting different adaptations.
Phase 1: Foundation (Weeks 1-2)
- Focus: Movement quality and work capacity
- Volume: Low (6-9 sets per week)
- Intensity: Moderate (8-12 reps)
- Exercises: Basic variations with perfect form
Phase 2: Volume (Weeks 3-4)
- Focus: Muscle growth and training tolerance
- Volume: Moderate (10-14 sets per week)
- Intensity: Moderate-high (8-15 reps)
- Exercises: Add exercise variations and increased frequency
Phase 3: Intensity (Weeks 5-6)
- Focus: Strength development and neural adaptation
- Volume: Moderate-high (12-16 sets per week)
- Intensity: High (6-10 reps with advanced variations)
- Exercises: Challenging progressions with tempo work
Phase 4: Power (Weeks 7-8)
- Focus: Explosive strength and movement quality
- Volume: Moderate (8-12 sets per week)
- Intensity: High (5-8 explosive reps)
- Exercises: Plyometric variations and circuit training
Each phase lasts 2 weeks, allowing sufficient time for adaptation while preventing staleness.
After completing all four phases, return to Phase 1 with more challenging exercise selections.
This systematic approach ensures continuous progress while managing fatigue and maintaining motivation throughout your training cycle.
The Complete 8-Week Home Chest Transformation Program
This program transforms your chest through systematic progression that builds strength, size, and power using only your body weight and basic household items.
Each phase targets specific adaptations while preparing you for the next level of challenge.
Weeks 1-2: Foundation Phase – Master the Basics
Your first two weeks establish movement quality and build work capacity.
Perfect form during this phase determines your success throughout the entire program.
Training Schedule: 3 sessions per week (Monday, Wednesday, Friday)
Total Weekly Volume: 9 sets across all sessions
Rest Between Sets: 90 seconds
Session Duration: 15-20 minutes
Workout Template:
- Incline Push-ups – 3 sets of 8-12 reps
- Use couch or chair at comfortable height
- Focus on 2-second lowering, 1-second pause, 2-second push
- Standard Push-ups – 3 sets of 8-12 reps
- Only if you can maintain perfect form
- Drop to knees if form breaks down
- Water Bottle Floor Press – 3 sets of 8-12 reps
- Start with 1-liter bottles or lighter
- Squeeze chest muscles at the top of each rep
Week 1 Goal: Complete all prescribed reps with excellent form Week 2 Goal: Add 1-2 reps per set while maintaining quality
Weeks 3-4: Volume Phase – Build Training Capacity
Volume increases significantly during this phase as you add exercises and training frequency.
Your muscles adapt to higher workloads while continuing to strengthen fundamental movement patterns.
Training Schedule: 4 sessions per week (Monday, Tuesday, Thursday, Friday)
Total Weekly Volume: 16 sets across all sessions
Rest Between Sets: 75 seconds
Session Duration: 20-25 minutes
Workout A (Monday/Thursday):
- Standard Push-ups – 4 sets of 8-15 reps
- Diamond Push-ups – 3 sets of 6-12 reps
- Water Bottle Floor Press – 3 sets of 10-15 reps
Workout B (Tuesday/Friday):
- Incline Push-ups – 3 sets of 12-20 reps
- Wide-Grip Push-ups – 3 sets of 8-15 reps
- Water Bottle Flyes – 3 sets of 10-15 reps
- Resistance Band Chest Press – 3 sets of 12-20 reps
Progressive targets: Increase reps by 1-2 per week while adding new exercise variations.
If you can complete the upper rep range for all sets of an exercise, progress to a more challenging variation.
Weeks 5-6: Intensity Phase – Advanced Variations
Training intensity jumps significantly as you incorporate challenging variations and tempo manipulation.
This phase builds serious strength while preparing your nervous system for explosive movements.
Training Schedule: 4 sessions per week
Total Weekly Volume: 20 sets across all sessions
Rest Between Sets: 2 minutes for strength moves, 60 seconds for accessory work
Session Duration: 25-30 minutes
Workout A (Monday/Thursday):
- Decline Push-ups – 4 sets of 6-10 reps
- Feet elevated on chair or couch
- 3-1-3 tempo (3 seconds down, 1 second pause, 3 seconds up)
- Single-Arm Push-up Progression – 3 sets of 3-8 reps per arm
- Use elevated variation if full single-arm isn't possible
- Focus on control and stability
- Water Bottle Floor Press – 4 sets of 8-12 reps
- Progress to heavier bottles or gallon jugs
- Add 2-second pause at bottom
Workout B (Tuesday/Friday):
- Diamond Push-ups – 4 sets of 8-12 reps
- 3-1-2 tempo for increased difficulty
- Wide-Grip Push-ups – 3 sets of 10-15 reps
- Maximum range of motion using books or handles
- Resistance Band Flyes – 3 sets of 12-15 reps
- Isometric Push-up Holds – 3 sets of 15-30 seconds
- Hold at bottom position of standard push-up
Intensity markers: You should reach within 2-3 reps of failure on each set.
If you can complete more than the prescribed reps easily, progress to a harder variation immediately.
Weeks 7-8: Power Phase – Explosive Development
The final phase develops explosive power and integrates all your newfound strength into dynamic movements.
Circuit training challenges your conditioning while maintaining strength gains.
Training Schedule: 4 sessions per week
Total Weekly Volume: 16 sets (reduced volume for recovery and power focus)
Rest Between Exercises: 10 seconds in circuits, 2-3 minutes between rounds
Session Duration: 20-25 minutes
Workout A (Monday/Thursday) – Power Focus:
- Plyometric Push-ups – 4 sets of 5-8 explosive reps
- Start with explosive push-ups, progress to clap push-ups
- Land softly with control
- Decline Push-ups – 3 sets of 6-8 reps
- Explosive concentric, controlled eccentric
- Single-Arm Negatives – 3 sets of 3-5 reps per arm
- 5-second lowering phase only
Workout B (Tuesday/Friday) – Circuit Training:
Circuit Format (Repeat 4 rounds):
- Decline Push-ups × 10 reps
- Diamond Push-ups × 8 reps
- Wide-Grip Push-ups × 12 reps
- Standard Push-ups × 15 reps
- Incline Push-ups × 20 reps
Perform exercises back-to-back with 10 seconds transition time. Rest 2-3 minutes between complete rounds.
Adaptation Strategies for All Fitness Levels
If exercises feel too easy:
- Progress to the next variation immediately
- Add tempo manipulation (slower eccentrics)
- Increase sets before increasing reps
If exercises feel too difficult:
- Use easier variations (higher incline for push-ups)
- Reduce reps by 20-30% and build up gradually
- Focus on negative (lowering) portions of movements
For strength-focused athletes: Emphasize lower rep ranges (6-8) with harder variations
For endurance-focused athletes: Use higher rep ranges (15-25) with moderate variations
For size-focused athletes: Stay in the 8-15 rep range with controlled tempo
Track Progress and Assess Milestones
Weekly assessments:
- Maximum consecutive standard push-ups (test every Friday)
- Body measurements (chest circumference at nipple line)
- Subjective energy levels and recovery quality
Key milestones to achieve:
- Week 2: 15 consecutive standard push-ups with perfect form
- Week 4: 25 consecutive standard push-ups
- Week 6: 5 consecutive decline push-ups
- Week 8: 1 clap push-up or 35+ consecutive standard push-ups
Progress indicators beyond numbers:
- Improved sleep quality and energy levels
- Better posture and shoulder stability
- Increased confidence in upper body strength
- Noticeable visual changes in chest development
Document your workouts in a simple log noting exercises, sets, reps, and how each session felt.
This data guides your progression decisions and reveals patterns in your recovery and performance.
After completing all eight weeks, you'll have transformed not just your chest strength but your entire approach to bodyweight training.
The foundation you've built supports years of continued progress using increasingly challenging variations and training methods.
Essential Warm-up, Recovery, and Long-term Success Strategies
The difference between good results and exceptional transformation lies not just in your workout execution, but in how well you prepare your body beforehand and support its recovery afterward. These protocols turn sporadic training into sustainable progress.
Pre-Workout Mobility: Prime Your Body for Performance
Your warm-up serves two critical functions: injury prevention and performance enhancement.
Cold muscles and stiff joints limit your strength output while increasing injury risk during challenging movements.
5-Minute Dynamic Warm-up Sequence:
- Arm Circles – 30 seconds forward, 30 seconds backward
- Start small and gradually increase circle size
- Mobilizes shoulder joints and activates surrounding muscles
- Shoulder Rolls – 10 forward, 10 backward
- Focus on full range of motion through the shoulder blades
- Releases upper trap tension from daily posture habits
- Trunk Rotations – 10 rotations each direction
- Keep hips facing forward while rotating your torso
- Activates core muscles and improves spinal mobility
- Wall Push-ups – 10-15 repetitions
- Stand arm's length from wall, perform push-ups against it
- Rehearses movement pattern with minimal load
- Band Pull-aparts – 15-20 repetitions (if available)
- Activates rear deltoids and rhomboids
- Counteracts internal rotation from push-up dominant training
This sequence progressively increases your heart rate and core temperature while activating the specific muscle groups you'll challenge during training.
Never skip this preparation, even when time is limited—five focused minutes prevent hours of recovery from preventable injuries.
Post-Workout Recovery: Maximize Your Training Investment
Your muscles grow during recovery, not during training.
The workout provides the stimulus, but recovery protocols determine whether that stimulus translates into strength and size gains.
Immediate post-workout protocol (first 30 minutes):
- Light stretching focusing on chest, shoulders, and triceps
- Deep breathing exercises to activate parasympathetic recovery
- Hydration with 16-20 ounces of water to replace lost fluids
Soreness management strategies: Active recovery beats complete rest for managing muscle soreness.
Light movement increases blood flow to working muscles, delivering nutrients while removing metabolic waste products.
Take a 10-15 minute walk, perform gentle stretching, or do light household activities on your off days.
Heat therapy through warm showers or heating pads can provide temporary soreness relief, but avoid ice baths or prolonged cold exposure immediately after training, as this may blunt the adaptation response you're trying to create.
Sleep and Nutrition: The Foundation of All Progress
Sleep represents your most powerful recovery tool.
During deep sleep phases, your body releases growth hormone, repairs muscle tissue, and consolidates motor learning from your training sessions.
Sleep optimization guidelines:
- Target 7-9 hours per night for optimal recovery and hormone production
- Maintain consistent sleep/wake times, even on weekends
- Create a cool, dark environment that promotes deep sleep phases
- Limit screen exposure 1 hour before bed to preserve natural melatonin production
Nutrition for muscle repair: Protein intake of 0.7-1 gram per pound of body weight supports muscle protein synthesis and recovery.
Distribute this across 3-4 meals rather than consuming it all at once—your muscles can only process about 25-30 grams of protein per meal for maximum benefit.
Timing matters less than total daily intake, but consuming 20-25 grams of protein within 2 hours post-workout can slightly enhance recovery when training sessions are particularly intense or long.
Prevent Plateaus Through Systematic Progression
Plateaus occur when your training stimulus no longer challenges your current strength level.
The solution isn't training harder—it's training smarter through systematic progression.
Plateau prevention strategies:
Week-to-week progression: Change one variable at a time.
If you can complete all prescribed sets and reps with perfect form, add 1-2 reps to each set the following week.
Monthly exercise rotation: Replace 1-2 exercises every 4 weeks to provide new movement patterns and muscle activation.
For example, swap standard push-ups for archer push-ups or replace water bottle presses with resistance band exercises.
Deload weeks: Every 4-6 weeks, reduce training volume by 40-50% while maintaining exercise difficulty.
This allows your body to fully recover from accumulated fatigue while preparing for the next progression phase.
Troubleshoot Common Sticking Points
“I can't progress beyond 15 standard push-ups” Your issue likely stems from inadequate recovery or poor form rather than lack of strength.
Record yourself performing push-ups to identify form breakdown points, then address those specific weaknesses through targeted progressions.
“My shoulders hurt during push-ups” Shoulder pain usually indicates excessive forward head posture or improper hand positioning.
Widen your hand placement, ensure your head stays in neutral alignment, and incorporate more pulling exercises to balance your training.
“I lose motivation after 2-3 weeks” Set process goals rather than outcome goals. Instead of “I want bigger chest muscles,” focus on “I will complete three workouts this week with perfect form.”
Process goals provide immediate feedback and maintain motivation through difficult periods.
“My progress feels slow compared to others” Individual response to training varies dramatically based on genetics, training history, and lifestyle factors.
Focus on your own week-to-week improvements rather than comparing yourself to others.
Consistent small improvements compound into significant results over months.
Integration with Complete Home Fitness
Chest training represents just one component of balanced physical development.
Integrate your chest workouts with other movement patterns to create comprehensive fitness without equipment dependence.
Weekly training split example:
- Monday: Chest and triceps focus
- Tuesday: Pulling movements (rows, pull-ups if available)
- Wednesday: Lower body and core
- Thursday: Chest and shoulders
- Friday: Full-body circuit or active recovery
- Weekend: Longer walks, recreational activities, or complete rest
Movement balance priorities: For every pushing exercise you perform, include at least one pulling movement to maintain shoulder health and postural balance.
If you can't do pull-ups at home, emphasize resistance band rows, reverse flyes, and doorway stretches that open your chest and strengthen your upper back.
Cardiorespiratory integration: Use circuit training formats during your chest workouts to simultaneously build strength and cardiovascular fitness.
The metabolic demands of back-to-back exercises provide conditioning benefits without requiring separate cardio sessions.
Success in home fitness comes from consistency with these fundamentals rather than searching for advanced techniques or perfect equipment.
Master these recovery and progression principles, and your chest development will continue for years regardless of where you train.
Conclusion
This complete home chest training system proves that significant muscle development doesn't require expensive equipment or gym memberships—just consistent application of progressive overload principles using your bodyweight and household items.
Follow the 8-week program systematically, prioritize recovery and proper form over rushing through progressions, and you'll build genuine strength that translates to real-world functional power.
With these evidence-based methods, your chest development will continue advancing for years, limited only by your commitment to the process rather than your access to equipment.