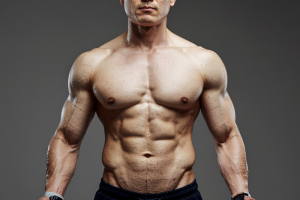
If you don’t have access to a decline bench or prefer alternative exercises, the five best substitutes for the decline press are chest dips, decline dumbbell bench press, decline dumbbell flyes, high to low cable flyes, and incline push-ups with an underhand grip.
Each of these movements effectively targets the lower chest, and you can keep reading for a more detailed breakdown of how to perform them correctly.
Chest Dips: Bodyweight Strength for Lower Chest Development
Chest dips are a powerful bodyweight exercise that effectively targets the lower portion of the chest, making them a great alternative to the decline bench press.
While dips primarily engage the triceps and shoulders, adjusting your body position can shift the emphasis toward the lower chest.
Because they require minimal equipment—just parallel bars or dip bars—they’re accessible in most gyms and even some home setups.
With proper form and progressive variations, dips can be an essential tool for lower chest growth and overall upper body strength.
How Dipping at a Forward Angle Shifts Focus to the Lower Pecs
The way you position your body during dips determines which muscle groups take on most of the workload.
A vertical torso keeps the focus on the triceps, but leaning forward changes the mechanics of the movement, shifting the emphasis to the lower chest.
This happens because:
- Gravity alters the pressing angle, placing more tension on the lower fibers of the pectoral muscles.
- A forward lean mimics a decline press movement, where the lower chest does most of the work to push the body upward.
- The stretch at the bottom of the dip maximally engages the chest, leading to better activation and muscle fiber recruitment.
To maximize lower chest activation, aim to maintain a 30-45 degree forward lean throughout the movement.
Keep your elbows slightly flared (but not excessively) to further shift tension from the triceps to the chest.
Additional Benefits: Triceps and Shoulder Engagement
While dips are a go-to exercise for lower chest development, they also build strength in supporting muscle groups:
- Triceps: The arms assist during the pressing phase, especially near lockout. This makes dips an effective compound movement for overall upper-body pushing strength.
- Shoulders: The anterior deltoids contribute to stabilization and movement control, particularly at the bottom of the dip where the stretch is deepest.
- Core Activation: Since dips require balance and control, the core muscles work to stabilize your body throughout the exercise.
These secondary benefits make dips not just a chest exercise but a multi-joint movement that improves pushing power across various lifts, including the bench press and overhead press.
Step-by-Step Guide to Performing Dips Correctly
Proper form is crucial for targeting the lower chest while avoiding unnecessary strain on the shoulders.
Follow these steps to execute dips safely and effectively:
- Grip the Bars & Set Your Position
- Use parallel bars that allow a natural shoulder-width grip.
- Fully extend your arms and support your weight with straight elbows.
- Engage Your Core & Lean Forward
- Tuck your chin slightly and lean your torso forward about 30-45 degrees.
- Keep your legs slightly bent or crossed behind you for balance.
- Lower Yourself with Control
- Bend your elbows and lower your body until your upper arms are parallel to the ground.
- Keep your elbows slightly flared outward, but not too wide.
- Feel the stretch in your chest at the bottom position.
- Press Up Powerfully
- Push through your palms, engaging your chest and triceps to return to the starting position.
- Avoid locking out your elbows at the top to maintain tension on the muscles.
- Maintain a Smooth, Controlled Tempo
- Lower yourself slowly (2-3 seconds) and push up explosively to maximize muscle engagement.
For optimal results, aim for 3-4 sets of 8-15 reps, adjusting as needed based on your strength level.
Modifications for Different Skill Levels
Dips can be challenging, especially for beginners.
Fortunately, several variations can make the exercise more accessible or increase the difficulty for advanced lifters.
Beginner Modifications: Assisted Dips
- Resistance Band Assistance: Loop a band around the bars and place your knees or feet in it to reduce the amount of body weight you have to lift.
- Assisted Dip Machine: Many gyms have a dip machine with a platform to support some of your weight, making the exercise easier.
- Negative Reps: Jump to the top position and lower yourself as slowly as possible to build strength.
Advanced Modifications: Weighted Dips
- Use a Dip Belt: Attach weight plates to a dip belt to increase resistance and further challenge the lower chest.
- Slow Eccentrics: Lower yourself over 4-5 seconds to emphasize muscle control and time under tension.
- Paused Reps: Pause for 1-2 seconds at the bottom of the movement to maximize chest engagement.
Regardless of skill level, progressing with controlled form is more important than simply adding reps or weight.
Common Mistakes to Avoid
Even small errors in form can reduce chest activation or increase injury risk.
Here’s what to watch for:
- Not Leaning Forward Enough: A vertical torso keeps the focus on the triceps rather than the chest. Ensure you’re leaning forward to engage the lower pecs.
- Going Too Low: While a deep stretch is beneficial, lowering too far can strain the shoulders. Keep the range within a safe and comfortable level.
- Limited Range of Motion: Stopping too high reduces effectiveness. Aim to lower yourself until your upper arms are parallel to the ground.
- Flaring the Elbows Too Much: While some outward flare is needed, excessive widening of the elbows increases shoulder strain. Maintain a natural elbow angle.
- Rushing Through Reps: Performing dips too quickly decreases muscle activation. Use a controlled movement for better results.
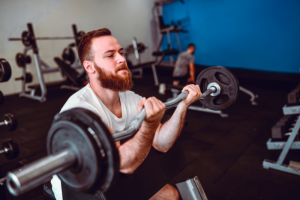
Decline Dumbbell Bench Press: Free Weight Alternative for Greater Range of Motion

The decline dumbbell bench press is an excellent substitute for the traditional decline barbell press, offering a greater range of motion and enhanced muscle activation.
Unlike a barbell, dumbbells allow each arm to move independently, helping to correct muscle imbalances and engage stabilizing muscles.
This variation not only targets the lower chest effectively but also adds versatility to any workout routine.
How Dumbbells Allow a Deeper Stretch and Better Activation
One of the key advantages of using dumbbells over a barbell is the increased range of motion they provide.
Because the barbell limits movement by stopping at chest level, the lower pecs don’t receive as much of a stretch.
With dumbbells, you can lower the weights past chest level, allowing the muscles to lengthen fully before contracting.
Additionally, dumbbells require more stabilization, activating smaller supporting muscles that a barbell press doesn’t engage as much.
This leads to better overall muscle development and improved control, reducing the risk of imbalances.
The independent movement of each arm also ensures that one side doesn’t dominate the lift, making it particularly useful for correcting asymmetries in strength and muscle size.
Step-by-Step Guide for Correct Form and Execution
Proper technique is crucial for maximizing chest engagement and preventing injury.
Follow these steps to perform the decline dumbbell bench press with perfect form:
- Set Up the Decline Bench
- Adjust a bench to a 15-30 degree decline to properly target the lower chest.
- Secure your legs in the bench's foot pads to maintain stability.
- Position Yourself with the Dumbbells
- Grab a dumbbell in each hand with a neutral grip (palms facing each other).
- Lie back on the bench and rotate your wrists forward so your palms face away from you.
- Lower the Dumbbells with Control
- Begin with the dumbbells at chest level, elbows slightly tucked (around 45 degrees from your body).
- Lower the weights slowly until your elbows are in line with your torso or slightly below.
- Focus on feeling a deep stretch in the lower chest.
- Press the Dumbbells Upward
- Push the dumbbells up in a controlled motion, bringing them slightly together at the top without touching.
- Squeeze your chest muscles at the top of the movement before lowering the weights again.
- Maintain a Controlled Tempo
- Lower the dumbbells for 2-3 seconds, press up explosively, and pause briefly at the top.
- Avoid locking out your elbows to keep tension on the muscles.
For best results, perform 3-4 sets of 8-12 reps, adjusting the weight as needed to challenge your muscles while maintaining proper form.
Adjusting Weight and Grip to Match Personal Strength Levels
Choosing the right weight is crucial for effective training.
If you’re just starting, begin with a moderate weight that allows you to complete all reps with proper form.
If you struggle to control the descent or feel shoulder strain, the weight is likely too heavy.
The grip position can also impact how the exercise targets your muscles:
- Standard grip (palms facing forward): Best for overall chest activation, including the lower pecs.
- Neutral grip (palms facing each other): Reduces shoulder strain and engages the triceps slightly more.
- Slight inward angle at the top: Bringing the dumbbells slightly together at the top enhances the chest contraction.
Experiment with different grip variations to find what feels best while keeping the focus on the lower pecs.
Comparison with the Barbell Decline Press (Pros and Cons)
Both the dumbbell and barbell decline presses are effective for lower chest development, but they have distinct advantages and disadvantages.
Dumbbell Decline Press – Pros
- Greater range of motion for deeper chest activation.
- More freedom of movement, reducing shoulder strain.
- Helps correct imbalances by forcing both arms to work independently.
- Requires more stabilizing muscle engagement, leading to better overall development.
Dumbbell Decline Press – Cons
- Harder to control heavy weights, limiting progression for advanced lifters.
- More difficult to set up, especially when using heavier dumbbells.
- Requires more stability and coordination, which may be challenging for beginners.
Barbell Decline Press – Pros
- Allows for heavier lifting, making it better for building maximal strength.
- Easier to progressively overload compared to dumbbells.
- More stable and requires less coordination, making it accessible for beginners.
Barbell Decline Press – Cons
- Limited range of motion, reducing the lower chest stretch.
- Can create muscle imbalances, as the stronger side may compensate for the weaker side.
- Fixed movement path can strain the shoulders for some individuals.
For those looking to maximize lower chest development, the dumbbell decline press is the superior choice due to its increased range of motion and better muscle activation.
However, if strength progression is a priority, incorporating both variations into your routine can be beneficial.
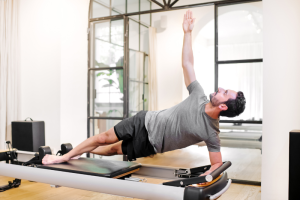
Decline Dumbbell Flyes: Chest Isolation with Maximum Stretch
The decline dumbbell fly is an excellent exercise for isolating the lower chest, allowing for a deep stretch and strong contraction without the involvement of secondary muscles like the triceps.
Unlike pressing movements, which engage multiple muscle groups, flyes focus on pec expansion and contraction, helping to sculpt and define the lower portion of the chest.
When performed correctly, this movement enhances chest mobility, improves muscle symmetry, and contributes to a well-rounded chest development.
Why This Exercise Isolates the Lower Chest Better Than Pressing Movements
Pressing exercises like the decline dumbbell press or barbell press involve multiple joints and muscle groups, with the triceps and shoulders assisting the chest in lifting the weight.
While presses are great for building overall strength, they don’t allow for the same level of isolation and stretch that flyes provide.
Decline dumbbell flyes work by maximizing the eccentric phase—the lowering portion of the movement—which is crucial for muscle fiber recruitment in the lower pecs.
Since the arms remain extended without locking out, the triceps and shoulders play a minimal role, keeping the focus on chest contraction throughout the exercise.
This makes it an excellent finishing move after heavier compound pressing exercises or a primary movement for those prioritizing muscle definition and isolation.
Step-by-Step Guide to Performing the Exercise with Proper Control
Executing decline dumbbell flyes with proper form ensures maximum chest activation while reducing the risk of shoulder or elbow strain.
Follow these steps for optimal results:
- Set Up the Decline Bench
- Adjust the bench to a 15-30 degree decline to effectively target the lower chest.
- Secure your legs in the foot pads to maintain stability and prevent sliding.
- Grip the Dumbbells and Position Yourself
- Hold a dumbbell in each hand with a neutral grip (palms facing each other).
- Lie back on the bench and extend your arms above your chest, keeping a slight bend in the elbows.
- Lower the Dumbbells in a Wide Arc
- Keeping your arms slightly bent, slowly lower the dumbbells out to the sides until you feel a deep stretch in your chest.
- Ensure that your elbows remain fixed in position and do not bend excessively.
- Contract and Bring the Dumbbells Back Together
- Squeeze your chest and lift the dumbbells back to the starting position in the same controlled arc.
- Avoid clashing the dumbbells together at the top; instead, stop just before they touch and focus on maximizing the contraction.
- Maintain a Slow, Controlled Tempo
- Lower the weights for 3-4 seconds to maximize muscle tension.
- Pause for a brief second at the bottom stretch before lifting back up.
- Avoid using momentum—focus on chest engagement rather than speed.
Perform 3-4 sets of 10-15 reps, ensuring each repetition is slow, controlled, and focused on feeling the chest contraction.
The Importance of Maintaining a Slight Bend in the Elbows to Avoid Joint Strain
One of the most common mistakes lifters make during dumbbell flyes is keeping the arms fully straight or locking the elbows.
This can place unnecessary strain on the elbow and shoulder joints, increasing the risk of injury.
To prevent this, always maintain a slight bend in the elbows (about 10-15 degrees) throughout the movement.
This keeps the tension on the chest muscles rather than transferring stress to the joints.
The goal is to create a stretch across the pecs without compromising joint integrity.
Additionally, avoid bending the elbows too much, as this turns the exercise into a press, shifting the focus away from the chest isolation that flyes are meant to achieve.
Finding the right balance between a fixed yet slightly bent arm position will ensure maximum chest engagement while keeping your joints safe.
Best Weight Selection and Rep Ranges for Muscle Activation
Since decline dumbbell flyes focus on isolation and muscle control rather than sheer strength, using excessively heavy weights can lead to improper form and shoulder strain.
The goal should be to select a weight that allows for full control and a deep stretch without sacrificing technique.
- For muscle growth (hypertrophy): 3-4 sets of 10-15 reps with moderate weight.
- For endurance and definition: 3 sets of 15-20 reps with lighter weight.
- For muscle strength: Not ideal for maximal strength training—flyes are best used as an accessory movement rather than a strength builder.
A good rule of thumb is to choose a weight where the last 2-3 reps feel challenging but not impossible while maintaining proper form.
If your shoulders or triceps begin to take over the movement, reduce the weight and focus on the mind-muscle connection with the lower pecs.
High to Low Cable Flyes: Constant Tension for Lower Chest Growth
High to low cable flyes are one of the most effective exercises for targeting the lower portion of the chest while maintaining constant muscle tension throughout the movement.
Unlike free weights, cables provide consistent resistance, ensuring the lower pecs stay engaged from start to finish.
This movement also mimics the natural function of the pectoral muscles—bringing the arms across the body—which helps improve definition and muscle activation.
Whether you’re looking to build size, strength, or muscle separation, this exercise is an essential addition to your chest workout.
How Cables Provide Consistent Resistance Throughout the Movement
One of the biggest advantages of using cables instead of dumbbells is the continuous tension they provide.
With free weights, resistance changes depending on the position of the weight in relation to gravity.
This means there are points in the movement where the lower chest is under less tension, reducing the effectiveness of the exercise.
With cables, however, resistance remains constant throughout the entire range of motion. This ensures that:
- The lower chest is fully engaged from the start of the movement to the finish.
- There is no momentum or resting point, forcing the muscles to work harder.
- The stretch and contraction are more pronounced, leading to better muscle activation and growth.
Additionally, the cable setup allows for a customizable movement path, making it a great option for lifters who struggle with shoulder discomfort during traditional free-weight flyes.
Step-by-Step Guide on Setup and Execution
Proper execution is key to maximizing chest activation and preventing unnecessary strain on the shoulders.
Follow these steps to perform high to low cable flyes correctly:
- Set the Pulleys to the Highest Position
- Use a cable crossover machine and adjust the pulleys to the highest setting above shoulder height.
- Attach D-handle grips to each pulley.
- Grab the Handles and Step Forward
- Stand in the middle of the machine with a slight forward lean, keeping your core engaged.
- Hold the handles with your palms facing forward and arms extended outward.
- Lower the Handles in a Controlled Arc
- With a slight bend in your elbows, bring the handles downward and inward in a wide arc.
- Aim to bring your hands together in front of your lower chest or just above your waist.
- Squeeze your pecs at the bottom for maximum contraction.
- Slowly Return to the Starting Position
- Reverse the movement, slowly bringing your arms back up until your chest feels fully stretched.
- Maintain constant tension by not letting the weight stack touch between reps.
- Control the Tempo and Focus on the Mind-Muscle Connection
- Lower the cables over 2-3 seconds, hold the contraction for a brief second, and return over 2 seconds.
- Avoid jerky movements or rushing through reps.
For best results, aim for 3-4 sets of 10-15 reps, ensuring full range of motion and proper control throughout.
How to Optimize Hand Positioning and Range of Motion
Your hand positioning and movement path play a huge role in ensuring maximum chest activation.
To get the most out of the exercise:
- Keep your palms facing slightly forward at the top and rotate them slightly inward as you bring the cables down. This enhances the natural contraction of the lower pecs.
- Avoid stopping too high or too low. The goal is to bring the handles in front of the lower chest or just above the waistline—not too far below, as this shifts tension to the shoulders.
- Keep a slight bend in the elbows, but do not exaggerate it, as this will turn the fly into a press and shift focus away from the chest.
- Ensure full range of motion by allowing a deep stretch at the top without hyperextending your shoulders.
These small adjustments maximize lower chest activation while keeping the movement natural and effective.
Adjusting Weight and Pulley Height for Maximum Chest Contraction
The pulley height and weight selection directly impact how effectively the lower chest is engaged.
Adjusting these factors correctly will ensure optimal performance:
- Pulley Height: The pulleys should be set above shoulder height to create a downward movement pattern. If the pulleys are too low, the exercise loses its focus on the lower pecs and shifts tension to the middle chest.
- Weight Selection: Choose a weight that allows for controlled reps with a strong mind-muscle connection. If the weight is too heavy, the movement becomes a front delt-dominant press instead of a chest fly.
- Stance and Stability: A staggered stance (one foot slightly forward) helps maintain balance and prevents excessive swaying, allowing for better muscle control.
If your goal is muscle growth, moderate weight with higher rep ranges (10-15 reps per set) works best.
For definition and endurance, aim for 12-20 reps with lighter weight, focusing on slow, controlled movements.
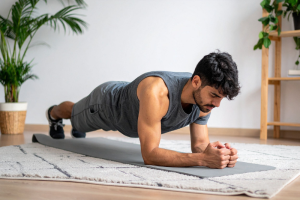
Incline Push-Ups with Underhand Grip: A Bodyweight Alternative for Lower Chest Activation
Incline push-ups with an underhand grip are an effective and accessible alternative to the decline bench press, offering a unique way to target the lower chest without requiring equipment.
By adjusting your hand position and body angle, this variation shifts emphasis to the sternal head of the pectoralis major, making it a great option for building muscle definition and strength in the lower portion of the chest.
Whether you're training at home, recovering from an injury, or looking to add variety to your chest routine, this movement provides a challenging yet joint-friendly alternative.
How an Underhand Grip Changes Muscle Engagement
Traditional push-ups primarily activate the mid and upper chest due to the standard pronated (palms-down) grip.
However, switching to an underhand grip (supinated palms-up position) alters wrist, elbow, and shoulder alignment, creating a mechanical shift that increases lower chest activation.
Here’s how the underhand grip affects muscle engagement:
- Lower Chest Emphasis – The underhand grip externally rotates the shoulders, causing more activation in the lower portion of the pectoralis major.
- Reduced Shoulder Strain – Many lifters experience discomfort in the shoulders with traditional pressing movements. The supinated grip allows for a more natural shoulder position, reducing strain.
- Increased Range of Motion – The grip change allows for a deeper stretch at the bottom of the push-up, further enhancing muscle fiber recruitment in the lower pecs.
- Stronger Mind-Muscle Connection – The altered angle forces a greater chest squeeze at the top, improving muscle activation.
By modifying hand position and body angle, this movement becomes a highly effective bodyweight alternative for isolating the lower chest.
Step-by-Step Guide on Proper Positioning and Movement Mechanics
To maximize lower chest activation while avoiding wrist or shoulder discomfort, follow these steps for proper execution:
- Set Up the Incline Surface
- Use a bench, low table, or sturdy elevated surface about knee to waist height.
- Ensure the surface is stable and can support your body weight.
- Position Your Hands in an Underhand Grip
- Place your hands shoulder-width apart on the surface, with palms facing up and fingers pointing toward your feet.
- Keep your wrists aligned under your shoulders for a stable pressing position.
- Engage Your Core and Maintain a Straight Body Line
- Step back so your body forms a straight line from head to heels.
- Engage your core, glutes, and legs to prevent sagging or excessive arching.
- Lower Yourself with Control
- Slowly lower your chest toward the elevated surface, keeping elbows close to your body (about a 45-degree angle).
- Focus on feeling a stretch in the lower chest as you descend.
- Push Back Up and Squeeze the Chest
- Press through your palms, bringing your arms back to the starting position in a controlled motion.
- At the top, squeeze your chest muscles for maximum contraction.
- Maintain a Controlled Tempo
- Lower yourself for 2-3 seconds, pause slightly at the bottom, and push up explosively.
- Avoid bouncing or rushing through reps—control is key for muscle activation.
Perform 3-4 sets of 12-20 reps, depending on your fitness level and training goals.
How to Progress or Regress the Movement
This variation can be adjusted for different skill levels by modifying incline height, rep ranges, and tempo.
Here’s how to progress or regress the movement based on your current strength level:
Making It Easier (Regression Options)
- Increase the Incline Height – The higher the surface, the easier the movement becomes, reducing the load on your chest.
- Perform on Knees – Drop your knees to the ground while keeping the same upper body form.
- Reduce Range of Motion – If struggling, focus on performing partial reps, gradually increasing depth as strength improves.
Making It Harder (Progression Options)
- Decrease the Incline Height – Lowering the surface (e.g., using a lower bench or step) increases the resistance on the chest.
- Elevate Your Feet – Raising your feet on another surface creates a decline angle, adding intensity.
- Slow Down the Eccentric Phase – Lowering yourself over 4-5 seconds enhances time under tension, boosting hypertrophy.
- Add a Weighted Vest or Backpack – Extra resistance makes the movement more challenging and effective for strength gains.
By gradually adjusting difficulty, this movement can remain a valuable part of any chest-focused workout, whether you’re a beginner or advanced lifter.
Ideal Rep and Set Schemes for Strength vs. Hypertrophy
The effectiveness of incline push-ups with an underhand grip depends on rep ranges and intensity.
Choose a scheme that aligns with your fitness goals:
- For Muscle Growth (Hypertrophy) – Perform 3-4 sets of 10-15 reps, focusing on slow, controlled movements and squeezing the chest at the top.
- For Strength Development – Increase resistance (e.g., weighted vest) and aim for 4-5 sets of 6-10 reps with strict form.
- For Endurance and Definition – Perform 3 sets of 15-20 reps, using a moderate pace while maintaining good form.
For progressive overload, try increasing reps, resistance, or time under tension over time to keep challenging your muscles.
Conclusion
Decline press alternatives like chest dips, decline dumbbell presses, decline flyes, high to low cable flyes, and incline push-ups with an underhand grip provide effective ways to build and strengthen the lower chest.
Each exercise offers unique benefits, allowing for variety, progressive overload, and muscle isolation without requiring a decline bench.
Incorporating these movements into your routine ensures balanced chest development, improved strength, and greater overall muscle definition.