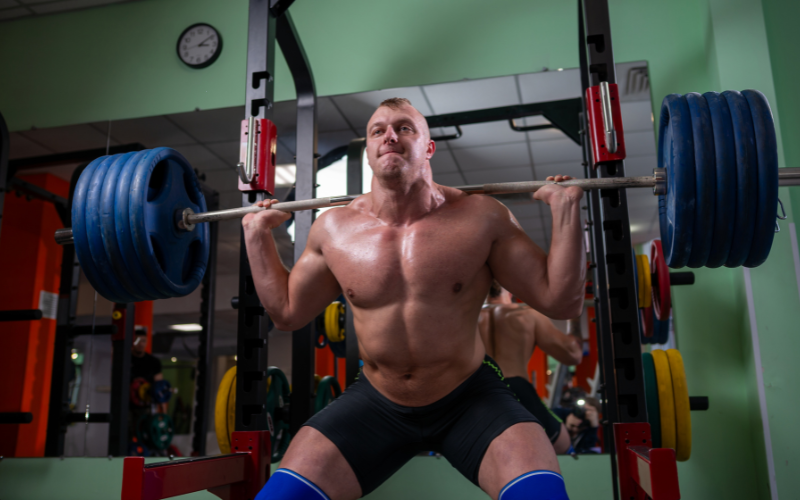
If squats are hurting your lower back, back off the weight or depth right away, switch to a more upright variation like a goblet or box squat, and rebuild your bracing and mobility before loading up again — unless you have leg numbness, weakness, or bladder or bowel changes, in which case you need medical care right away.
Keep reading for a full breakdown of what's causing your pain, how to tell soreness from injury, and the exact steps to get back to squatting pain-free.
Why Squats Are Hurting Your Lower Back
Squat-related back pain is almost always mechanical. Your spine ends up absorbing force that your hips and legs should be handling, and that shift usually comes down to a handful of overlapping issues.
Too much weight, too fast
This is the most common cause, and it shows up in two ways. Acute overload hits you mid-set: you load more than your body can currently control, and something gives right then.
Chronic overload builds quietly, with reps, sets and weight all climbing at once and no real recovery in between. By the time it hurts, there's no single moment you can point to.
Bracing that isn't doing its job
A weak or “lazy” brace lets your spine round under load instead of staying stable. Once your trunk stops controlling the weight, your lower back starts absorbing it directly, and your center of gravity drifts toward your toes.
Technique breakdowns that follow
A few patterns tend to show up together:
- The good-morning squat — your hips shoot up faster than your shoulders, tipping your torso forward until your lower back is doing the work of lifting the weight. This often points to quads that are underpowered relative to your back.
- Butt wink — your pelvis tucks under at the bottom of the squat. A small tilt at full depth is normal; a large or early tuck under heavy load usually signals limited hip mobility, tight hip anatomy, or poor control through the pelvis.
- Restricted ankles and hips — when your ankle can't let your knee travel forward, your body finds range somewhere else: heels lift, knees cave in, or your lower back rounds to compensate.
Weak links elsewhere
Underpowered glutes, core, or quads all shift extra demand onto your spine. Bar position matters too — a low-bar squat naturally forces more forward lean and hip involvement than a high-bar setup, putting more strain through your lower back.
Warming up matters more than people think
Skipping warm-up sets or rushing through them leaves your hips and ankles stiff and your bracing pattern unrehearsed before you touch real weight.
What's actually happening structurally
Pain can originate from the discs, facet joints, the sacroiliac joint, irritated nerve roots, or the muscles themselves — sometimes more than one at once.
It's also worth knowing that back injuries are a leading complaint among lifters, but serious injury rates in the sport overall stay low. Most of what you're feeling is a fixable technique and load issue, not a sign your spine is falling apart.
Soreness or Injury? How to Tell the Difference
Not all post-squat pain means something's wrong. The type of pain, where it shows up, and how it behaves over time tell you almost everything you need to know.
What normal soreness feels like
Ordinary muscle soreness is dull and even on both sides of your back. It usually shows up a day or two after training, feels tight rather than sharp, and actually eases once you start moving — a walk or a light warm-up makes it feel better, not worse. It fades on its own within a few days, especially after trying something new or bumping up your training volume.
What points to a real injury
A few signs separate a strain from ordinary soreness:
- Sharp or localized pain — pain that's stabbing, sudden, or concentrated on one side rather than spread evenly across your back
- Spasm or tenderness — a muscle that feels tight, guarded, or painful to the touch
- Movement restrictions — trouble bending, twisting, sitting down, or walking normally, which suggests your body is protecting the area
When nerves are involved
Pain that radiates down your leg, or comes with numbness or tingling, points to nerve irritation rather than a simple muscle strain — often connected to a disc issue. This is a different category from muscular soreness and needs a different response.
Timing clues worth tracking
A couple of patterns can help you narrow down the source:
- Morning stiffness — disc-related pain often feels worse first thing in the morning, since your discs absorb fluid overnight and are at their fullest when you wake up. It also tends to flare with forward bending or long periods of sitting.
- Load thresholds — if pain only shows up above a certain percentage of your max, that points to a load tolerance issue rather than structural damage. Note the exact weight and position where it starts.
When to stop self-treating
If pain doesn't meaningfully improve within three to five days, that's your signal to get it looked at rather than keep pushing through on your own.
Pain sitting in one specific spot, or pain that starts interfering with everyday activities, deserves the same response. The longer ambiguous pain sticks around, the more value there is in getting a professional opinion instead of guessing.
When to Seek Medical Care (Including Emergency Warning Signs)
Most squat-related back pain resolves with rest and technique fixes, but certain patterns mean it's time to bring in a professional rather than wait it out.
When to book an appointment
See a doctor or physical therapist if your pain persists beyond a few days to a week, keeps getting worse instead of better, or starts limiting things you need to do every day.
Pain sitting in one specific spot rather than spread across your back is also worth flagging. There's no harm in getting checked early — the harm comes from pushing through pain that's trying to tell you something.
Situations that call for prompt evaluation
- Pain that started with a fall, collision, or other accident
- Pain concentrated in a single, consistent location
- Symptoms that don't fit the usual pattern of muscle soreness
Any of these deserve a same-week evaluation rather than a wait-and-see approach.
Emergency red flags — go to the ER or call for help
A small set of symptoms signal something more serious than a muscle strain, and none of them should wait:
- Pain, tingling, weakness, or numbness in both legs at once
- Numbness around the genitals or anus (often called saddle numbness)
- New changes in bladder or bowel control
- Changes in sexual sensation or function
- Chest pain alongside your back pain
- Sudden, severe pain following a serious accident
Why these matter: cauda equina syndrome
These symptoms can point to cauda equina syndrome, a rare condition where a large disc prolapse compresses the nerve bundle at the base of your spine.
It affects roughly 1 to 3 people per 100,000, so the odds are heavily in your favor. But delayed treatment can cause permanent loss of bladder, bowel, or sexual function, which is why this is one of the few situations in general fitness where speed genuinely matters. If you notice any of these signs, don't monitor them overnight — get evaluated immediately.
One more flag worth acting on fast: feeling suddenly hot, shivery, or generally unwell alongside severe back pain that's worsening quickly also warrants urgent same-day care.
How to Self-Screen and Identify Your Pain Trigger
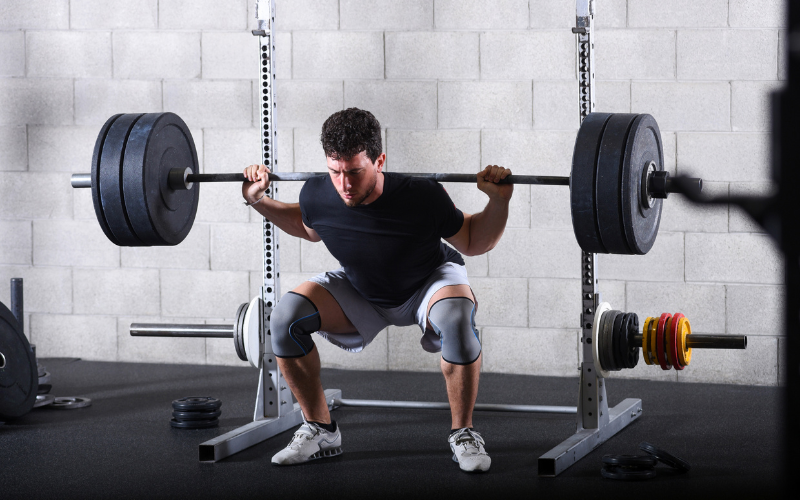
Before you can fix your squat pain, you need to know exactly what sets it off. A structured self-screen turns vague “my back hurts” into specific, actionable information.
Track your triggers
Start keeping notes on which movements, loads, and postures bring symptoms on — not just in the gym, but throughout your day. Does it flare during air squats with a deep butt wink? Only on sets above a certain percentage of your max?
After hours of sitting versus a day spent walking? You're awake roughly 16 hours a day and squatting for a fraction of that, so daily posture often matters as much as what happens under the bar.
Classify the pattern
Once you've got a few data points, sort your pain into one of four categories:
- Flexion-intolerant — worse with bending or rounding forward
- Extension-intolerant — worse with arching or standing upright
- Rotation-with-extension intolerant — worse with twisting combined with arching
- Load-intolerant — pain appears only above a certain weight, regardless of position
Knowing which category you fall into tells you which movements to avoid short-term and which corrective work will actually help.
Test how posture changes your symptoms
Stand in your normal, relaxed posture and note how you feel. Then consciously “stand tall” — lightly brace your core and squeeze your glutes — and check again. If your symptoms shift, you've just found a lever you can pull to manage pain in daily life and during lifting.
Run the knee-to-wall test
This checks ankle dorsiflexion, a common hidden contributor to back strain:
- Kneel or stand facing a wall, with your big toe positioned about 5 inches from it.
- Keeping your heel flat on the ground, drive your knee forward toward the wall, aiming over your second or third toe.
- If your knee touches the wall without your heel lifting, your dorsiflexion is adequate. Every centimeter short of that adds up to roughly 3.6 degrees of missing range.
The number itself matters less than the comparison between your two sides — a clear left-right difference is often more telling than hitting some ideal figure.
Film your squat from the side
Set up a camera at hip height and record a few working sets. Watch for three things: whether your hips rise faster than your shoulders out of the bottom, whether the bar drifts forward of your midfoot, and the exact depth at which your pelvis starts to tuck under. These three observations usually point straight to which correction you need.
Fixing the Problem — Technique, Bracing, and Targeted Corrections
Once you know your trigger, the fix usually comes down to technique, breathing, and rebuilding strength in the right places.
Get your setup right
Stand with your feet about shoulder-width apart, toes pointed forward or turned slightly out. Spread your weight across the ball and heel of your foot, keeping all four points of contact grounded rather than shifting onto your toes. Your knees should track in line with your toes throughout the movement, not caving inward as you descend.
Match your torso to your shins
Your torso angle should roughly mirror your shin angle as you descend — not arched back, not folded forward. Go only as deep as you can while keeping your spine neutral, aiming for at least a 90-degree knee bend as a general depth target.
Correcting butt wink
Widen your stance slightly and turn your toes out a bit more. This reduces how much hip flexion the squat demands, which often stops the pelvis from tucking under. Pair this with a temporary depth limit — stop just above the point where your pelvis starts to round — while you build mobility and control underneath it.
Correcting the good-morning pattern
Cue your hips and shoulders to rise together, and keep pressure centered over your midfoot rather than shifting forward. Elevated heels or weightlifting shoes let your knees travel forward more easily, taking pressure off the hips.
Long-term, build quad strength with front squats, safety-bar squats, or belt squats so your legs — not your back — drive the lift.
Breathing and bracing
- Take a deep breath into your belly, not your chest.
- Brace your trunk as though bracing for a punch to the stomach — expand outward, don't suck in.
- Hold that brace through the descent on heavy sets. Either maintain it through the ascent or exhale through pursed lips once you're past the hardest point.
- Reset your breath at the top before the next rep.
A brief breath-hold under heavy load is a normal part of lifting and helps stabilize your spine — but if you have cardiovascular concerns, get medical clearance first.
Avoid over-bracing into an exaggerated arch; aim to keep your ribs stacked over your pelvis in a neutral line, not pushed into extension.
Warm-up sequence (10–15 minutes)
- General: 3–5 minutes of easy cardio to raise tissue temperature
- Ankles: calf/soleus stretches and knee-to-wall lunge rocks, about 10 reps per side
- Hips: 90/90 switches, adductor rocks, and a posterior hip stretch
- Activation: glute bridges and a bodyweight or light goblet squat hold
- Ramp-up sets: start empty and add small jumps up to your working weight, bracing every rep like it's heavy
Ongoing mobility
Keep working ankle and hip range on non-training days too — calf stretches, tempo goblet squats, and 90/90 contract-relax work all build lasting range rather than a temporary loosening.
Strengthening the support system
The McGill Big 3 — curl-up, side plank, and bird dog — trains your core to resist movement rather than create it, which is exactly what a squat demands. Add glute and hip work for stability, and quad-focused training if you tend toward the good-morning pattern.
Progress your core training in order: sagittal-plane work first, then lateral, then rotational exercises last, since twisting movements load the spine more than simple bracing does.
Rebuilding Your Squat — Variations, Progression, and Return-to-Lifting Plan
Getting back to squatting isn't about jumping straight back to your old numbers. It's a staged rebuild, moving through progressively more demanding variations while your pain stays in check.
Squat variations, ranked most to least back-friendly
- Bodyweight or mini squats, banded chair squats
- Bottom-up (reverse) goblet box squat
- Goblet squat
- Belt squat
- Front squat or safety-bar squat
- High-bar back squat
- Low-bar back squat
Work down this list in order. Each step loads the spine a bit more, so mastering one pain-free before moving to the next keeps your rebuild controlled rather than reactive.
Unilateral alternatives
Bulgarian split squats, split squats, hack squats, and Smith machine squats let you keep training your legs hard while you have more control over trunk position. These are useful additions alongside your main rebuild, not just substitutes.
Using a belt correctly
A belt is a performance tool for heavy sets, generally in the 75–85%-of-max range and above, and it only works if you actively brace against it.
It has no place in the rehab process itself — reintroduce it only once your pain is gone and you can demonstrate solid technique with moderate loads. Using a belt to push through pain just masks a problem that's still there.
Rest: relative, not total
For a minor tweak, back off the aggravating load rather than stopping all movement — typically for about 7 to 14 days. Keep walking and doing gentle mobility work during that window. Total inactivity tends to make back pain worse, not better.
The pain-monitoring rule
Use this three-part check to decide if an exercise is safe to keep doing:
- Pain stays at or below about 5/10 during the movement (some prefer capping it at 3/10)
- Pain doesn't spike significantly afterward
- Pain is back to your baseline by the next morning
If the next morning feels worse than your baseline, drop back a step in your progression.
When you're ready for heavier squats
Three things should all be true before you load back up:
- Everyday activities are pain-free
- You can squat moderate loads with consistent technique on video
- Your Big 3 and hip-hinge patterns are pain-free
A simple recovery timeline
- Days 1–14: Relative rest, daily walking, cat-camel and gentle hip/ankle mobility, McGill Big 3 once tolerable
- Week 2–3: Diagnose your pattern, film your squat, run the knee-to-wall test
- Week 3 onward: Rebuild through the variation ladder — goblet box squat, goblet, front or safety-bar, then back squat — adding load gradually
Preventing it from coming back
Warm up with ramp-up sets every single session, and progress weight or volume — never both at once. Keep the Big 3 or similar core work in rotation three to five times a week, even once you're pain-free. Consistency here does more to prevent recurrence than any single technique fix.
Conclusion
Squat-related back pain is almost always fixable — it usually comes down to too much load, a technique breakdown, or a mobility gap, and each of those has a clear correction.
Work through the self-screen, adjust your setup, and rebuild gradually through friendlier variations before loading back up, watching for the emergency red flags along the way.
With the right adjustments and a bit of patience, most people get back to squatting heavy and pain-free.