Floor skull-crushers work your triceps by having you lie on the floor and lower a dumbbell or EZ-bar toward the top of your head, then press back up to full lockout, keeping your upper arms still throughout.
Do them for 3-4 sets of 8-15 reps with a slow, controlled lowering phase, and keep reading for the full breakdown of form, common mistakes, and how to program them for real triceps growth.
What Makes the Floor Skull-Crusher Different From the Bench Version
The skull-crusher, at its core, is a lying elbow-extension exercise. You bend and straighten your arms while your upper arms stay fixed in place, which puts the workload almost entirely on your triceps — hitting the long, lateral, and medial heads in one movement. Swap the bench for the floor, and the exercise itself doesn't change. What changes is how far down you can go.
On a bench, your arms have room to travel below torso level, letting your elbows drift back and stretching the long head of the triceps as deep as your shoulder mobility allows.
The floor doesn't give you that room. Once the dumbbells or your upper arms touch the ground, your descent stops — even if your triceps could handle more stretch. You end up with a shorter, harder-capped range of motion than the bench version offers.
This limitation doesn't hit everyone equally. If you have long arms or particularly mobile shoulders, you'll likely feel the floor cut you off early, often before you get a real stretch through the triceps. Shorter arms or tighter shoulders mean less of a gap between “floor-limited” and “full range,” so the trade-off matters less.
Why does that lost range of motion matter for growth? Research on loaded stretching suggests the deepest portion of a triceps extension — the part where the muscle is most lengthened under load — plays an outsized role in driving long-head hypertrophy.
Cut that portion short, and you're likely leaving some growth potential on the table. That doesn't make floor skull-crushers a bad exercise; it just means they're not automatically your best option for maximum size if a bench or cable station is sitting right there.
Where the floor version earns its keep is everywhere else: training at home without equipment, working around a crowded gym with no bench free, or giving your elbows and shoulders a break from the deepest, most joint-stressful position.
Think of it less as a downgrade and more as a specialized tool — one that swaps a bit of stretch for convenience and joint comfort.
Step-by-Step Form for Floor Skull-Crushers
Good form here comes down to a handful of positions and checkpoints, in order. Get these right and the exercise takes care of itself.
- Set up your position. Lie flat on your back with knees bent and feet planted about hip-width apart. Tuck your pelvis so your lower back presses into the floor, then brace your core and keep your glutes engaged — this keeps your spine from arching as the weight moves overhead. A mat under your back and head makes this a lot more comfortable and worth using every time.
- Get into the starting position. Grab a pair of dumbbells with a neutral, palms-facing grip, or an EZ-bar with hands just inside shoulder width. Press the weight up so your arms are fully extended, angled slightly backward so it sits over your forehead rather than directly above your shoulders. Wrists stay straight, elbows in line with your shoulders.
- Lower under control. Bend only at the elbows — your upper arms shouldn't move. Take 2 to 3 seconds to bring the weight down toward or behind the top of your head, letting a little backward shoulder movement happen naturally to deepen the stretch. Go slow enough that you're controlling the weight, not letting it fall.
- Adjust if you bottom out early. Long arms or a lot of shoulder mobility can mean the dumbbells hit the floor before you feel much of a stretch. When that happens, angle the weights down and in toward the tops of your shoulders instead of straight back — this keeps tension on the triceps even with a shorter range of motion.
- Drive back to lockout. Reverse the motion, extending your elbows firmly but without snapping them straight. Squeeze your triceps hard at the top, and hold that same slight backward arm angle rather than letting the weight rest directly over your shoulder joints.
- End the set safely. Once you've hit your reps, bring the dumbbells to your chest and sit up, or lower them to the floor from the bottom position. Never throw or toss the weights from a fully extended overhead position — that's how wrists and shoulders get hurt.
Common Mistakes That Kill Your Gains (and Your Elbows)
Most problems with this exercise trace back to one root cause, with a handful of predictable symptoms.
Elbow flare. Letting your elbows bow outward — usually from gripping too wide or loading too heavy — shifts work off your triceps and onto your shoulders and chest, while putting uneven, twisting stress on the elbow joint itself. Keep your elbows roughly shoulder-width and pointed toward the ceiling throughout the movement.
Turning it into a press. If your shoulders start driving the weight instead of your elbows doing the work, you've stopped doing a skull-crusher and started doing an overhead press. Your upper arms should stay locked in place; only your forearms move.
Lowering to the forehead. This shortens the bar path and puts more strain on your elbows for less triceps benefit. Aim the weight toward or behind the top of your head instead — it keeps more tension where you want it and eases the joint stress.
Overcorrecting the other way. Some lifters, trying to fix the forehead mistake, let their elbows drift too far back. Past a certain point this puts your elbow joint into extreme flexion and dramatically increases the load on your tendons and connective tissue. There's a middle ground — a strong stretch without joint pain — and that's what you're after.
Wrist hyperextension. A loose grip lets your wrists collapse backward, which misaligns your forearms and transfers stress straight into your elbow tendons. Grip firmly and keep your wrists straight and stacked under the weight.
Rushing the lowering phase. Dropping the weight fast instead of controlling it removes most of the muscle-building stimulus and dumps extra stress onto your joints. A 2 to 3 second descent isn't a suggestion — it's doing real work.
Snapping the lockout. Forcefully whipping your elbows straight at the top transfers load onto bone and passive tissue instead of muscle. Lock out with control and a firm squeeze, not a ballistic snap.
Nearly every mistake on this list traces back to one thing: using more weight than you can actually control. Drop the ego, dial in the form, and the rest tends to fall into place.
Best Equipment Choices for Floor Skull-Crushers
Not all equipment works equally well for this exercise on the floor, and the right choice depends on what you're optimizing for — joint comfort, load capacity, or convenience.
Dumbbells are the default pick for most lifters, and for good reason. The neutral, palms-facing grip is easy on the wrists and elbows, each arm works independently so one side can't compensate for the other, and if you fail a rep, you can simply lower the weights to the floor instead of getting stuck. For a floor-based movement, that built-in bail-out option matters.
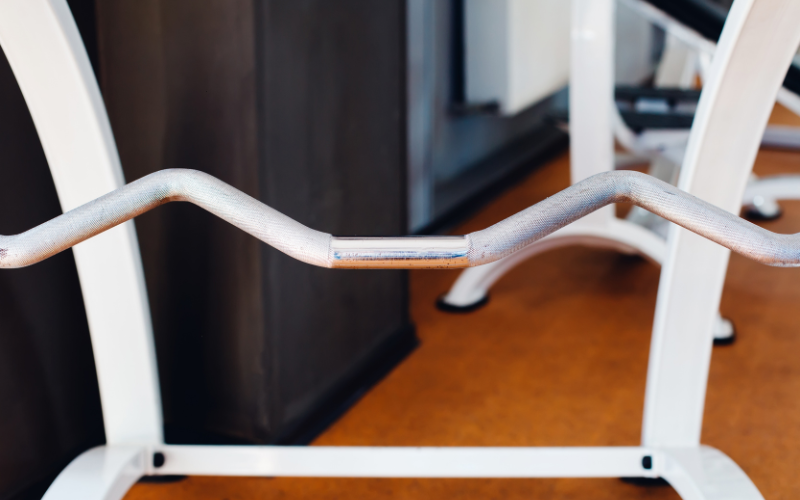
EZ-bars come in a close second. The angled, semi-pronated grip is gentler on your wrists than a straight bar, and it lets you load slightly more weight than you'd manage with dumbbells — useful once you've built up some strength on this movement.
Barbells let you handle the most weight of any option, but that comes at a cost: a straight bar forces your wrists into full pronation, which tends to aggravate wrist and elbow discomfort as the load increases. Save this for lifters with healthy joints who've already mastered the movement.
Kettlebells feel comfortable in hand and still let you train each arm independently, but their bulkier shape means they hit the floor sooner than dumbbells — cutting an already-limited range of motion even shorter. Not the best choice if you're trying to preserve as much stretch as possible.
Cables, set up with a low pulley, are the most underrated option for floor skull-crushers. Since the resistance comes from the cable rather than gravity pulling straight down, you don't lose range of motion the way you do with free weights on the floor — and you get constant tension throughout the entire rep. If you have access to a low pulley, it's worth trying.
A few other tools round out the list. Resistance bands add extra tension right at lockout, matching the exercise's natural strength curve. A single weight plate works in a pinch if dumbbells aren't available. And training one arm at a time, regardless of implement, sharpens mind-muscle connection and helps iron out any strength imbalances between sides.
Programming: Sets, Reps, and Frequency for Growth
Form gets you doing the exercise correctly; programming is what turns those reps into actual triceps growth. A few numbers to build around:
- Sets and reps: Aim for 3 to 4 sets of 8 to 15 reps per session. If your elbows are sensitive, pushing toward 20 reps with a lighter load takes some of the joint stress out of the equation while still delivering a solid growth stimulus.
- Weekly volume: Somewhere between 6 and 12 triceps-extension sets per week works well for most lifters, split across 2 to 3 sessions rather than crammed into one. This gives your triceps enough total work without any single workout becoming excessive.
- Rest between sets: 60 to 90 seconds is enough to recover for the next set without letting your muscles cool off completely.
Tempo matters as much as the numbers on the weight. Lift the weight back up with intent, then take 2 to 3 seconds to lower it under control — resist the urge to speed through the eccentric.
Pause briefly at the bottom, where you feel the stretch, then finish with a full lockout and a one-second squeeze at the top. That combination — controlled descent, brief pause, deliberate lockout — does more for growth than rushing through reps ever will.
Where you place this exercise in your workout matters too. Floor skull-crushers work best after your heavy compound pressing — bench press, overhead press, close-grip bench, or dips.
By that point your elbows are already warmed up and your triceps are pre-fatigued, which means this isolation work finishes the job your pressing started rather than pre-exhausting muscles you still need for heavier lifts.
For progression, follow a simple rule: add reps before you add weight. Once you're hitting the top of your rep range with solid form across all your sets, bump up the load slightly and drop back to the bottom of the rep range. Then build back up again. This keeps your joints from being asked to handle more weight before they're ready for it.
Safety, Troubleshooting, and When to Adjust
One of the underrated perks of floor skull-crushers is that you don't need a spotter. If a rep gets too tough, you have a built-in exit: lower the weight the rest of the way to the floor instead of forcing a lockout. That safety net alone makes this a smart option for anyone training alone.
If your elbows start bothering you, a few adjustments usually fix it before you need to abandon the exercise entirely. Drop the weight and shift toward higher reps to take some strain off the joint. Switch from a straight barbell to an EZ-bar or dumbbells, since the neutral or semi-pronated grip is easier on the wrists and elbows. And make sure you're lowering the weight toward or behind your head rather than straight to your forehead — that shorter path is exactly what tends to aggravate the joint in the first place. If pain sticks around after these changes, that's a signal to back off the exercise and get it checked out.
If you have long arms or very mobile shoulders, you'll likely find the weights hitting the floor before you feel much of a stretch. Two fixes work well here: angle the weight down and in toward your shoulders instead of straight back, or switch to a cable setup with a low pulley, which sidesteps the floor's range-of-motion limit entirely.
A few warning signs tell you your load has gotten away from you:
- Your lower back arches off the floor instead of staying flat
- The weight bounces at the bottom instead of pausing under control
- You lose control during the lowering phase and the weight starts dropping rather than descending
Any one of these means it's time to drop the weight, not push through.
If your triceps size stalls despite training the floor version consistently, the issue is likely the range of motion itself — the floor caps how deep a stretch you can load, and that deep-stretch portion is where a lot of long-head growth comes from. Adding a deep-stretch overhead movement, like an overhead cable extension or a bench skull-crusher with the arms angled back, gives your triceps the range the floor version can't, and rounds out what floor training alone tends to miss.
Conclusion
Get the form dialed in first — fixed upper arms, controlled descent, full lockout — and only then start pushing the weight up.
Floor skull-crushers aren't a consolation prize for not having a bench; they're a genuinely useful, joint-friendly tool that belongs in your triceps training whether or not you have other equipment around.