If you want a back that looks thick from every angle, you need a mix of row variations, not just one favorite lift.
Your best bet is combining a heavy free-weight row like the bent-over barbell row for overall mass, a chest-supported or machine row for strict isolation, and a unilateral row like the single-arm dumbbell row to fix imbalances and get a deeper stretch.
Keep reading to see exactly how each one works, the science behind why they're effective, and how to put them together in your own training.
Why Rows Are the Foundation of Back Training
Every back workout worth doing needs rows at its core. They're the horizontal pulling movement that gives your back depth and thickness, while vertical pulls like pull-ups and pulldowns build the width that creates that classic V-taper.
Skip one or the other and you're left with a back that's incomplete, no matter how much time you spend training it.
A single row works far more than just your lats. You're also recruiting:
- Traps (upper, middle, and lower) — for scapular retraction and depression
- Rhomboids — the mid-back muscles that pull your shoulder blades together
- Rear delts, teres major/minor, and infraspinatus — activated when your elbows flare out
- Erector spinae — working isometrically to keep your spine stable during unsupported rows
- Biceps, forearms, and core — all pitching in as assistors
That range of involvement is exactly why rows deserve more attention than most lifters give them.
What actually changes the muscles you hit isn't your grip — it's your torso angle, your elbow path, and where you pull the weight to.
Pull toward your lower abdomen with your elbows tucked in close, and you'll bias the lats.
Pull higher, up toward your chest, with your elbows flared out, and the emphasis shifts to your rear delts, rhomboids, and mid-traps. Grip matters too, but it's a minor variable compared to these three factors.
This lines up with what EMG research has found. Studies looking at different row variations consistently show only small changes in muscle activation between them, which means the popular idea that one specific row “targets” one specific muscle is often overstated.
The muscles doing the work stay largely the same — what shifts is how much emphasis lands where.
So there's no single best row for building your whole back. Instead, you want to combine 2 to 4 variations, each serving a different purpose: one for heavy overall mass, one for strict isolation on your mid-back, and one unilateral movement to correct imbalances and get a deeper stretch.
The rest of this guide breaks down exactly which exercises fill each of those roles.
The Heavy Mass-Builders (Free-Weight Rows)
If you only had room for one category of row, this would be it. Free-weight rows demand the most from your body — stability, control, full-body tension — and that demand is exactly why they build the most back mass.
They're also the most technically unforgiving, so getting the setup right matters more here than anywhere else.
Bent-Over Barbell Row
This is the row that does the most work across the most muscles. Hinge at your hips until your torso sits somewhere between 30 and 45 degrees from the floor, keep your spine neutral, and pull the bar toward your lower ribs or upper abdomen.
Drive your elbows back and slightly tucked, squeeze your shoulder blades at the top, and control the bar on the way down.
Your torso angle should stay locked in place through the whole set — if it starts creeping upright, the weight's too heavy.
Grip changes the emphasis slightly:
- Pronated (overhand) — the standard choice, balances upper-back development
- Supinated (underhand) — brings in more biceps, often felt more in the lower lats
- Narrower grip with tucked elbows — biases the lats
- Wider or snatch grip — shifts focus to the upper back and rear delts
Watch for these mistakes: rounding your lower back, jerking your torso upright to move the weight, pulling too high toward your chest (which turns it into more of an upright row), and flaring your elbows when you're trying to hit the lats.
Here's why this exercise earns its reputation: it produces the highest erector-spinae activation of any row and some of the highest activation across the middle traps and lats combined.
But that comes at a cost — it also places the greatest compressive load on your lower back of any row variation.
Program it early in your session while you're fresh, and think twice about stacking it on a day that's already deadlift- or squat-heavy.
Pendlay Row
The Pendlay row strips away momentum entirely. Every rep starts from a dead stop on the floor, torso held parallel to the ground throughout.
That reset forces strict form on every single rep and lets you re-establish a neutral spine before you pull again.
Beyond building the lats, traps, and rhomboids, this version trains explosive posterior-chain power — which is exactly why it carries over well to deadlifts and Olympic lifts.
Keep your torso horizontal rather than letting it rise to a more upright “bodybuilding” angle, pull to your upper abdomen, and lower the bar under control rather than dropping it. You'll need decent hip and hamstring mobility to hold the position correctly.
Yates Row
Named after six-time Mr. Olympia Dorian Yates, this variation uses an underhand grip with a more upright torso, typically 55 to 65 degrees from vertical — noticeably more upright than a Pendlay.
That underhand grip pulls the biceps in more heavily, and many lifters feel it more in the upper back and lower lats.
Because you're less bent over, it puts less strain on your lower back than a strict bent-over row, which means you can usually handle heavier loads.
A caution worth flagging: some coaches push back on the idea that this row specifically targets “lower lats,” since the lat is a single muscle and can't really be isolated by region.
Treat it as a solid loading variation rather than a lower-lat-specific tool. Avoid using leg drive to cheat the weight up, and keep your torso angle honest throughout the set.
T-Bar Row
Set up with a barbell anchored in a landmine or a dedicated T-bar machine, loaded on one end and pulled with a V-handle or wide handle. The fixed arc removes the balancing demands of a free barbell, which means you can generally load it heavier with less risk.
Grip width changes the target:
- Close or neutral grip — biases the lats and mid-back, allows the heaviest loading
- Wide or pronated grip — shifts emphasis to the upper back, rear delts, and rhomboids
Some lifters run grip drop sets — wide, then overhand, then underhand, then neutral — without changing the weight, hitting the whole back in one set.
Use smaller-diameter plates (25s or 35s) to get a fuller range of motion, hinge like you would for a deadlift with a slight knee bend, and drive your elbows back while squeezing at the top. Avoid using momentum, rounding your back, or limiting your range with oversized plates.
Programming These Movements
Run 3 to 4 sets of 6 to 12 reps for the bent-over row, 5 to 8 reps for the Pendlay, 6 to 10 for the Yates, and 8 to 12 for the T-bar row.
These all belong at the start of your back workout, while your lower back and central nervous system are fresh enough to handle the load and stability demands they require.
Back-Sparing Rows for Strict Isolation

Once you've done your heavy free-weight work, it's time to shift gears. This next category removes the lower back and legs from the equation almost entirely, letting you push your back muscles hard without worrying about spinal stability running out before your target muscles do.
Chest-Supported Row
Lie prone on an inclined bench, and your torso is braced the moment you set up. With your lower body and lower back taken out of the movement, more of your effort goes straight into the muscles you're trying to grow instead of getting spent on stabilization.
Research backs this up directly: chest-supported rows use the erector spinae far less than bent-over rows, which cuts down on lumbar strain. That makes this exercise ideal for pushing sets close to failure, even on days when your lower back is already fatigued from earlier training.
A few setup and execution details make a real difference:
- Set the bench angle so the handle path lines up with your mid-torso
- Lead with your elbows, not your hands
- Keep your chest pressed to the pad — if it peels off, the weight's too heavy
- Avoid shrugging as you pull
Seal Row
Take the chest-supported concept a step further and you get the seal row: lying fully prone on a flat bench elevated off the floor, weight hanging straight down.
This version eliminates lower-back involvement, leg drive, and momentum completely, isolating the lats, rhomboids, traps, and rear delts with nothing else contributing.
If you're dealing with lower-back issues, this is one of the safest rowing options available. There's simply no way to compensate with your spine, which forces the target muscles to do all the work.
Machine Rows
Machine rows — Hammer Strength, iso-lateral setups, and standard plate-loaded or selectorized machines — offer a fixed path and chest support that let you focus purely on contracting your back muscles, with almost no spinal shear involved.
Iso-lateral machines, where each arm moves independently, also force balanced development between your left and right sides rather than letting a stronger side compensate.
Two main variations serve different purposes:
- High row — pulls down at an angle, landing somewhere between a seated row and a pull-up, emphasizing the upper lats
- Low row — targets the rhomboids, mid and lower traps, and rear delts
Seat height changes the emphasis toward upper or lower lats, and switching between neutral, pronated, and underhand grips shifts the focus further.
Retract your shoulder blades before initiating the pull, drive your elbows down and back rather than curling the handles toward you, and keep your chest pinned to the pad through the full range of motion.
Free Weights vs. Machines: The Real Trade-Off
Some coaches argue free-weight rows generate more total back and erector-spinae activation simply because of the added stability demand — your body recruits more muscle just to keep things under control.
Machines can't replicate that same total-body challenge, but they make up for it by letting you overload the prime movers directly and safely.
- Free weights: potentially higher total activation, higher stability demand, higher injury risk under fatigue
- Machines: more targeted overload, safer for beginners, better for high-rep sets taken close to failure, and a smart choice if you're managing a lower-back issue
Neither one replaces the other — they solve different problems in the same workout.
Where These Fit in Your Session
Place chest-supported, seal, or machine rows second or third in your back workout, right after your heavy free-weight row. Run 3 to 4 sets of 8 to 15 reps, chasing a strong squeeze and a controlled eccentric on each rep.
Because these movements don't tax your lower back, they're exactly where you should be pushing sets closer to failure.
Unilateral Rows for Fixing Imbalances and Deep Stretch
Training one arm at a time solves a problem bilateral rows can't touch: your stronger side compensating for your weaker one.
Every rep of a unilateral row forces each side of your back to handle its own load, which makes these movements indispensable if you want symmetrical development and the deepest possible stretch on your lats.
Single-Arm Dumbbell Row
Set up with one hand and one knee on a bench, or brace against a rack or your own thigh if you're standing. Either way, the setup lets you isolate one side completely while stabilizing your torso.
A few cues make the difference between an average set and a great one:
- Drive the elbow back — think of your hand as just a hook holding the weight
- Pull toward your hip, not your shoulder
- Keep your shoulder down through the whole rep; don't let it shrug up toward your ear
- Avoid rotating your torso to heave the weight up
- Use a relaxed, “false” grip if you notice your biceps taking over the movement
Done right, this row gives you one of the deepest lat stretches available in any free-weight exercise, along with a strong mind-muscle connection since you're not splitting your attention between two sides.
Kroc Row
The Kroc row takes the single-arm dumbbell row and pushes it into different territory entirely — heavy weight, high reps, and deliberate use of body English once your strict form starts to break down.
It was built specifically for lifters chasing back thickness and serious grip and forearm endurance, with real carryover to your deadlift.
The original protocol works like this:
- Warm up thoroughly
- Perform your first 10 to 15 reps with strict form
- Once fatigue sets in, allow controlled body English to keep the set going
- Aim for one all-out top set of 20-plus reps, done about once a week after deadlifts
- Once you exceed roughly 25 reps at a given weight, increase the load next session
Get a full stretch at the bottom of every rep and touch the dumbbell to your ribcage at the top. Brace your non-working hand against your body or a support to protect your lower back.
Straps are fine if you're chasing maximum load, but training strapless builds serious grip strength over time. If the all-out approach isn't your style, 3 to 4 sets of 10 to 12 reps works as a more conventional alternative.
Meadows Row
This one uses a landmine setup, but the positioning is unique: you stand perpendicular to the bar in a staggered stance and grip the sleeve end, which creates an arcing bar path unlike any other row variation.
That arc, combined with a pronated grip and a slightly flared elbow, shifts emphasis toward the rear delts and traps compared to a straight-line dumbbell row, while still delivering a deep stretch to the upper and outer lats. To get the most out of it:
- Use smaller plates for a longer range of motion
- Keep your staggered stance small rather than wide
- Elevate the hip closest to the bar to pre-stretch the lat before you pull
- Avoid shrugging your traps or loading so heavy that your torso starts swinging
- Straps are optional if grip becomes the limiting factor before your back does
Why Unilateral Training Matters
Bilateral rows let your dominant side quietly do more work, rep after rep, without you ever noticing. Over time, that gap compounds into visible asymmetry.
Training one arm at a time removes that option — each side has to lift its own weight, which exposes and gradually closes the strength gap between them.
Programming Guidance
Match your set and rep scheme to your actual goal:
- Hypertrophy: 3 to 4 sets of 8 to 12 reps per side
- Strength: 3 to 5 sets of 4 to 8 reps per side
- Endurance or grip/biceps focus: 15 to 20 reps per side
Slot one unilateral row into each back session, ideally after your heavy free-weight and supported rows, when you can give each side your full focus without other movements draining your energy first.
Cable Rows and the Science of Muscle Bias
Cable and bodyweight rows round out your back training with something free weights and machines can't fully replicate: constant tension through the entire range of motion, paired with genuine versatility from a single setup.
Seated Cable Row
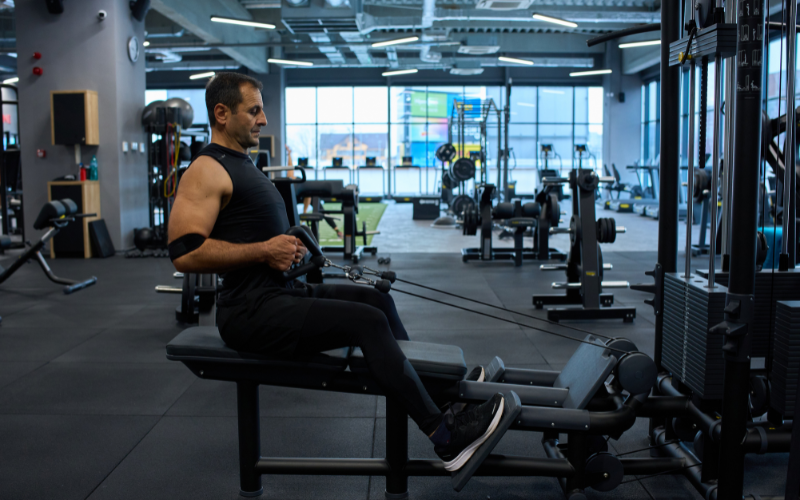
Sitting at a cable station with your feet braced, you can switch between a V-bar, wide bar, straight bar, or rope attachment without changing anything else about the exercise. That versatility alone makes it one of the most adaptable rows available.
What sets this row apart is its effect on your mid-back. Research has consistently found it produces the highest middle trapezius and rhomboid activation among common back exercises, along with a high lat-to-biceps ratio, meaning your lats do more of the work relative to your biceps than in many other row variations.
Interestingly, actively squeezing your shoulder blades together doesn't change mid-trap activation any further, so there's no need to over-focus on that cue.
To execute it well:
- Lead with your elbows, not your hands
- Pull to your lower abdomen
- Pause and squeeze at the point of full contraction
- Control the eccentric rather than letting the weight yank you forward
- Keep your chest tall, avoiding excessive backward lean or rounding your back
Grip and Attachment Effects
Your attachment choice does shift emphasis, though the effect is more modest than most people assume:
- Close or neutral grip — greater latissimus dorsi activation in both the pulling and lowering phases
- Wide or pronated grip — higher activation in the upper trapezius, middle and lower traps, and lateral deltoid
- Underhand grip — brings in more biceps, often felt more in the lower lats
Pick your attachment based on which muscles you're prioritizing that session, not because one grip is objectively superior.
Inverted Row
This is a bodyweight row done under a fixed bar, in a Smith machine, on rings, or using a TRX, with your body held in a straight line from head to heel.
It stands out because research comparing it to the bent-over row and one-armed cable row found it produced the highest latissimus dorsi and upper-back activation of the three — while placing the lowest amount of compressive load on the spine.
That combination makes it one of the most efficient and safest rows available for building your lats.
Keep these points in mind:
- Hold your body rigid, like a plank, from start to finish
- Pull your chest to the bar
- Squeeze your shoulder blades together at the top
- Avoid letting your hips sag or your lower back hyperextend
Adjust the difficulty by changing your body angle — more horizontal is harder, more upright is easier — or add weight or elevate your feet as you get stronger. Aim for 3 to 4 sets taken close to failure, or 8 to 15 reps once you're using added resistance.
Biasing Lats vs. Upper Back
Three variables control where a row lands, regardless of which exercise you're doing:
- Torso angle — more horizontal increases upper-back and rear-delt involvement along with erector-spinae demand; more upright reduces lumbar load but increases upper-trap involvement
- Elbow path — tucked close to your torso biases the lats; flared out biases the rear delts, rhomboids, and traps
- Pull destination — pulling toward your hip or lower abdomen favors the lats; pulling higher toward your chest favors the upper back
Master these three levers, and you can adjust the emphasis of nearly any row without changing the exercise itself.
Setting the Record Straight on Grip Width
Popular fitness content often treats grip width as a major lat-targeting tool, but the evidence doesn't support that claim to the degree it's usually presented.
Multiple EMG studies, including work on both rows and pulldowns, have found that grip width and hand orientation produce little to no significant difference in latissimus dorsi activation.
Grip is worth adjusting for comfort, joint health, and minor emphasis shifts — but it's not the lever to pull if you're trying to dramatically change which muscles a row targets. Save that for torso angle, elbow path, and pull destination instead.
Building Your Back Day: Programming and Practical Takeaways
Now it's time to pull everything together into a session that actually works.
Structuring Your Session
A well-built back day follows a simple template:
- Heavy free-weight row (bent-over barbell, Pendlay, Yates, or T-bar) — 3 to 4 sets, done first while you're fresh
- Strict or supported row (chest-supported, seal, machine, seated cable, or inverted row) — 3 to 4 sets, pushed close to failure
- Unilateral row (single-arm dumbbell, Kroc, or Meadows) — 3 to 4 sets per side, to correct imbalances and maximize stretch
This order isn't arbitrary. Your free-weight row demands the most stability and central nervous system output, so it goes first.
Your strict row lets you chase failure without spinal-stability limits getting in the way. Your unilateral row wraps things up by addressing anything your bilateral movements couldn't fix.
Weekly Volume and Frequency
Hypertrophy research points to a clear volume target: 10 or more hard weekly sets of back work tends to produce the greatest muscle growth, with each additional weekly set adding a small but meaningful bump in muscle thickness. Practically, that means:
- Aim for roughly 10 to 20 hard weekly sets of back training
- Train rows 1 to 2 times per week
- If training twice, make one session heavier and strength-focused, the other moderate-to-high-rep and hypertrophy-focused
If You Have Lower-Back Issues
Not every row belongs in your program if your lower back is a limiting factor. Prioritize:
- Inverted rows
- Chest-supported rows
- Seal rows
- Machine rows
These four options place the lowest load on your spine while still training your lats and upper back hard. Hold off on heavy, unsupported bent-over rows until you're cleared to load your spine that way again.
Rotating Grips and Variations
Sticking with the same grip and exercise week after week eventually catches up with your elbows and shoulders.
Rotate your grip and row variation every 4 to 6 weeks — this keeps your joints healthier long-term and gives you a broader stimulus without needing to overhaul your whole program.
Don't Forget Vertical Pulls
Rows build thickness, but they won't build width on their own. Pair every back session with vertical pulling movements like pull-ups or lat pulldowns to develop both dimensions together. A back that's only trained with rows will look incomplete no matter how much volume you put into it.
Key Caveats to Keep in Mind
Before you lock in your program, keep a few things in perspective:
- EMG activity measures electrical signal, not long-term growth — higher activation doesn't automatically mean better results, so use this data to guide exercise selection rather than to rank exercises as definitively “best”
- Individual anatomy matters — limb length, mobility, and injury history all affect which rows feel best and work best for you personally, so don't assume a row that works well for someone else will work the same way for you
Use the framework in this guide as your starting point, then adjust based on how your own back responds.
Conclusion
Building a bigger back comes down to combining the right mix of rows, not chasing a single “best” exercise.
Anchor your sessions with a heavy free-weight row, add a strict supported row for isolation, and finish with a unilateral row to fix imbalances and deepen your stretch.
Stick with this structure, stay consistent with your volume, and your back will grow the way you're aiming for.