If you want a pull-up variation that turns your abs into the real workhorse, the leg pull-up is it — you simply combine a standard pull-up with a raised or held leg position, which forces your core to fight gravity the entire time.
Keep reading for a full breakdown of the form, muscles involved, and how to build up to it safely.
What Is a Leg Pull-Up? (Breaking Down the Variations)
“Leg pull-up” isn't one specific exercise with a fixed set of rules. It's a catch-all term for pull-up variations that add a leg raise or hold into the mix, and depending on who you ask, that can mean a few different things. Here's how the main versions break down:
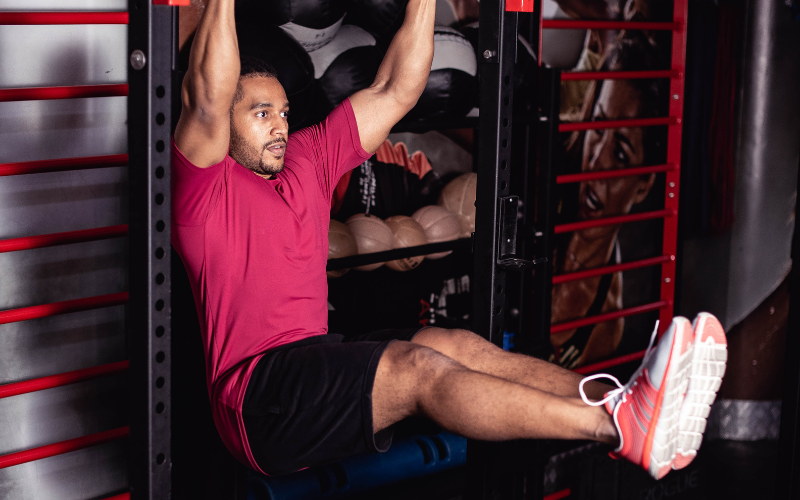
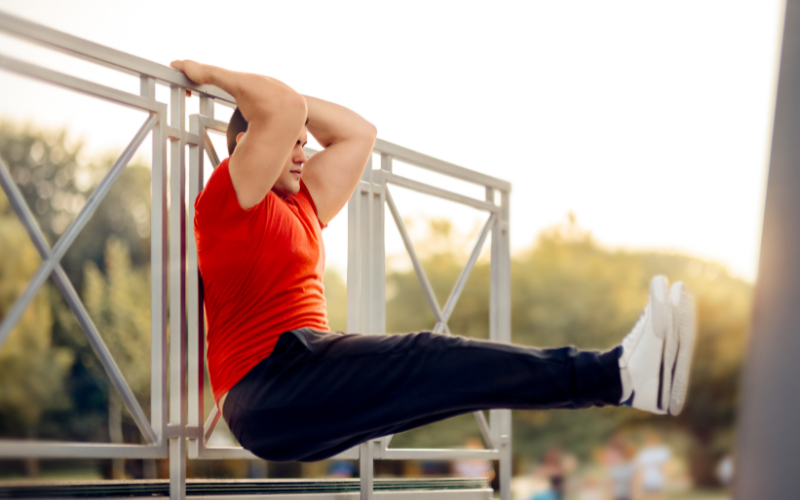
- L-sit pull-up: You raise your straight legs until they're parallel to the floor, forming an “L” shape with your torso, and hold that position for every single rep. The legs don't move up or down—they stay locked in place while you pull your chin over the bar and lower back down.
- Pull-up with leg raise: This version turns the leg raise into part of the rep itself. You pull up, and once your lats are fully engaged, you raise your legs to 90 degrees, then lower them before lowering your body back to the hang. It's more dynamic than the L-sit version since the legs are moving rather than holding still.
- Pull-up + knee raise combo: This is the easier entry point. Instead of straight legs, you pull up, hold briefly at the top, and draw your knees toward your chest before lowering. It still challenges your core, just with less demand on your hip flexors and hamstrings.
What ties all three together—and what separates them from a regular pull-up—comes down to what your legs are doing. In a standard pull-up, your legs just hang there, maybe swaying slightly, while your abs quietly stabilize your body so you don't swing around. In any version of the leg pull-up, your legs are doing actual work.
They're lifted, held, or actively raised, which means your abs and hip flexors shift from background support to primary movers. That single change is what turns a back-and-arms exercise into one that also demands serious core strength.
How to Perform a Leg Pull-Up With Proper Form
Good form here matters more than it does on a regular pull-up, since sloppy technique won't just slow your progress—it'll shift the work away from your abs and onto your lower back. Follow these steps in order for a clean rep:
- Grab the bar with an overhand grip, slightly wider than shoulder width. A pronated grip is standard, but your choice affects muscle emphasis: an overhand (thumbless or “false”) grip reduces biceps involvement and keeps more tension on your back, while a supinated (chin-up style) grip shifts more load onto your biceps.
- Pack your shoulders before you pull. From a dead hang, pull your shoulder blades down and back, like you're tucking them into your back pockets. This protects your shoulders and gives you a stable base to pull from.
- Build your L-shape or hollow position. Tilt your pelvis slightly backward and engage your abs to create that dish or hollow shape, then raise your straight legs to hip height. If straight legs are too much right now, bend your knees into a tuck, or aim for a “low L” with your toes sitting just below hip level. Point your toes and squeeze your quads and glutes to lock everything in place.
- Pull without letting your legs drop. Drive your elbows down and back toward your ribs, pulling your chest or chin toward the bar. Your legs need to stay exactly where you put them—no dropping, no piking at the hips. Keep your head neutral and avoid craning your neck upward.
- Pause briefly at the top, then lower with control. Once your chin clears the bar, hold for a beat without letting your legs sink, then lower yourself down to near-full elbow extension. Avoid a hard lockout at the bottom, since that puts unnecessary stress on your elbow and shoulder ligaments.
- Breathe deliberately throughout the set. Exhale during the pull (and the leg raise, if you're doing the dynamic version), then inhale as you lower back down. Holding your breath through the whole set will just tire you out faster—and exhaling actually helps deepen the abdominal contraction.
Since a full straight-leg L-sit pull-up is demanding, it makes sense to build toward it in stages rather than attempting it cold. The progression typically looks like this, moving from easiest to hardest:
- Bent-knee or tucked pull-up
- One-leg-extended pull-up
- Low-L pull-up (toes at or slightly below hip height)
- Full straight-leg L-sit pull-up
- Dynamic pull-up with leg raise
- Toes-to-bar-style pull-up (legs raised all the way to the bar)
Work through each stage until it feels controlled and repeatable before moving to the next. Rushing the progression is one of the fastest ways to end up compensating with your lower back instead of your abs.
Muscles Worked and Why the Abs Take Over
A leg pull-up still trains the same muscles as a standard pull-up—it just adds a whole second layer of work on top. Understanding both layers explains why this variation hits your core so much harder.
The muscles carried over from a regular pull-up:
- Latissimus dorsi (the primary mover, doing the bulk of the pulling)
- Rhomboids, trapezius, and rear deltoids (assisting through the shoulder blades)
- Biceps and brachialis (flexing the elbow)
- Forearm flexors (handling your grip on the bar)
The muscles the leg component adds:
- Rectus abdominis (your “six-pack” muscle)
- Internal and external obliques
- Transverse abdominis (the deep muscle that acts like a corset around your midsection)
- Hip flexors, or iliopsoas
- Quadriceps (which keep your knees locked straight)
So why does adding a leg position turn a back-and-arms exercise into a serious ab workout? It comes down to leverage. When you extend your legs out in front of you, you shift your center of gravity away from the bar, which lengthens the lever your core has to control.
That longer lever means your abs have to work isometrically—holding steady against a constant pull—instead of just stabilizing against a bit of sway.
It also removes your ability to cheat with momentum, since any swing would send your legs flying out of position immediately.
There's a catch, though: simply raising your legs doesn't automatically load your abs. Since the abdominals don't attach to your femur, hip flexion alone is largely a hip-flexor movement.
The move that shifts the work from your hips to your abs is the posterior pelvic tilt—curling your pelvis toward your ribs as you hold the position.
Once that tilt happens, your abdominals take over the brunt of the load; skip it, and you're mostly just working your hip flexors while your abs coast.
This isn't just theory. Lab research using EMG (which measures muscle activation) on the closely related hanging straight-leg raise found it created the highest abdominal-wall activation of the anterior-chain exercises tested—over 130% MVC in the rectus abdominis, and 88% MVC in the external obliques.
That same research also recorded roughly 3,000 newtons of spinal compression during the movement, which is a useful reminder that this level of core demand comes with real load on your lower back, making proper form and gradual progression non-negotiable.
Benefits of Adding Leg Pull-Ups to Your Routine
Once you've got the form down, leg pull-ups earn their place in your training for reasons that go beyond just “harder abs.” Here's what you actually get out of them:
- Midline stability that rivals your heavy lifts. Holding your legs in position while pulling forces you to brace your core the same way you would under a loaded squat or deadlift—except here, you're building that bracing strength without adding any external weight to your spine.
- Two muscle groups trained in one movement. Instead of doing pull-ups and then a separate ab exercise, you're hitting your lats, biceps, upper back, grip, hip flexors, and abs all in a single set. That's a meaningful time-saver if your training sessions are already packed.
- More time under tension for growth and coordination. Holding the L-shape (or controlling it through the dynamic version) keeps your muscles engaged longer than a standard pull-up rep would. That extended tension is linked to better neuromuscular firing and coordination, along with added hypertrophy potential in your back and core.
- Direct carryover to harder skills. The compression strength and body control you build here transfer well to muscle-ups, toes-to-bar, and front levers, along with better stability and control during overhead work like Olympic lifts.
- Stronger grip and forearms. Holding onto the bar for longer, more demanding sets builds grip strength that carries over into deadlifts and other pulling movements—useful well beyond this one exercise.
Taken together, these benefits make the leg pull-up less of a novelty move and more of a genuinely efficient addition to a training program built around strength, control, and coordination.
Common Mistakes, Safety Tips, and Who Should Avoid This Move
Most of the risk in this exercise comes from rushing it—trying to hit reps before your body's actually ready to control the position. Here are the mistakes that show up most often, and what they cost you:
- Swinging or kipping. This is the single most common error, and it's the one that undermines the whole point of the exercise. Momentum takes tension off your abs, cuts your training effect, and adds unnecessary stress to your shoulders. Reset to a dead hang between every rep instead of chasing volume with a swing.
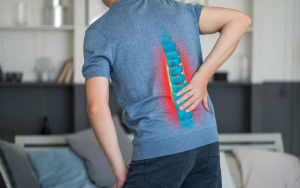
- Arching your lower back. When your abs aren't strong enough to counter the pull of your hip flexors, your lumbar spine arches and your hip flexors take over the work. Fix this by bracing your core, squeezing your glutes, and holding that posterior pelvic tilt—the cue “show your belt buckle to your chin” works well here.
- Legs dropping or piking. If your legs sink below parallel, that's a sign you don't yet have the endurance or compression strength for the position. If your hips bend toward your chest instead, that points to a core weakness. Either way, the answer is the same: regress to an easier variation rather than letting your form fall apart.
- Shrugging at the top. Focusing too hard on getting your chin over the bar often causes your shoulders to shrug up toward your ears, which turns the rep into a shoulder grind and destabilizes your whole position. Cue yourself to keep your shoulders down and drive with your elbows instead.
Beyond technique, there are a couple of physical considerations worth taking seriously before you load up on this exercise:
- Spinal load matters if you have a back history. Straight-leg hanging work generates significant lumbar compression—research on the related hanging leg raise measured roughly 3,000 newtons. If you have a history of low-back pain, start with bent-knee versions, keep your range of motion at parallel or below, slow down your eccentric, and stop immediately at any sharp pain, numbness, or radiating symptoms.
- Progress your volume gradually. Long isometric holds can cause hip flexor cramping, and ramping up your volume too fast can irritate your elbows. Increase your training load by roughly 10 to 20 percent per week, and always keep a rep or two in reserve rather than training to failure.
If you fall into either of those risk categories, that doesn't mean this exercise is off-limits forever—it just means you should spend more time in the easier progressions before attempting the full straight-leg version.
Prerequisites, Programming, and How to Build Up to It
Before you attempt a full leg pull-up, you need two specific strength qualities in place. Skipping this step is the fastest way to end up compensating with bad form.
The two prerequisites to test first:
- At least 8 to 10 strict, full-range pull-ups with no swing
- A 20 to 30 second L-sit hold, either on the floor, parallel bars, or in a hanging position
If you can't hit both of these comfortably, spend a dedicated training block building each capacity separately before you try combining them.
The regression path, from easiest to hardest:
- Dead hang
- Scapular pull-ups
- Hanging knee-raise holds, working up to about 30 seconds in a tuck position
- Tucked-knee pull-ups
- One-leg-extended pull-ups
- Low-L or band-assisted L-sit pull-ups
- Full straight-leg L-sit pull-ups
Work through these stages in order, and don't move to the next one until the current stage feels controlled rather than shaky.
How to program it once you've built the base:
Since you can't easily add load to this movement, sources tend to program it by managing reps, sets, and quality instead of weight:
- For a strength focus: 3 to 5 sets of 3 to 6 reps, resting 90 to 150 seconds between sets
- For skill and control: 3 to 4 sets of 2 to 5 strict reps, stopping 2 to 3 reps shy of failure, resting 45 to 90 seconds
- As an alternative structure: an EMOM of 1 clean rep every minute for 10 minutes, or a complex of a 5 to 10 second L-sit hold followed by 1 pull-up
Train this 2 to 4 times per week as part of a back or pulling day, giving your body 24 to 72 hours of recovery between sessions. Since it demands both strength and control, it responds better to frequent, quality-focused practice than to occasional all-out sets.
Knowing when to progress and when to pull back:
Your reps will tell you which direction to go. If you can hit 3 to 4 sets of 5 clean reps with a controlled 2 to 3 second lowering phase, you're ready to progress—add a pause at the top, slow your eccentric further, or work toward toes-to-bar.
On the other hand, if your legs start dropping below parallel, your reps turn into swings, or you notice recurring hip flexor cramping or elbow irritation, that's your signal to cut back on volume and rebuild more gradually.
One last thing worth keeping in mind: this exercise builds real core strength, but it won't reveal a visible six-pack on its own.
That still comes down to your body fat percentage, which means your diet and overall training approach matter just as much as how well you perform this one movement.
Conclusion
The leg pull-up earns its reputation as a serious ab challenge by turning your legs from passive weight into an active lever your core has to control throughout the entire movement.
Getting there safely means building your pull-up strength and L-sit hold separately first, then working through the regression steps with strict form rather than rushing to the hardest version.
Master that progression, and you'll have added one of the most efficient upper-body-and-core exercises to your training toolkit.