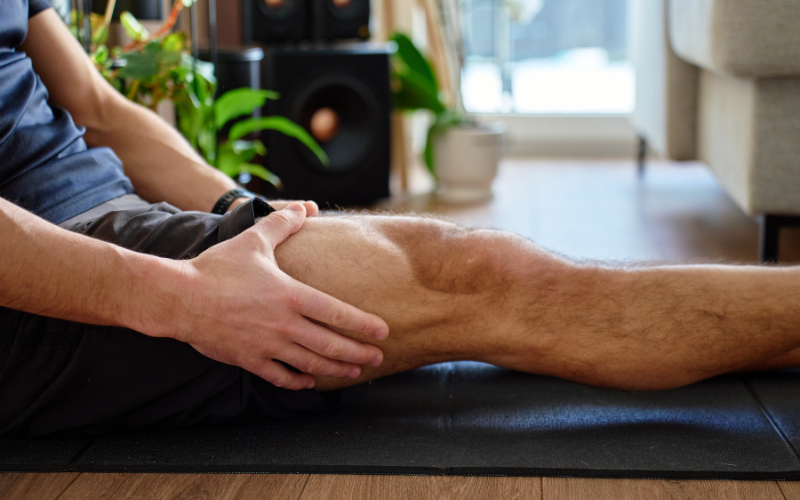
If your knee aches right below the kneecap after jumping or squatting, the fastest path back is progressive tendon loading, not rest.
The five best exercises are isometric quadriceps holds, heavy slow resistance training, eccentric decline squats, split squats with isotonic knee extension, and calf/hip strengthening for the surrounding kinetic chain—keep reading for exactly how and when to use each one.
Why Loading (Not Rest) Is the Right Approach to Jumper's Knee
Your first instinct when something hurts is probably to stop using it. With patellar tendonitis, that instinct works against you.
Tendons adapt to the stress you put on them, and a tendon that's already struggling needs the right kind of stress to rebuild, not a complete break from activity.
Take away the load entirely, and the tendon just gets weaker, leaving you worse off than before once you try to return to sport.
The exercises in this article all work by asking the tendon to handle load again, in carefully measured doses. That raises an obvious question: how much pain during exercise is too much?
The answer researchers and clinicians tend to agree on is this: pain up to about 3 out of 10 during the exercise is fine, as long as it settles back down within 24 hours.
Anything beyond that threshold, or pain that lingers into the next day, signals you've pushed too hard and need to dial back the load.
Within that framework, three main approaches compete for the title of “best” exercise: isometric holds, eccentric decline squats, and heavy slow resistance training. Each has research behind it, and each has passionate advocates.
But here's the more useful way to think about it: these aren't rival treatments where one wins and the others lose. They're different tools suited to different moments in your recovery. Isometrics shine when you need pain relief right now.
Heavy slow resistance and eccentric work shine when you're ready to rebuild capacity. Neither replaces the other; they simply serve different jobs.
That's why the most effective approach to jumper's knee isn't picking one exercise and sticking with it. It's moving through a structured, four-stage progression as your tendon improves:
- Isometric loading to calm pain and regain some strength without aggravating symptoms
- Isotonic and heavy slow resistance work to rebuild muscle and tendon capacity
- Energy-storage and plyometric training to prepare the tendon for the demands of jumping and quick direction changes
- Return to sport, where you gradually reintroduce the specific movements your activity requires
Each stage builds on the one before it, and moving through them in order is what separates a structured comeback from just hoping the pain goes away.
The rest of this article breaks down exactly how to perform each exercise and where it fits into that progression.
Exercise 1 — Isometric Quadriceps Holds for Pain Relief
If you're dealing with a flare-up right now, or you're an athlete who needs to keep competing through the season, this is where you start.
How to perform it:
- On a leg-extension machine, set the knee at around 60° of flexion (a mid-range position, generally somewhere between 30° and 60° works)
- Push against the pad at roughly 70% of your maximum effort
- Hold that contraction for 45 seconds
- Rest about 2 minutes, then repeat for 5 total sets
- Do this 2 to 3 times per day
No leg-extension machine available? Use the Spanish squat instead. Anchor a rigid strap or heavy band behind your knees, squat down to somewhere between 70° and 90° of knee flexion, keep your torso upright and shins vertical, and hold there for the same 45-second, 5-set structure.
Why this works: Pain in tendinopathy isn't purely a tissue problem — it's partly a nervous system problem. Your brain reduces its signal to the quadriceps as a protective measure, which weakens the muscle and can actually increase your perception of pain.
Isometric holds appear to interrupt that inhibition, letting you generate more strength with less discomfort. There's also a direct analgesic effect layered on top, which is what makes this exercise so useful for athletes mid-season who can't afford extended time off.
The evidence for how dramatic this effect can be comes from a small study of male volleyball players. Before performing isometric holds, they rated their pain during a single-leg decline squat at 7 out of 10.
Immediately after the isometric protocol, that pain dropped to essentially zero, and the relief lasted at least 45 minutes.
Their strength during the contraction also increased by about 19%. That's a striking result, and it's worth understanding both what it shows and where its limits are.
Where this exercise has limits:
- The dramatic pain relief seen in that volleyball study hasn't replicated consistently across other tendon conditions. In plantar fasciopathy, for instance, only around 15% of participants got meaningful relief. In Achilles tendinopathy, some people improved slightly while others felt worse immediately after the same protocol. Your response may simply differ from someone else's, and that's normal, not a sign you're doing it wrong.
- Avoid holding near full knee extension or in deep flexion early on — these positions tend to provoke rather than calm the tendon.
- If heavy knee-extension holds make your anterior knee pain worse instead of better, that's a signal worth paying attention to. It may mean the pain is coming from the patellofemoral joint or the fat pad behind the kneecap, not the tendon itself, and continuing the same protocol won't help.
Exercise 2 — Heavy Slow Resistance (HSR) Training
Once your pain is under control and you're ready to rebuild real strength and tendon capacity, heavy slow resistance training is where most of the durable progress happens.
How to perform it:
The protocol involves three exercises — barbell squat, leg press, and hack squat — trained through about 90° of knee flexion at a slow, controlled tempo: 3 seconds lowering, 3 seconds lifting, for 6 seconds per rep. You'll train 3 times a week, every other day, for 12 weeks, with 2 to 3 minutes of rest between sets. Load and reps shift as you progress:
- Weeks 1: 3 sets of 15-rep max
- Weeks 2–3: 3 sets of 12-rep max
- Weeks 4–5: 4 sets of 10-rep max
- Weeks 6–8: 4 sets of 8-rep max
- Weeks 9–12: 4 sets of 6-rep max
As reps drop, load goes up, gradually pushing your tendon and muscles to handle heavier stress. Throughout, keep pain during loading at or below that 3/10 threshold.
Why this works: Slow, heavy loading maximizes the time your tendon spends under tension, which drives collagen synthesis and structural remodeling — not just muscle strength. In a randomized trial of 39 male patients, the HSR group saw tendon swelling drop by 12% and abnormal blood vessel growth (a hallmark of unhealthy tendon tissue) drop by 45% after 12 weeks, alongside markers of active collagen turnover. Those are structural changes, not just symptom management. Pain and function improvements held steady at six months, and patient satisfaction was notably higher with HSR than with other loading approaches, which matters for staying consistent with a program that takes months to pay off.
Progression tip: Start with double-leg versions of these lifts, but don't stay there. Bilateral squats and leg presses let your uninjured leg quietly take over more of the work, which hides strength asymmetry between your two legs instead of fixing it. Shift toward single-leg leg press, split squats, and single-leg variations as soon as you're able, so you're actually addressing the deficit in the affected leg rather than compensating around it.
Watch out for:
- Relying only on multi-joint, double-leg lifts throughout the whole program — this is the most common mistake and it slows real recovery of the affected leg
- Pushing into deep flexion (beyond 90°) or full extension too early, both of which can aggravate the tendon before it's ready
- Starting this protocol before pain during loading is already low and manageable — HSR builds on a foundation, it doesn't replace the need for one
Exercise 3 — Eccentric Decline Squats

This is the exercise most people picture when they think of jumper's knee rehab, and for good reason — it's one of the most studied loading protocols for this condition. But it comes with tradeoffs worth understanding before you build your program around it.
How to perform it:
- Stand on a 25° decline board, with your affected leg forward
- Lower yourself slowly on that single leg, taking 3 to 5 seconds to descend to around 60° of knee flexion
- Push back up using your uninjured leg, not the injured one, to keep the loading one-directional
- Perform 3 sets of 15 repetitions, twice daily
- Add load over time — a weighted backpack works well — as the exercise gets easier
This runs for 12 weeks in the original protocol, and unlike some of the other exercises here, working into some tendon discomfort is actually part of the design rather than something to avoid entirely.
Why this works: The decline angle isn't incidental — it's the whole point. Standing on a slope limits how much your calf can contribute to the movement and reduces how far your shin travels forward, which concentrates load directly onto the patellar tendon. Research measuring tendon strain found it's roughly 20-25% higher on a decline surface compared to a flat one. That extra, targeted strain is what stimulates the tendon's collagen-producing cells to get to work, which is the core process needed to reverse tendinopathy at a tissue level.
The trade-off you need to know about: Eccentric decline squats work well when you have time to dedicate to a full off-season program, but they're generally a poor fit for in-season athletes. A few reasons why:
- The twice-daily time commitment is substantial
- The exercise can be genuinely painful, and pushing through some discomfort is expected
- It may not settle symptoms mid-season, and can even increase pain risk in athletes whose tendons show pathology on imaging but aren't yet symptomatic
- Patient satisfaction with this protocol runs considerably lower than with heavy slow resistance training — in one comparison, only about 22% were satisfied with eccentric squats versus roughly 70% with HSR
That doesn't mean it's not effective — it clearly can be, particularly in elite athletes willing to commit to it during off-season training. It just means the timing and your season schedule should drive whether this is the right tool for you right now.
A few technique cues that matter:
- Don't bounce at the bottom of the movement. Bouncing stores and releases energy through the tendon in a way that can aggravate rather than help it.
- Keep your knee tracking in line with your foot — don't let it collapse inward or drift too far outward.
- Some discomfort during the set is expected with this particular exercise, but it should still fall within that same manageable pain threshold and settle within a day.
Exercise 4 & 5 — Isotonic Strengthening and Kinetic Chain Support
The knee doesn't work in isolation, and neither should your rehab. These last two pieces round out the picture: targeted isotonic strengthening for the quadriceps itself, and support work for the muscles above and below the knee that influence how much load the tendon has to absorb.
Split Squat and Seated Knee Extension
When to start: Once your pain during loading is consistently at or below 3/10, you're ready to add isotonic work — split squats and seated leg extension — into your routine.
How to perform them:
- Begin working through a limited range, roughly 10° to 60° of knee flexion, and only extend toward 90° as your tolerance improves
- Start with higher reps and lighter load — around 4 sets of 15 — and progress toward heavier, lower-rep work, eventually around 4 sets of 6
- Move toward single-leg versions as soon as you're able, for the same reason as with HSR: bilateral exercises let the good leg compensate
- In the split squat specifically, keep your shin vertical and your knee behind your toes, which naturally keeps flexion under 90°
Why this matters: Isotonic loading rebuilds muscle bulk and strength through a full functional range of motion, rather than the static positions used in isometric work. Seated knee extension in particular isolates the quadriceps directly, which makes it one of the more effective ways to address the strength deficits and left-right asymmetry so common in this condition. It's also been shown to reverse the quadriceps inhibition that isometric holds address, giving you a second tool for the same underlying problem.
Watch for: the same trap as HSR — leaning too heavily on double-leg movements lets asymmetry hide instead of resolving. And early on, avoid pushing past 90° of flexion or into full extension, since both tend to provoke symptoms before the tendon's ready.
Kinetic Chain Support: Calves, Hips, and Glutes
Your knee tendon doesn't operate independently from the rest of your leg. Weakness above or below it — in the hips or the calf — often shows up as extra strain funneled straight into the knee.
The exercises:
- Standing calf raises (straight knee) to target the gastrocnemius
- Seated calf raises (bent knee) to target the soleus
- Hip and glute work, including bridges and hip abduction/extension exercises
These run alongside your main tendon-loading program rather than replacing any of it.
Why this matters:
- Weakness in the glutes, quadriceps, and calf muscles is commonly seen in people with this condition — it's not incidental, it's part of the picture
- Stronger hip extensors reduce how much load the knee extensors have to absorb during weight-bearing movements like landing from a jump — one case report found that a hip-strengthening and landing-technique program shifted the hip-to-knee strength balance and reduced symptoms
- Better calf strength improves shock absorption and control of the shin as you land and decelerate
- Limited ankle dorsiflexion — generally under about 45° — has been linked to abnormal patellar tendon findings on imaging, making ankle mobility worth checking as well
The most common mistake here is treating the tendon as the only thing that needs attention because it's the only thing that hurts. Skipping the hip and calf work because the pain is clearly coming from the knee is exactly what undermines a full recovery and a safe return to sport. The tendon may be where you feel it, but it's rarely where the whole problem lives.
Putting It All Together — Progression, Timelines, and When to Get Help
You now have five exercises, but the real skill is knowing how they fit together into one coherent path back to full function.
The 4-stage roadmap:
- Isometric loading — calms pain, restores some strength, safe enough to use even mid-season
- Isotonic and heavy slow resistance work — rebuilds muscle and tendon capacity once pain during loading is manageable
- Energy-storage and plyometric training — reintroduces jumping, hopping, and quick loading once your strength has caught up
- Return to sport — gradually brings back the specific movements your sport demands
Each stage is a prerequisite for the next. Skipping ahead because you're feeling impatient, or because the pain has quieted down faster than your strength has actually rebuilt, is one of the more common ways people set themselves back.
How do you know you're ready to move from strength work into jumping? You need an objective benchmark, not just a feeling. One useful one: your single-leg press strength on the affected side should reach roughly 150% of your body weight for 4 sets of 8 reps, matched closely to what your uninjured leg can do. Hitting that kind of symmetry is a much more reliable signal than pain alone, since pain can settle before the underlying strength and tendon capacity have actually caught up.
On timelines: this is not a two-week fix. Meaningful recovery from patellar tendinopathy typically takes 3 to 12 months, and full tendon remodeling can take up to a year. Progress is governed by pain levels and strength benchmarks, not by the calendar, so resist the urge to rush stages just because a certain number of weeks has passed.
Signs you need to regress or seek help:
- Pain consistently exceeds 3/10 during exercise, or doesn't settle back down within 24 hours
- Heavy knee-extension work makes your pain worse rather than better, which may point to a different source of pain, such as the patellofemoral joint or fat pad, rather than the tendon
- You've been loading consistently for 6 to 12 weeks with no real improvement
Any of these is a reason to scale back to the last stage that felt manageable, or to bring in an individualized assessment rather than pushing through on your own.
Before you start any of this, it's worth getting a proper diagnosis. Conditions like patellofemoral pain, fat pad impingement, and plica irritation can all mimic patellar tendinopathy, and some of them can actually get worse with the same loading strategies that help a true tendon problem.
A qualified physiotherapist can confirm what you're dealing with and help guide the trickier decisions, particularly around when it's safe to return to sport.
Conclusion
Patellar tendonitis responds best to progressive loading, moving through isometrics, heavy slow resistance or eccentric work, and finally energy-storage training before you return to sport.
Stick to the pain guideline of 3/10 or less that settles within a day, and don't skip the hip and calf work just because the tendon is where you feel it.
Recovery takes months rather than weeks, so stay consistent, track your strength benchmarks, and get a physiotherapist involved if progress stalls.