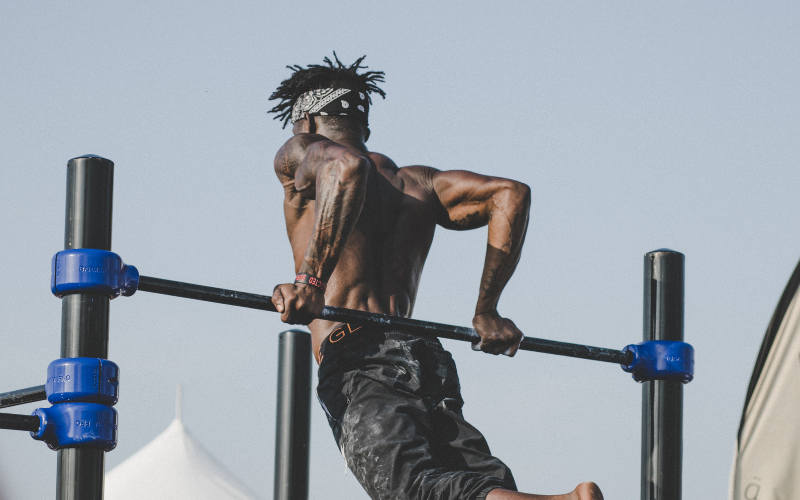
Weighted calisthenics means adding external load, like a vest, dip belt, or plates, to bodyweight moves such as pull-ups, dips, and push-ups once your own bodyweight stops challenging you enough.
In 30 days you can expect solid strength gains (around 10–30%), better conditioning, and modest fat loss, but only 1–2 lb of visible muscle at most, so keep reading for the full workout plan and a realistic breakdown of what actually changes in a month.
What Is Weighted Calisthenics (And Who It's Actually For)
Weighted calisthenics takes the same movements you already know from bodyweight training, pull-ups, dips, push-ups, squats, lunges, and adds external resistance on top.
That could mean a weighted vest, a dip belt loaded with plates, a dumbbell held between your feet, or even a backpack packed with books. The movement pattern stays exactly the same. What changes is the resistance your muscles have to work against.
It helps to think of this less as a new training style and more as the next logical step. Bodyweight training works great until your body adapts to moving its own weight around, at which point reps alone stop driving progress.
Once you can knock out 20 clean push-ups without much effort, adding more reps does less for strength and muscle than adding load does.
Weighted calisthenics is simply progressive overload applied to movements you've already mastered, not a separate discipline you switch to.
That's exactly why it's not a starting point. Before adding weight, you need a real bodyweight foundation:
- Roughly 10–15 strict pull-ups with full range of motion
- 12–20 clean dips, elbows locked out at the top, no bouncing
- Solid push-up and squat numbers with controlled form
- About three months of consistent training at that level
That three-month window matters more than people think. Your muscles get stronger fairly quickly, but tendons and connective tissue adapt on a much slower timeline.
If you start loading pull-ups the moment you hit your first 10 reps, your muscles may be ready for the extra weight while your elbow and shoulder tendons are still catching up.
That mismatch is one of the most common causes of overuse injuries in calisthenics, and it's largely preventable just by waiting.
A few groups should hold off or get clearance before jumping in. True beginners belong on unweighted calisthenics first, mastering form before ever touching added load.
Anyone with existing joint problems or cardiovascular conditions should talk to a doctor before loading up, and the same goes for anyone who's pregnant, particularly given the impact-heavy nature of moves like weighted burpees later in this program.
If any of that applies to you, the smartest 30-day plan is the one that builds your foundation first and saves the weight for later.
Equipment You Need and How to Choose
You don't need a garage full of gear to start weighted calisthenics. Two tools cover almost everything, and a handful of extras help you fine-tune loading as you get stronger.
The weighted vest is the most versatile piece of equipment you can own for this style of training. Because the load sits close to your torso and stays evenly distributed, it barely throws off your balance, which makes it usable across nearly every movement: push-ups, squats, lunges, dips, pull-ups, walking, and conditioning work like burpees. If you're only buying one thing, this is it. Look for an adjustable or removable-weight model so you can scale the load up as your strength improves, rather than being locked into a single weight from day one.
The dip belt earns its place once you're loading pull-ups and dips heavily. It's a belt with a chain or strap that lets you hang plates, kettlebells, or dumbbells below your waist, which keeps the weight off your chest and shoulders entirely. That matters because vests can start to feel awkward or restrictive once you're adding real weight to a pull-up, while a dip belt lets you keep loading well past what a vest can comfortably handle. It's the standard tool once you're working with anything heavier than around 15 kg of added resistance.
Alternatives worth knowing:
- Plates, dumbbells, or kettlebells — held between the feet for pull-ups, or set on the back for push-ups and planks
- Loaded backpack — the cheapest, most accessible entry point if you're not ready to invest in dedicated gear
- Resistance bands and chains — provide variable resistance that increases as you move through the rep, useful for push-ups where the top portion is otherwise the easiest part
Fractional plates, the small 0.5–2.5 kg plates used for microloading, deserve a specific mention because they solve a real problem: standard plate jumps are often too large for slow lifts like weighted pull-ups, where adding 5 kg at once can wreck your form overnight. These let you increase load in small, controlled increments instead.
Buying order: start with a weighted vest, since it covers the widest range of movements and gets you through most of a 30-day program on its own. Add a dip belt and a set of fractional plates once you're ready to load pull-ups and dips more seriously, typically after your first few weeks of vest work has built a baseline of strength and comfort with added resistance.
Building Your 30-Day Program — Structure, Split, and Progression Rules
A good weighted calisthenics program isn't complicated, but it does need a clear structure. Here's how to set one up for the next 30 days.
Weekly structure: Train 3–4 times per week. If you're newer to weighted work, a full-body split, hitting pull, push, and legs in every session, works well because it lets you practice loaded movements more frequently while you're still learning them. If you've got more experience, a push/pull/legs (PPL) split lets you go harder in each session since you're only tackling one movement category at a time. Either way, aim to hit each major movement pattern about twice a week.
Rep, set, and rest schemes depend on what you're prioritizing:
- Strength focus: 3–5 sets of 3–6 reps, with 2–5 minutes of rest between sets
- Muscle-building focus: 3–4 sets of 6–12 reps, with 60–120 seconds of rest between sets
You can run both within the same week, for example, lower reps and heavier loads on pull-ups, higher reps on push-ups, depending on what each exercise and your recovery can handle.
Starting loads should be conservative. For vest work, begin around 5–10% of your bodyweight, and lean toward the lower end if this is your first time training loaded. For belt work on pull-ups and dips, add small increments, 1.25–2.5 kg at a time, rather than jumping straight to a weight that feels challenging. The goal in week one isn't to test your limits; it's to see how your body responds to load at all.
Progression runs on a simple system called double progression: keep the load fixed until you can hit the top of your rep range across every set with 1–2 reps still left in the tank, then add the smallest weight increment available. Only bump volume or load, never both in the same week. This keeps progress steady without letting fatigue pile up faster than you can recover from it.
Here's how that plays out across the month:
- Week 1 — Establish loads. Add a light load to your main lifts and focus entirely on technique. Keep 2–3 reps in reserve on every set.
- Week 2 — Add volume. Tack on an extra set to lifts that felt manageable in week one, keeping the load the same.
- Week 3 — Push intensity. Work toward the top of your rep ranges and start adding small load increases where you've earned them.
- Week 4 — Peak, then taper. Push your heaviest clean sets early in the week, then dial back volume in the final 2–3 days so you finish the block recovered rather than run down.
Rest days aren't optional. Give at least 48 hours between sessions that hit the same muscle group, and build in 2–3 full rest or active-recovery days each week. Weighted work adds real stress to joints and connective tissue, and skipping recovery is one of the fastest ways to stall progress or get hurt before the month is even over.
The Complete 4-Week Weighted-Burpee Workout

Burpees earn a dedicated slot in this program because nothing else hits full-body conditioning quite the same way.
Every rep trains your legs, chest, shoulders, and core in one continuous movement while spiking your heart rate, and each set of 20 burns roughly 8–12 calories, a number that climbs slightly once you add a vest.
Because that demand is so high across joints and your cardiovascular system, this workout runs just twice a week, on non-consecutive days, alongside your main strength sessions rather than on top of them.
Equipment and starting load: A weighted vest at 5–10% of your bodyweight is the primary tool here. If you weigh 150–160 lb, that's roughly 8 lb to start; if your vest throws off your posture or how you land, it's too heavy, and you should drop it immediately. Prefer dumbbells over a vest? A light pair (5–15 lb) works too, either held through the burpee or used for the devil's press variation, a dumbbell burpee finished with an overhead snatch, which also takes pressure off your wrists.
Form comes first. A proper weighted burpee follows this sequence:
- Stand tall, feet shoulder-width apart, vest secured (or dumbbells in hand)
- Hinge and squat down, placing your hands on the floor
- Step or jump your feet back into a rigid plank, core braced, hips level
- Lower into a push-up, chest touching the floor, no hovering
- Step or jump your feet back up to your hands
- Explode upward, reaching overhead or adding a hop, then land softly with knees tracking over your toes
Scale down by stepping instead of jumping, or dropping the push-up entirely if form starts to break. Scale up with a box jump, star jump, or the devil's press once the base movement feels solid.
Warm up for 8–10 minutes before every session: light cardio, wrist circles and mobility work, shoulder and hip mobility, scapular activation, then 1–2 slow, unweighted burpees to groove the pattern before you add the vest.
The four-week plan (two sessions per week):
- Week 1 — Learn the pattern (vest at ~5% bodyweight): Session A is an EMOM for 8 minutes, 5 weighted burpees at the top of every minute. Session B is 4 rounds of 8 weighted burpees, resting 90 seconds between rounds. Form is the only goal this week, keep 2–3 reps in reserve throughout.
- Week 2 — Add volume (same vest weight): Session A extends the EMOM to 10 minutes at 5 reps per minute. Session B climbs to 5 rounds of 8 burpees, with rest trimmed to 75–90 seconds.
- Week 3 — Add density and intensity: Session A pushes the EMOM to 6 reps per minute (drop to 5 if form slips) across 10 minutes. Session B switches to intervals, 6 rounds of 30 seconds of max-quality burpees followed by 60 seconds of rest. If week 2 felt clean, this is where you can bump the vest toward 7–8% of bodyweight.
- Week 4 — Peak, then taper: Session A is your peak effort, 10 rounds for time of 6 weighted burpees plus 10 air squats, resting as needed. Record your time as a benchmark. Session B tapers back down, a 6-minute EMOM at 5 reps per minute using the lighter 5% vest, prioritizing crisp form so you finish the block fresh rather than fried.
Progression always follows the same order: volume first, then intensity, then load, and never more than one of those at a time. Add reps or rounds before you shorten rest periods, and only increase vest weight once your form holds up cleanly under the current load. Stacking two of these at once is the fastest way to break technique and end up sore in places you shouldn't be.
What Results to Realistically Expect After 30 Days
This is the section most people skip past to get to the workout, but it's the one that actually determines whether you stick with the program or quit after two weeks feeling disappointed. Here's what actually happens in a month, and why.
Strength jumps fast, but not for the reason most people assume. You can realistically expect a 10–30% improvement on the lifts you're tracking, and that gain is mostly neural, your nervous system learning to recruit muscle fibers more efficiently, not new muscle tissue being built. This is why your second week often feels dramatically stronger than your first: your body is getting better at the skill of the movement itself, coordinating muscles, stabilizing joints, before it's built anything new.
Muscle growth, by contrast, is minimal. A natural beginner can expect a maximum of about 1–2 lb of actual muscle gain in 30 days, and women typically see roughly half that rate. This isn't a flaw in the program; it's just how hypertrophy works. Noticeable muscle growth generally takes 6–12 weeks to become visible, so if you're checking the mirror daily expecting bigger arms by day 30, you're going to be let down for reasons that have nothing to do with how hard you trained.
Where you'll actually see fast, tangible progress is conditioning. Work capacity and endurance improve quickly and noticeably, more reps per set, faster recovery between rounds, less gassed after a burpee EMOM. This is the payoff that shows up almost immediately and keeps compounding throughout the month.
Fat loss follows normal, unglamorous rules. With a genuine calorie deficit, 1–4 lb of actual fat loss is a realistic outcome over 30 days. The scale might show a bigger drop due to water weight fluctuations, but claims of losing 10 lb of fat in a month are generally unrealistic and, at that pace, often unsafe.
The most visible change by day 30 is usually movement quality, not size or the scale. Cleaner technique, better balance, more control through each rep. It's the least Instagram-friendly outcome, but it's also the one that compounds the most, since better movement quality is what lets you keep progressing safely once the 30 days are up.
This isn't guesswork. Research on progressive, loaded push-up training found it produced pressing strength gains statistically comparable to a traditional bench press program over four weeks.
A separate eight-week study loaded push-ups to match 40% of a lifter's bench press 1RM and found pec and triceps muscle growth nearly identical to a matched bench-press group.
Loaded bodyweight training isn't a lesser alternative to barbell work; it produces comparable results when the load and effort are actually matched.
All of this points to the same conclusion: dramatic 30-day transformations are a marketing promise, not a physiological one. Strength and conditioning respond quickly because your nervous system adapts fast.
Muscle and fat respond slowly because tissue change is a gradual biological process that doesn't accelerate just because you want it to.
Judge this program by what it's actually built to deliver, real strength gains and better conditioning, and revisit the mirror in three months, not thirty days.
Staying Safe — Common Mistakes, Injury Prevention, and Recovery
Most weighted calisthenics injuries aren't caused by the training itself; they're caused by rushing it. Here's what to watch for.
The single biggest mistake is adding weight before your bodyweight form is actually solid. If your unweighted pull-ups already have shaky range of motion or your dips are missing depth, loading them just adds resistance to bad technique, which reinforces the flaw rather than fixing it. Fix the pattern first. Load it second.
A few related habits tend to show up together:
- Progressing load too fast — jumping from 5 kg to 15 kg because one set felt easy, rather than earning that jump through consistent, clean performance
- Ego-driven partial reps — shortening your range of motion on weighted dips or pull-ups just to move more weight, which trains a smaller, less useful version of the movement
- Skipping warm-ups for the wrists, shoulders, and scapula, the joints doing most of the stabilizing work under load
- Neglecting rest days, treating recovery as optional rather than part of the program
Why connective tissue is the real limiting factor: Muscles adapt to new stress relatively quickly, but tendons and ligaments adapt on a much slower timeline. That gap is the root cause of most calisthenics injuries, tendinopathy in the elbows, shoulders, or wrists in particular. You might feel strong enough to add weight well before your tendons have actually caught up, which is exactly why progressive warm-up loading matters: build up to your working weight gradually within each session rather than jumping straight from bodyweight to full load.
Before every session, spend a few minutes on wrist mobility and circles, shoulder rotations, and scapular activation. This matters even more on burpee days, where wrists absorb repeated impact and the shoulders are working through a full range of motion under fatigue.
Recovery is where the actual adaptation happens, not in the workout itself. Prioritize:
- Sleep — aim for 8+ hours; this is when most tissue repair occurs
- Protein — roughly 0.8–1 g per pound of bodyweight to support muscle and connective tissue repair
- Hydration — especially important on high-intensity burpee days
- Rest spacing — at least 48 hours between sessions hitting the same muscle group
- Deloads — reduce volume by about 50–60% every 6–8 weeks if you continue training past this 30-day block
Know when to pull back. Persistent joint pain, dizziness during or after burpee sessions, or form that keeps degrading despite your best effort are all signals to reduce weight, cut volume, or swap to a gentler variation, like a dumbbell devil's press instead of a vested burpee, until things settle. Pushing through these signs doesn't build toughness; it just turns a minor issue into a setback that costs you far more than the training time you're trying to protect.
Conclusion
Weighted calisthenics turns movements you've already mastered into a long-term strength tool, and 30 days is enough time to see real gains in strength and conditioning, even if visible muscle and fat loss take longer to show up.
Stick to the prerequisites, progress load in small steps, and prioritize recovery, and you'll finish the month stronger and more capable than when you started.
From here, the plan above gives you everything you need to begin safely and keep building past day 30.