If you're looking to build muscle and improve your overall strength using the power of yoga, you've come to the right place.
By the end of this article, you'll be equipped with all the knowledge you need to confidently incorporate these 9 powerful yoga poses into your routine.
Not only will you learn how to perform each pose correctly, but you'll also understand which muscles they target and how to maintain proper alignment.
So, let's dive in and get ready to strengthen your body with these amazing yoga poses!
Warm-up: Preparing your body for the poses
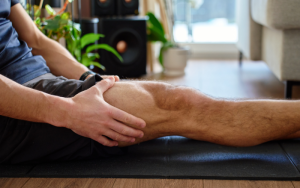
Before diving into the world of muscle-building yoga poses, it's essential to properly warm up your body to prevent injury and ensure optimal results.
Warming up helps to increase blood flow, loosen tight muscles, and mentally prepare you for the practice ahead.
By giving your muscles and joints some attention before getting into the more intense poses, you'll not only enhance your performance but also minimize the risk of strains and discomfort.
So, let's explore the importance of warming up further and go through some suggested exercises to get you started on the right foot!
Importance of warming up
Warming up is a crucial part of any exercise routine, including yoga.
It prepares your body for the physical demands of the practice and helps to prevent injury.
When you warm up, you:
- Increase blood flow: A good warm-up boosts circulation, delivering oxygen and nutrients to your muscles, which in turn helps to improve your overall performance.
- Enhance flexibility: As your muscles become warmer, they become more pliable, allowing for a greater range of motion during your practice.
- Improve mental focus: Warming up helps you transition from the busyness of daily life to the present moment, allowing you to concentrate on your practice and set intentions for your session.
Suggested warm-up exercises
To make the most out of your muscle-building yoga practice, consider incorporating these simple yet effective warm-up exercises:
- Cat-Cow Pose (Marjaryasana-Bitilasana): This gentle movement helps to warm up your spine, stretch your back and neck muscles, and relieve tension. Start on your hands and knees, and as you inhale, arch your back and lift your chest and tailbone towards the sky. Exhale, rounding your spine and tucking your chin and tailbone inwards. Repeat for 5-10 breaths.
- Leg swings: Stand next to a wall or chair for support, and gently swing one leg forward and backward, gradually increasing the range of motion. Do this for 10-15 swings on each leg to warm up your hips, hamstrings, and quadriceps.
- Arm circles: Stand with your feet hip-width apart and extend your arms out to the sides. Make small circles with your arms, gradually increasing the size of the circles. Do this for 10-15 seconds in one direction, and then switch to the opposite direction. This helps warm up your shoulders and upper back.
- Hip circles: Place your hands on your hips and make slow, controlled circles with your hips, moving in a clockwise direction. After 5-10 circles, switch to a counterclockwise direction. This movement helps to loosen up your hip joints and lower back.
- Sun Salutations (Surya Namaskar): This classic yoga sequence is an excellent full-body warm-up, incorporating a series of poses that help to stretch and activate various muscle groups. Perform 3-5 rounds at a slow and steady pace, coordinating your breath with each movement.
Remember, the key to an effective warm-up is to listen to your body and adjust the exercises to suit your needs.
By dedicating a few minutes to warming up before diving into the muscle-building poses, you'll set yourself up for a successful and injury-free practice.
#1: Plank Pose (Phalakasana)
Let's kick off our journey into muscle-building yoga poses with Plank Pose, or Phalakasana.
This powerful pose is a fantastic way to strengthen your entire body, engaging multiple muscle groups simultaneously.
Plank Pose is the foundation for many other poses, making it an essential addition to your practice.
Read on to learn how to perform this pose correctly, the muscles it targets, and tips to maintain proper alignment for maximum benefits.
How to perform the pose
To perform Plank Pose, follow these step-by-step instructions:
- Start on your hands and knees, with your hands shoulder-width apart and directly under your shoulders. Spread your fingers wide for added stability.
- Extend your legs back, one at a time, bringing your body into a straight line from head to heels. Tuck your toes under and press them firmly into the mat.
- Engage your core muscles by drawing your navel towards your spine, and keep your thighs and glutes active.
- Ensure your neck is in a neutral position by gazing down at the mat, just slightly ahead of your hands.
- Hold the pose for 30 seconds to 1 minute, focusing on maintaining proper alignment and steady breathing.
Muscles targeted
Plank Pose is a full-body exercise that targets several muscle groups, including:
- Core muscles: The pose engages your entire core, including the rectus abdominis (the “six-pack” muscles), transverse abdominis, and obliques.
- Shoulders and arms: Your deltoids, triceps, and biceps work together to support and stabilize your upper body.
- Lower body: Your glutes, quadriceps, and hamstrings are activated to maintain the straight line of your body.
Tips for proper alignment
To get the most out of Plank Pose and avoid injury, keep these alignment tips in mind:
- Keep your shoulders stacked over your wrists to avoid placing too much strain on your wrists and shoulders.
- Avoid arching or sagging your lower back by engaging your core muscles and maintaining a neutral spine.
- Press your heels back, as if you were pushing against a wall, to activate your lower body muscles.
- Don't forget to breathe! Inhale and exhale deeply and steadily throughout the pose.
#2: Chair Pose (Utkatasana)
Next up on our list of muscle-building yoga poses is Chair Pose, or Utkatasana.
This dynamic pose is perfect for strengthening your lower body, particularly your legs and glutes, while also engaging your core and upper body.
Chair Pose challenges your balance and endurance, making it an excellent addition to your strength-building yoga practice.
Read on to learn how to perform this pose, which muscles it targets, and tips for maintaining proper alignment.
How to perform the pose
To perform Chair Pose, follow these step-by-step instructions:
- Begin by standing tall in Mountain Pose (Tadasana) with your feet hip-width apart and your arms by your sides.
- Inhale and raise your arms overhead, keeping your palms facing each other and your shoulders relaxed away from your ears.
- Exhale and bend your knees, lowering your hips as if you were sitting back into a chair. Aim to bring your thighs as close to parallel with the floor as possible.
- Shift your weight back into your heels, keeping your toes light on the mat and your chest lifted.
- Engage your core muscles to maintain a neutral spine and avoid arching your lower back.
- Hold the pose for 5 to 10 breaths, focusing on maintaining proper alignment and steady breathing.
Muscles targeted
Chair Pose targets several key muscle groups, including:
- Lower body: The pose primarily strengthens your quadriceps, hamstrings, and glutes as you hold the squat position.
- Core muscles: Your core muscles, including your rectus abdominis, transverse abdominis, and obliques, work to stabilize your torso and maintain a neutral spine.
- Upper body: Your deltoids and trapezius muscles are engaged as you reach your arms overhead and maintain an open chest.
Tips for proper alignment
To get the most out of Chair Pose and avoid injury, keep these alignment tips in mind:
- Keep your knees aligned with your feet, being careful not to let them collapse inward or extend past your toes.
- Maintain a neutral spine by engaging your core muscles and avoiding excessive arching or rounding of the back.
- Keep your chest lifted and open, drawing your shoulder blades down and back.
- If you experience discomfort in your shoulders, consider widening the distance between your arms or bringing your hands to your heart center.
#3: Warrior II (Virabhadrasana II)
Continuing our exploration of muscle-building yoga poses, we come to Warrior II, or Virabhadrasana II.
This iconic and powerful pose is fantastic for strengthening your lower body, particularly your legs and glutes, while also providing a gentle stretch for your hips and shoulders.
As you hold Warrior II, you'll also engage your core and upper body, making it a well-rounded strength-building pose.
Read on to learn how to perform Warrior II, the muscles it targets, and tips for maintaining proper alignment.
How to perform the pose
To perform Warrior II, follow these step-by-step instructions:
- Start in Mountain Pose (Tadasana) with your feet hip-width apart and your arms by your sides.
- Step your feet about 4 feet apart, keeping them parallel to each other.
- Turn your right foot out 90 degrees, so your toes point to the top of your mat. Pivot your left foot inwards slightly, maintaining a comfortable angle for your hips.
- Raise your arms out to the sides, parallel to the floor, with your palms facing down. Keep your shoulders relaxed and away from your ears.
- Inhale, and as you exhale, bend your right knee, aiming to align it directly above your right ankle. Keep your left leg straight and strong.
- Gaze over your right fingertips, maintaining a steady and focused drishti (gaze).
- Hold the pose for 5 to 10 breaths, focusing on maintaining proper alignment and steady breathing.
- To release, straighten your right leg, lower your arms, and step your feet together. Repeat on the left side.
Muscles targeted
Warrior II targets several key muscle groups, including:
- Lower body: The pose primarily strengthens your quadriceps, hamstrings, and glutes in both legs, while also providing a gentle stretch for your inner thighs and hips.
- Core muscles: Your core muscles, including your rectus abdominis, transverse abdominis, and obliques, work to stabilize your torso and maintain a neutral spine.
- Upper body: Your deltoids and trapezius muscles are engaged as you extend your arms out to the sides and keep your shoulders relaxed.
Tips for proper alignment
To get the most out of Warrior II and avoid injury, keep these alignment tips in mind:
- Ensure your front knee is stacked directly above your front ankle, and avoid letting it collapse inward or extend past your toes.
- Keep your back leg straight and strong, pressing down through the outer edge of your back foot.
- Maintain a neutral spine by engaging your core muscles and avoiding excessive arching or rounding of the back.
- Keep your chest open and lifted, drawing your shoulder blades down and back.
- If you experience discomfort in your front knee, consider shortening your stance or placing a folded blanket or towel under your back heel for added support.
#4: Boat Pose (Navasana)
Now, let's explore Boat Pose, or Navasana, a fantastic pose for building core strength and stability.
As you hold this challenging pose, you'll not only engage your abdominal muscles but also work your hip flexors and spinal muscles.
Boat Pose tests your balance and endurance, making it a valuable addition to any muscle-building yoga practice.
In the following sections, you'll learn how to perform Boat Pose, the muscles it targets, and tips for maintaining proper alignment.
How to perform the pose
To perform Boat Pose, follow these step-by-step instructions:
- Start by sitting on your mat with your legs extended in front of you and your hands resting on your thighs.
- Bend your knees and bring your feet flat on the floor, hip-width apart.
- Place your hands behind your thighs, just below your knees, and gently lean back while maintaining a straight spine.
- Lift your feet off the floor, keeping your knees bent, until your shins are parallel to the floor.
- Engage your core muscles and lengthen your spine, broadening your chest and drawing your shoulder blades down and back.
- If you feel stable and comfortable, extend your arms forward, parallel to the floor with your palms facing each other.
- For an added challenge, straighten your legs, lifting your toes towards the sky, and maintain a V-shape with your body.
- Hold the pose for 5 to 10 breaths, focusing on maintaining proper alignment and steady breathing.
- To release, lower your feet to the floor and sit up tall.
Muscles targeted
Boat Pose targets several key muscle groups, including:
- Core muscles: The pose primarily targets your rectus abdominis (the “six-pack” muscles), transverse abdominis, and obliques, helping to build overall core strength and stability.
- Hip flexors: Your hip flexors, particularly the iliopsoas muscles, work to maintain the lifted position of your legs.
- Spinal muscles: The erector spinae muscles, which run along your spine, are engaged as you maintain a straight back and open chest.
Tips for proper alignment
To get the most out of Boat Pose and avoid injury, keep these alignment tips in mind:
- Keep your chest open and lifted, avoiding rounding your back or collapsing your shoulders.
- Engage your core muscles throughout the pose to support your lower back and maintain stability.
- Focus on lengthening your spine, drawing the crown of your head towards the sky and your tailbone towards the floor.
- If you experience discomfort in your hips or lower back, consider keeping your knees bent or placing a folded blanket under your hips for added support.
#5: Low Lunge (Anjaneyasana)
Moving on to our next muscle-building yoga pose, let's take a look at Low Lunge, or Anjaneyasana.
This dynamic pose is excellent for strengthening your lower body, particularly your quadriceps and glutes, while providing a deep stretch for your hip flexors and psoas muscles.
As you hold Low Lunge, you'll also engage your core and upper body, making it a well-rounded addition to your strength-building practice.
In the sections below, you'll learn how to perform Low Lunge, the muscles it targets, and tips for maintaining proper alignment.
How to perform the pose
To perform Low Lunge, follow these step-by-step instructions:
- Begin in Downward-Facing Dog (Adho Mukha Svanasana) with your hands shoulder-width apart and your feet hip-width apart.
- Inhale and step your right foot forward between your hands, aligning your right knee directly over your right ankle.
- Lower your left knee to the ground, releasing the top of your left foot to the mat. Ensure your left leg is extended straight behind you.
- Inhale and lift your torso upright, raising your arms overhead with your palms facing each other. Keep your shoulders relaxed away from your ears.
- Engage your core muscles and gently draw your tailbone down towards the floor to deepen the stretch in your left hip.
- Hold the pose for 5 to 10 breaths, focusing on maintaining proper alignment and steady breathing.
- To release, lower your hands to the mat, step your right foot back, and return to Downward-Facing Dog. Repeat on the left side.
Muscles targeted
Low Lunge targets several key muscle groups, including:
- Lower body: The pose primarily strengthens your quadriceps and glutes in your front leg, while also providing a deep stretch for your hip flexors and psoas muscles in your back leg.
- Core muscles: Your core muscles, including your rectus abdominis, transverse abdominis, and obliques, work to stabilize your torso and maintain a neutral spine.
- Upper body: Your deltoids and trapezius muscles are engaged as you reach your arms overhead and maintain an open chest.
Tips for proper alignment
To get the most out of Low Lunge and avoid injury, keep these alignment tips in mind:
- Ensure your front knee is stacked directly above your front ankle, and avoid letting it collapse inward or extend past your toes.
- Maintain a neutral spine by engaging your core muscles and avoiding excessive arching or rounding of the back.
- Keep your chest open and lifted, drawing your shoulder blades down and back.
- If you experience discomfort in your back knee, consider placing a folded blanket or towel under your knee for added support.
#6: Bridge Pose (Setu Bandha Sarvangasana)

Next up on our list of muscle-building yoga poses is Bridge Pose, or Setu Bandha Sarvangasana.
This rejuvenating backbend is ideal for strengthening your lower body, particularly your glutes and hamstrings, while also providing a gentle stretch for your chest, shoulders, and spine.
As you hold Bridge Pose, you'll engage your core and back muscles, making it a comprehensive strength-building pose.
In the following sections, we'll guide you through performing Bridge Pose, the muscles it targets, and tips for maintaining proper alignment.
How to perform the pose
To perform Bridge Pose, follow these step-by-step instructions:
- Lie on your back on your mat with your knees bent and your feet flat on the floor, hip-width apart. Position your feet close to your sitting bones, with your heels within reach of your fingertips.
- Place your arms by your sides with your palms facing down.
- Press your feet and arms firmly into the mat, and as you inhale, lift your hips towards the sky, keeping your thighs parallel to each other.
- Engage your glutes and hamstrings to support the lift in your hips, and press your shoulder blades down into the mat to open your chest.
- If comfortable, interlace your fingers underneath your hips, rolling your shoulders under to create more space in your chest.
- Hold the pose for 5 to 10 breaths, focusing on maintaining proper alignment and steady breathing.
- To release, unclasp your hands (if interlaced), and slowly lower your hips to the mat, vertebra by vertebra.
Muscles targeted
Bridge Pose targets several key muscle groups, including:
- Lower body: The pose primarily strengthens your glutes and hamstrings, which work together to lift and maintain the elevation of your hips.
- Core muscles: Your core muscles, including your rectus abdominis, transverse abdominis, and obliques, work to stabilize your torso during the pose.
- Back muscles: The erector spinae muscles, which run along your spine, are engaged as you lift your hips and maintain an open chest.
Tips for proper alignment
To get the most out of Bridge Pose and avoid injury, keep these alignment tips in mind:
- Keep your knees and thighs parallel to each other, resisting the urge to let them splay outward.
- Maintain a neutral spine by engaging your core muscles and avoiding excessive arching or rounding of the back.
- Press your shoulder blades down into the mat to create more space in your chest and reduce pressure on your neck.
- If you experience discomfort in your neck or shoulders, consider placing a folded blanket or towel under your shoulders for added support.
#7: Crow Pose (Bakasana)
Let's dive into our next muscle-building yoga pose, Crow Pose, or Bakasana.
This challenging arm balance is fantastic for building upper body strength, particularly in your arms, shoulders, and core.
As you hold Crow Pose, you'll also improve your balance, focus, and body awareness.
In the following sections, we'll walk you through how to perform Crow Pose, the muscles it targets, and tips for maintaining proper alignment.
How to perform the pose
To perform Crow Pose, follow these step-by-step instructions:
- Begin in a squatting position on your mat with your feet hip-width apart and your toes pointing outward. Lower your hips and bring your hands to the mat in front of you, shoulder-width apart.
- Spread your fingers wide, pressing your palms firmly into the mat. Rotate your elbows so that the creases face forward.
- Lift your hips towards the sky, straightening your legs slightly, and position your knees as high up on your triceps as possible, close to your armpits.
- Engage your core muscles, and as you shift your weight forward, lift your toes off the mat, coming onto the balls of your feet.
- Continue to shift your weight forward, allowing your toes to lift off the ground as you balance on your hands. Keep your gaze slightly forward, just past your fingertips.
- Squeeze your knees inward, using your inner thigh muscles to maintain your balance, and lift your feet towards your buttocks.
- Hold the pose for 5 to 10 breaths, focusing on maintaining proper alignment and steady breathing.
- To release, gently lower your feet back to the mat and return to a squatting position.
Muscles targeted
Crow Pose targets several key muscle groups, including:
- Upper body: The pose primarily strengthens your wrists, forearms, shoulders, and trapezius muscles as you support your body weight in the arm balance.
- Core muscles: Your core muscles, including your rectus abdominis, transverse abdominis, and obliques, work to stabilize your torso and maintain your balance in the pose.
- Inner thighs: Your adductor muscles are engaged as you squeeze your knees inward, helping to maintain your balance.
Tips for proper alignment
To get the most out of Crow Pose and avoid injury, keep these alignment tips in mind:
- Spread your fingers wide and press your palms firmly into the mat to create a strong and stable base.
- Engage your core muscles throughout the pose to support your lower back and maintain balance.
- Keep your gaze slightly forward, rather than down, to help maintain your balance and avoid putting too much pressure on your neck.
- Warm up your wrists and shoulders before attempting Crow Pose to reduce the risk of injury.
#8: Dolphin Pose (Ardha Pincha Mayurasana)
Continuing our exploration of muscle-building yoga poses, we now arrive at Dolphin Pose, or Ardha Pincha Mayurasana.
This powerful inversion is perfect for strengthening your arms, shoulders, and core while providing a deep stretch for your hamstrings and calves.
As you hold Dolphin Pose, you'll also improve your balance and posture, making it an excellent addition to your strength-building practice.
In the following sections, we'll guide you through performing Dolphin Pose, the muscles it targets, and tips for maintaining proper alignment.
How to perform the pose
To perform Dolphin Pose, follow these step-by-step instructions:
- Begin on your hands and knees, with your wrists directly under your shoulders and your knees under your hips.
- Lower your elbows to the mat, placing them shoulder-width apart, and interlace your fingers to create a stable base.
- Press your forearms and elbows firmly into the mat, and as you exhale, tuck your toes under and lift your hips towards the sky, coming into an inverted “V” shape.
- Keep your legs straight, but not locked, as you press your chest back towards your thighs, creating a straight line from your elbows to your tailbone.
- Hold the pose for 5 to 10 breaths, focusing on maintaining proper alignment and steady breathing.
- To release, gently lower your knees to the mat and rest in Child's Pose (Balasana) for a few breaths.
Muscles targeted
Dolphin Pose targets several key muscle groups, including:
- Upper body: The pose primarily strengthens your wrists, forearms, shoulders, and trapezius muscles as you support your body weight in the inversion.
- Core muscles: Your core muscles, including your rectus abdominis, transverse abdominis, and obliques, work to stabilize your torso and maintain your balance in the pose.
- Lower body: Your hamstrings and calves receive a deep stretch as you press your chest back towards your thighs.
Tips for proper alignment
To get the most out of Dolphin Pose and avoid injury, keep these alignment tips in mind:
- Ensure your elbows and forearms are shoulder-width apart and pressing firmly into the mat to create a strong and stable base.
- Engage your core muscles throughout the pose to support your lower back and maintain balance.
- Keep your neck relaxed and gaze towards your feet, allowing your head to hang naturally between your arms.
- If you experience tightness in your hamstrings, feel free to bend your knees slightly to maintain proper alignment in your spine.
#9: Side Plank (Vasisthasana)
Last but not least, let's explore Side Plank, or Vasisthasana, in our quest for muscle-building yoga poses.
This dynamic and challenging pose targets your core, shoulders, and arms, helping you build strength and stability.
As you hold Side Plank, you'll also improve your balance and coordination, making it a valuable addition to your strength-focused practice.
In the following sections, we'll walk you through how to perform Side Plank, the muscles it targets, and tips for maintaining proper alignment.
How to perform the pose
To perform Side Plank, follow these step-by-step instructions:
- Begin in a plank position with your hands shoulder-width apart and your feet hip-width apart.
- Shift your weight onto your right hand and the outer edge of your right foot, stacking your left foot on top of your right.
- Align your body so that your shoulders, hips, and ankles form a straight line.
- Engage your core muscles and lift your left hand towards the sky, opening your chest and creating a “T” shape with your arms.
- Keep your gaze either towards the mat, straight ahead, or up towards your left hand, depending on what feels most comfortable for your neck.
- Hold the pose for 5 to 10 breaths, focusing on maintaining proper alignment and steady breathing.
- To release, lower your left hand to the mat and return to plank position. Repeat on the other side.
Muscles targeted
Side Plank targets several key muscle groups, including:
- Core muscles: The pose primarily strengthens your obliques, which are responsible for side bending and twisting, as well as your other core muscles, including the rectus abdominis and transverse abdominis.
- Upper body: Your wrists, forearms, and shoulders work to support your body weight and maintain balance in the pose.
- Lower body: Your glutes, quadriceps, and adductors are engaged to stabilize your hips and maintain the alignment of your legs.
Tips for proper alignment
To get the most out of Side Plank and avoid injury, keep these alignment tips in mind:
- Press your supporting hand firmly into the mat and engage your shoulder muscles to create a strong and stable base.
- Engage your core muscles throughout the pose to support your lower back and maintain balance.
- Keep your body in a straight line, avoiding the urge to let your hips sag or lift too high.
- If you need to modify the pose, you can lower your bottom knee to the mat for additional support.
Conclusion
In conclusion, incorporating these nine muscle-building yoga poses into your practice can help you build strength, stability, and flexibility.
From the foundational Plank Pose to the challenging Crow and Side Plank, each pose targets specific muscle groups and offers unique benefits.
Remember to prioritize proper alignment, engage your core muscles, and modify poses as needed to ensure a safe and effective practice.
By regularly practicing these poses, you'll not only develop a stronger body but also enhance your overall yoga practice and well-being.
Happy stretching!