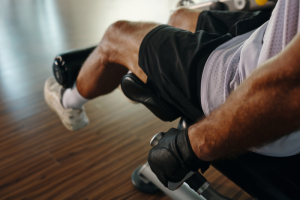
The seated dumbbell shoulder press is done by sitting upright on a bench with back support, holding dumbbells at shoulder height, and pressing them upward in a controlled motion while keeping your core tight and spine neutral.
To do it correctly, you need proper setup, form, and control throughout the entire range of motion—no shortcuts.
Keep reading for a step-by-step breakdown, key mistakes to avoid, and tips to help you press safely and effectively.
Why the Seated Dumbbell Shoulder Press Deserves a Spot in Your Routine
If you're looking to build upper-body strength and size while keeping things joint-friendly and controlled, the seated dumbbell shoulder press is a smart, efficient choice.
It combines muscle-building potential with a relatively low risk of injury—making it valuable whether you're a beginner or more advanced in your training.
Targets the Right Muscles for Well-Rounded Shoulder Development
At the core of this movement is the anterior deltoid—the front portion of your shoulder—which takes on most of the pressing workload.
But it's not working alone.
The lateral delts, triceps, upper traps, and even your core stabilizers all contribute to the lift, creating a balanced and efficient upper-body movement.
This blend of muscle involvement makes it ideal for developing both strength and visual symmetry in your upper body.
If you're after that “capped” shoulder look, this exercise should be a regular in your rotation.
Better Muscle Isolation with Less Body Distraction
What sets the seated version apart from the standing overhead press is how it locks in your position.
When you're seated with a backrest, your lower body is removed from the equation.
That makes it easier to isolate the shoulders without relying on your legs or hips to generate momentum.
You're forced to stabilize the weight with your upper body alone, which leads to better form and more targeted muscle engagement.
And because your lower back is supported, you're less likely to compensate with poor mechanics.
This matters especially when fatigue kicks in toward the end of a set—there’s simply less room to cheat the movement.
A Safer Option—Especially for Beginners
The seated dumbbell shoulder press also offers a more beginner-friendly path to overhead pressing.
Standing versions require full-body coordination and core control, which many newer lifters haven’t yet developed.
By taking the balance and coordination demands down a notch, the seated version helps you focus on what matters most early on: clean pressing mechanics.
It’s also easier to control dumbbells when seated, which reduces the risk of jerky, unstable movement—something that can strain the shoulder joint or lead to form breakdown.
A Foundational Lift with Lasting Benefits
Don’t mistake simplicity for lack of value.
The seated dumbbell shoulder press is a compound lift, meaning it works multiple joints and muscle groups in one efficient movement.
It supports progress in other lifts—like the bench press or push press—and plays a key role in overall shoulder health and strength.
If you’re planning a well-rounded upper-body routine, this press deserves a spot alongside your rows, pulldowns, and bench variations.
Not only does it build strength, but it also improves shoulder mobility and stability over time when performed correctly.
Whether your goals include better posture, bigger shoulders, or just being able to lift more overhead without discomfort, this movement sets a strong foundation.
Setting Up for Success: Bench, Body, and Dumbbells
Before you even lift the dumbbells, your setup needs to be dialed in.
How you position your body and equipment will directly impact your form, comfort, and long-term joint health.
Taking a few extra seconds to get this part right sets the tone for an effective and safe pressing session.
Start with the bench. You want a backrest set at a true 90 degrees—completely upright.
This provides the spinal support needed to press without overextending your lower back.
It also helps you maintain an upright torso, allowing your shoulders to do the bulk of the work instead of relying on momentum from your hips or back.
Once the bench is in place, plant your feet firmly on the floor.
Aim for about shoulder-width apart, flat on the ground—not just your toes or heels.
This creates a stable base that keeps your entire body grounded as you press.
Think of your legs as passive stabilizers: they’re not doing the lifting, but they’re helping you stay locked in.
Now to the dumbbell position. Start with one in each hand, raised to shoulder height.
Your palms should face forward, and your elbows shouldn’t be flared straight out to the sides.
Instead, position them just slightly in front of your body.
This subtle angle takes unnecessary stress off the shoulder joint while still allowing for a full range of motion.
Pay close attention to your spinal alignment throughout.
Keep your chest lifted without exaggerating the curve in your lower back.
To help with that, engage your core and press your upper back firmly into the bench.
A good cue to remember is to “ribs down, chest tall.”
You’re aiming for a neutral spine—not stiff or overly arched—just stable and supported.
This setup might feel meticulous at first, but it quickly becomes second nature.
And once it does, you’ll notice improved control, more consistent reps, and less strain in places that shouldn't be working.
It’s the kind of foundation that makes every press more effective.
Step-by-Step Breakdown of the Movement
Once you're set up properly, every part of the press—from the first rep to the last—should be intentional and controlled.
Rushing through the motion or letting your form slip might not seem like a big deal, but over time it adds up to missed gains and increased risk of injury.
Here’s how to execute the seated dumbbell shoulder press the right way, one step at a time.
Start in an upright seated position with your back fully supported by the bench.
Your spine should be neutral—no overarching in the lower back—and your core should be lightly braced.
Hold the dumbbells at shoulder height, palms facing forward, with your elbows just slightly in front of your torso.
This position helps protect your shoulders while setting you up for a stronger press.
As you begin the pressing phase, push the dumbbells straight up while keeping your wrists stacked directly above your elbows.
This vertical path ensures you're loading your shoulder joints properly without unnecessary strain.
Don’t slam the weights together at the top, and avoid locking out your elbows completely.
Stopping just short of full extension keeps tension on your shoulder muscles, which is what you want for building strength and size.
On the way down, focus on control.
Slowly lower the dumbbells back to shoulder height, tracking the same path you pressed along.
Keep your elbows slightly in front of your body—never directly out to the sides—and avoid letting the weights drop quickly.
That negative (lowering) portion is just as important as the press, especially for muscle growth and joint stability.
Your breathing should support the movement, not work against it. Exhale as you press the dumbbells upward, and inhale as you lower them back down.
This rhythm helps you stay consistent, and it reinforces core engagement without you having to think about it too much.
Finally, stay aware of how each arm moves. Symmetry matters—if one side moves faster or higher than the other, you’re likely compensating for a strength imbalance.
Pay attention to this early, and make small adjustments as needed to keep both arms moving together through each rep.
With proper pacing, clean form, and consistent attention to detail, each rep becomes an opportunity to get stronger—not just in your shoulders, but in your ability to move with precision and control.
Common Mistakes and How to Fix Them
Even with a solid setup and clear instructions, a few technical missteps can sneak in and compromise your form.
These errors don’t just limit progress—they can also put unnecessary stress on your shoulders, spine, or joints over time.
The good news is they’re easy to spot and fix when you know what to look for.
One of the most common issues is overarching the lower back during the press.
It usually happens when the weights get heavy or when your core isn’t fully engaged.
Instead of letting your ribs flare and spine extend, focus on bracing your abs and keeping your lower back pressed gently into the bench.
Think of driving your ribcage down slightly as you press—this helps keep your spine neutral and supported.
Another mistake is using momentum to move the weight.
You might notice yourself bouncing at the bottom of the rep or swinging the dumbbells up rather than pressing.
This might feel like a shortcut, but it takes work away from your shoulder muscles and puts your joints at risk. The fix is simple: slow down.
Make the lowering phase deliberate, and start the press from a dead stop—not a bounce.
Elbow positioning is another key detail that gets overlooked.
When your elbows flare straight out to the sides, your shoulder joint takes on more strain than it should.
Instead, make sure your elbows stay slightly in front of your body throughout the movement.
This alignment allows your deltoids to stay engaged while reducing unnecessary joint stress.
Avoid cutting the range of motion short, too.
Not bringing the dumbbells all the way back down to shoulder height might let you lift heavier weight, but it also limits how much your shoulder muscles actually do.
You want a full, controlled range from shoulder height to just short of lockout at the top.
Every rep should follow that full arc unless you're intentionally training partials—which most people aren’t.
Finally, watch for uneven pressing—when one arm moves faster or higher than the other.
This usually points to a strength imbalance or lack of control.
If you notice this happening, slow the movement down and actively match the speed and height of both arms.
Over time, adding in occasional unilateral (single-arm) pressing can also help fix the imbalance.
Each of these mistakes is common but manageable. The key is awareness.
Once you catch the issue and correct it, you’ll get more out of every set—and your shoulders will thank you for it.
Making Progress Without Sacrificing Form
Progressing in your seated dumbbell shoulder press doesn’t mean simply adding more weight every week.
The real key is knowing when—and how—to challenge yourself without compromising the quality of your movement.
If your form breaks down, you're no longer training the muscles effectively, and you could be setting yourself up for joint pain instead of strength gains.
Start with smart weight selection.
A good rule of thumb is to choose a weight you can press for 8 to 12 solid reps without struggling to maintain form.
If you notice your back arching more, your elbows drifting out, or the dumbbells moving unevenly, that’s a sign the load is too heavy.
Dial it back slightly so every rep looks and feels consistent.
The goal is to challenge the muscles, not survive the set.
Before going into working sets, don’t skip your warm-up.
Your shoulders are one of the most mobile joints in the body—and also one of the most injury-prone.
Start with some light mobility drills like shoulder circles, band pull-aparts, or arm swings to loosen things up.
Then do a couple of lighter sets of the press itself, just to groove the movement pattern and warm up the muscles involved.
This simple step can make a noticeable difference in how stable and strong your working sets feel.
When you’re ready to progress, resist the urge to add weight too aggressively.
Instead, use a slower and more flexible approach: increase the number of reps, add another set, or bump the weight slightly—but only one of those at a time, and only when your form stays locked in.
It’s not a race. Long-term consistency beats short-term ego lifting every time.
To improve balance and fix strength discrepancies between sides, add in unilateral pressing now and then.
Single-arm dumbbell shoulder presses make it easier to notice—and correct—any asymmetries in strength, coordination, or mobility.
They also force your core to work harder to stabilize your torso, giving you even more value from each rep.
Above all, keep in mind that movement quality comes first. The goal is to train the shoulders, not just move the weight from point A to B.
That means staying controlled, aligned, and intentional throughout every set, even as you get stronger.
When in doubt, choose cleaner reps over heavier reps—it’s the difference between building strength and just going through the motions.
Pro-Level Tips for Shoulder Stability and Long-Term Gains
Once you’ve nailed the basics of the seated dumbbell shoulder press, small refinements can make a big difference in your performance, stability, and long-term progress.
These details are often overlooked, but they separate clean, safe lifting from sloppy reps that stall gains or lead to nagging pain over time.
One of the most important yet subtle adjustments is how you control your scapulae, or shoulder blades.
Instead of letting them shrug upward or move freely throughout the press, focus on gently pulling them down and slightly together before you start each rep.
This doesn't mean pinching your shoulder blades aggressively—just enough to stabilize the joint and create a solid foundation.
It protects your shoulders and gives your delts a more efficient platform to work from.
Next, check your wrist positioning.
Letting your wrists bend backward under the weight puts unnecessary stress on the joint and weakens the pressing position.
Aim to keep them neutral—straight and in line with your forearms.
This alignment doesn’t just reduce risk; it also improves force transfer, meaning more power into each rep with less discomfort.
Eye position might not seem like a big deal, but it plays a quiet role in keeping your posture solid.
Looking up can cause your neck to crane and shift your spine out of alignment.
Instead, look straight ahead. Keeping your head and neck neutral helps maintain overall alignment from your hips to your shoulders.
For those who want to tighten up technique or spot subtle form breakdowns, recording your sets is a highly effective tool.
It’s hard to feel every small mistake in real time, but watching yourself later gives you an outside view of elbow path, wrist position, press symmetry, and posture.
Over time, this kind of feedback can dramatically sharpen your form.
Lastly, the most underrated pro tip? Stay patient and consistent.
Shoulder strength and stability aren’t built overnight.
Clean pressing, good habits, and steady progress add up slowly—but they do add up.
Stick with it, keep an eye on the details, and your shoulders will thank you not just in your next workout, but for years to come.
Conclusion
The seated dumbbell shoulder press is a powerful tool for building strong, stable shoulders—if you do it right.
With proper setup, controlled execution, and attention to detail, you can safely progress and avoid common pitfalls.
Stick with clean form and consistent effort, and the results will follow.