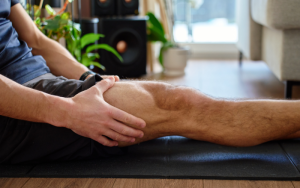
If your shoulder progress has stalled, there’s a good chance you’re following advice that’s doing more harm than good.
These five common training myths can limit results and increase your risk of injury—keep reading to learn what to fix and how to train smarter.
Myth 1: Flaring Your Elbows During Overhead Presses Enhances Shoulder Engagement
At a glance, flaring your elbows straight out to the sides during overhead presses might seem like a stronger or more direct way to target your shoulders.
It feels natural for some, especially if you're trying to “open up” the chest or mimic a wide push—but that position often sacrifices joint safety for the illusion of effort.
Reality Check: Risky Positioning Can Do More Harm Than Good
When your elbows flare directly out from your sides—creating a 90-degree angle between your upper arms and torso—you’re pressing with your shoulders in a vulnerable position.
This alignment can pinch structures inside the shoulder joint, particularly in the space between the acromion (part of your shoulder blade) and the rotator cuff tendons.
Over time, this leads to irritation, discomfort, or even more serious shoulder issues like impingement syndrome.
People often assume this flared position “activates more muscle” because it feels harder or more intense.
In reality, that extra strain is often just your joint mechanics being pushed out of alignment, not your delts doing more work.
The Scapular Plane: Where Your Shoulders Actually Want to Move
Your shoulder blades don’t sit flat on your back—they rest at a slight angle.
That angle is called the scapular plane, and pressing within it allows your arms to move more naturally and safely.
Instead of forcing your elbows directly out to the sides, angling them slightly forward—about 30 to 45 degrees from your torso—aligns your movement with the scapular plane.
This reduces joint stress and helps your delts and stabilizing muscles fire more effectively, without unnecessary wear on the rotator cuff.
What to Do Instead
To press in a way that’s both safe and effective, start by adjusting your setup:
- Keep your elbows angled about 45 degrees from your torso—not directly to the sides.
- A slightly narrower grip can help you naturally fall into this position.
- If you're using dumbbells, let your palms face slightly inward rather than fully forward to support this angle.
When you press, think about moving your elbows slightly in front of your shoulders, not straight out to the sides.
This keeps the movement smooth and more in line with your body's natural range.
Don’t rush through the lift. Slowing things down—especially on the way down—helps you stay in control and correct any compensation habits that might creep in.
Myth 2: Raising Arms Above Shoulder Level in Lateral Raises Maximizes Deltoid Activation
Lateral raises are a go-to move for building rounder, more defined shoulders—but how high you lift your arms makes a bigger difference than you might think.
Many lifters push their arms well above shoulder height, assuming that more range equals more results, but that’s not how the delts work best.
Reality Check: More Height Doesn’t Equal More Gains
The deltoid muscles are primarily responsible for lifting the arms up and out to the sides, but only to about shoulder level.
Once you move beyond that range, other muscles—especially the upper trapezius—start to take over.
The higher you go, the more your traps engage, and the less effective the movement becomes for actually targeting the delts.
This shift not only makes the exercise less focused, it can also create neck and shoulder tension over time, especially if you’re using momentum to get the weights higher.
How to Know You’re Lifting Too High
There are a few clear signs your lateral raises are going too far:
- Your shoulders shrug upward during the lift
- You feel tension in your neck or upper back instead of your side delts
- Your elbows start to bend more than necessary
- You need to swing or use momentum to lift the weights
These are all signals that your traps are stepping in to do the work your delts were supposed to handle.
What to Do Instead
To get the most out of your lateral raises, the key is control and precision—not height.
Keep the following in mind as you perform the movement:
- Only lift until your arms are parallel to the ground. That’s where your delts are fully engaged. Going higher just shifts the work elsewhere.
- Keep your wrists aligned with or slightly below shoulder level. Don’t let them drift higher than your elbows—this can alter the angle and take tension off the delts.
- Focus on a soft bend in the elbows and raise with control. If you’re swinging or jerking the weights up, they’re too heavy.
- Use a tempo you can manage. Two seconds up, two seconds down is a good rule of thumb to avoid cheating the movement.
Also, don’t be afraid to go lighter than you think you need. Lateral raises are all about targeted activation, not brute strength.
Most people get more from 10–15 lb dumbbells with perfect form than 25s with bad mechanics.
Myth 3: The “Empty Can” Exercise Is Optimal for Strengthening the Supraspinatus

The “empty can” exercise has been a staple in shoulder rehab and training circles for years, mainly because it was believed to isolate and strengthen the supraspinatus—a key rotator cuff muscle.
But the mechanics of the movement don’t quite support long-term shoulder health, especially if it’s done frequently or under load.
Reality Check: That Inward Rotation Isn’t Helping Your Shoulders
The “empty can” position involves lifting your arm out at an angle with the thumb turned downward—as if you’re pouring out a can.
It was designed to isolate the supraspinatus by minimizing help from the deltoid, but there's a tradeoff: rotating the arm inward in that position places stress on the shoulder joint, particularly on the rotator cuff tendons.
This internal rotation narrows the subacromial space (the small gap through which tendons pass), increasing the risk of impingement.
Over time, this can lead to inflammation, discomfort, or even rotator cuff irritation.
So while the intention might be good, the execution can do more harm than good—especially when used as a go-to strengthening exercise rather than an occasional assessment or rehab drill.
Smarter Ways to Target the Supraspinatus
You can still train the supraspinatus and the rest of the rotator cuff effectively—just without forcing the shoulder into awkward positions.
One great alternative is external rotation work.
Using a resistance band or light cable, position your elbow at your side, bent at 90 degrees, and rotate the forearm outward.
This builds strength in the rotator cuff muscles, including the infraspinatus and supraspinatus, while keeping the joint in a safer, more neutral alignment.
Neutral grip lateral raises are another excellent option.
When you raise your arms out to the sides with your thumbs pointed up (instead of down), you maintain space in the shoulder joint and reduce strain on the tendons.
It’s a small tweak, but it makes a big difference in joint comfort and long-term performance.
Rotator cuff stability drills are also worth including in your routine.
Moves like bottom-up kettlebell carries, banded pull-aparts, and wall slides help strengthen the supporting muscles around the shoulder without overloading the joint.
They build both strength and control—something the rotator cuff needs more than brute force.
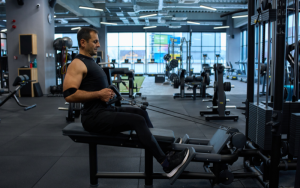
Myth 4: Training Shoulders with High Frequency and Volume Yields Superior Results
It’s easy to assume that more direct shoulder work means faster results—especially since the delts are visible and responsive muscles.
But hitting them with high frequency and tons of volume can backfire, leaving you worn out, stalled in progress, or even nursing overuse injuries.
Reality Check: More Isn’t Better—Better Is Better
Your shoulders are already involved in nearly every upper body workout you do.
Bench presses, overhead presses, rows, pull-ups—all of these movements heavily recruit the delts, even if they aren’t the main target.
This means your shoulders might already be getting more work than you realize, and piling on extra direct training can tip the balance toward overuse instead of progress.
That’s when signs of overtraining start to show up: your shoulders feel sore for days, your pressing strength dips, or you start noticing tightness or pain that wasn’t there before.
What seems like dedication may actually be a sign that your muscles—and connective tissues—aren’t recovering between sessions.
Targeted Training vs. Overkill
Effective shoulder training isn’t about blasting your delts with as many sets and reps as possible—it’s about placing the right amount of direct work where it actually matters.
There’s a difference between training a muscle intentionally and just hammering it out of habit.
Delts respond well to focused, controlled exercises that emphasize proper form and tempo.
Going overboard often leads to compensations, like using momentum or recruiting other muscle groups to finish the job.
Not only does that reduce the impact of your workout, but it also increases the risk of joint strain—especially in a joint as mobile and complex as the shoulder.
What to Do Instead
You don’t need to avoid shoulder training—just approach it with purpose.
- Limit shoulder-specific work to 1–2 exercises per session. A smart combo might be one overhead press variation and one isolation move like lateral raises.
- Fold shoulder work into chest or back days. Your shoulders are already working during these sessions, so adding a couple of targeted sets makes sense without overloading the week.
- Choose quality over quantity. Focus on good mechanics, slow controlled reps, and smart weight selection. Heavy loads with poor form will do less for your gains and more for your chiropractor.
- Give your shoulders time to recover. That means not just rest days, but also attention to mobility, posture, and sleep. Recovery isn't passive—it’s part of the training.
Myth 5: Shrugs Are the Most Effective Exercise for Upper Trapezius Development
Shrugs are often the first (and sometimes only) movement people turn to when trying to build their upper traps.
They’re simple, loadable, and give a strong burn—but relying on them alone can leave a lot of trap development on the table.
Reality Check: Shrugs Have Their Place, but They’re Not the Whole Picture
While shrugs do activate the upper portion of the trapezius, they don’t engage the full muscle or challenge it through a variety of functions.
The traps aren’t just responsible for elevating the shoulders—they also play a big role in stabilizing the shoulder blades and supporting posture during dynamic movement.
Shrugs isolate only one function: elevation. If you stop there, you’re missing out on a more complete stimulus.
Overemphasizing shrugs can also create imbalance.
The traps have three main regions—upper, middle, and lower—and when only the upper traps are trained, it can lead to poor scapular control, rounded shoulders, and even neck tension.
The goal should be building strong, well-balanced traps that support overall upper body function—not just trying to get that “yoked” look from one angle.
The Traps Are Already Working Hard—You Just Might Not Realize It
Your traps are actually involved in a wide range of compound lifts, often in ways that aren't immediately obvious.
Think about heavy deadlifts, rows, carries, and overhead presses—these all demand trap engagement to stabilize your shoulders and spine under load.
For example:
- Overhead presses require upper trap support to help elevate and stabilize the shoulders.
- Deadlifts and rows engage the middle and lower traps during scapular retraction and control.
- Farmer’s carries challenge all three sections of the traps through loaded static holds and postural control.
If you’re doing these lifts with good form and enough intensity, you’re already giving your traps more work than you might think—shrugs just add a little extra to the top.
What to Do Instead
To fully develop the traps, it helps to include a variety of movements that train them through different angles and functions.
Here’s how to do that more effectively:
- Mix in overhead movements. Barbell or dumbbell overhead presses hit the upper traps in a more functional, dynamic way than isolated shrugs.
- Use upright rows carefully. When done with proper form and moderate weight, upright rows can be effective for upper trap involvement. Avoid going too high or flaring the elbows to reduce shoulder strain.
- Add loaded carries. Farmer’s carries, suitcase carries, and yoke walks train the traps isometrically—this builds serious strength and control, especially for the upper and middle portions.
- Change the angle. Try incline shrugs or overhead shrugs to shift how the traps are activated.
- Combine movement and holds. Isometric pauses at the top of presses or slow eccentrics during raises and rows help deepen muscle recruitment and time under tension.
Conclusion
Shoulder progress often stalls not from lack of effort, but from following outdated or misleading training advice.
By adjusting your form, focusing on quality over quantity, and choosing smarter movements, you’ll train more effectively and reduce your risk of injury.
Small changes in how you approach shoulder work can lead to better results and long-term joint health.