If you're keen to build impressive bicep muscles, the exercises you absolutely must try are chin-ups, neutral grip pull-ups, supinated cable lat pulldown, one-arm bent-over cable pull, dumbbell Zottman curls, cable drag curls, barbell curl, reverse curl, and dumbbell hammer curl.
Don't just take our word for it, though! Keep reading for a more detailed explanation of each exercise and how they can fast-track your journey to stronger, bulkier biceps.
What Makes a Good Bicep Exercise
Before we dive into the list of exercises that can strengthen your biceps, it's crucial to understand what makes an exercise effective.
So, what does it mean for a bicep exercise to be good?
The answer lies in three key elements: intensity, form, and variation.
Buckle up, we're about to break these down and explain why they're the secret sauce to successful bicep growth.
Intensity
Think of intensity as the fuel that drives muscle growth.
This doesn't mean you need to push yourself to the absolute limit every time you work out, but it does mean you need to challenge your muscles to stimulate growth.
High-intensity exercises involve lifting heavy weights for fewer repetitions.
This causes stress on your muscle fibers, which then repair and grow during your rest period, resulting in bigger biceps.
The weight you use should be heavy enough that you're finding it hard to complete the last couple of reps of your set, but not so heavy that your form suffers, which brings us to our next point.
Form
In the realm of fitness, form is king. Proper form ensures that you're targeting the right muscle groups and reduces the risk of injury.
With bicep exercises, the correct form often involves keeping your elbows close to your body and maintaining control of the weight throughout the entire movement.
Swinging the weights, using your back or shoulders to lift, or not fully extending your arm at the end of a rep are all signs of poor form.
It's better to lift a lighter weight with good form than a heavier one with bad form.
Remember, building muscles isn't a race. It's about consistent effort, and consistent effort is much easier when you're not injured.
Also, working out with correct form will ensure the targeted muscle group is isolated and getting the full benefit of the exercise, which is crucial for growth.
Variation
Our bodies are smart and adaptable. If we keep doing the same exercise, over time, our bodies will adapt, and the exercise will become less effective.
This is where variation comes in. By incorporating different exercises into your routine, you constantly challenge your muscles in new ways, leading to more significant growth.
Variation can involve changes in the type of exercise (e.g., barbell curl vs. hammer curl), grip (e.g., supinated vs. neutral), range of motion (e.g., regular curl vs. preacher curl), and equipment (e.g., dumbbells vs. cables).
Changing these variables will ensure your muscles don't adapt to a single stimulus, making your workouts more effective over time.
Chin-ups
Say hello to chin-ups, a powerful exercise that deserves its reputation for building impressive biceps.
It might seem like an upper back and shoulder exercise, but trust us, your biceps are about to feel the burn.
Why are chin-ups so effective for the bicep muscles, and how can you nail the proper form? Let's break it down.
Why Chin-ups Are Effective for Bicep Muscles
At a glance, chin-ups are a simple movement— you hang from a bar and pull yourself up until your chin is over the bar.
However, the magic is in the details.
When you perform a chin-up, you engage multiple muscle groups, including your biceps, back, and shoulders.
But why are they especially effective for the biceps?
It comes down to the grip. When you grip the bar with your palms facing you (also known as a supinated grip), your biceps are in the prime position to take on much of the work.
The unique pull and lift motion of the chin-up makes it a compound exercise, allowing you to work more than one muscle group at a time, maximizing the use of your workout time.
When you pull yourself up and lower yourself down, your biceps go through a full range of motion.
This full contraction and extension, under tension, lead to micro-tears in the muscle fibers.
As these repair, your muscles grow — leading to stronger, bigger biceps.
Proper Form and Technique
The effectiveness of chin-ups heavily relies on proper form. Here's a step-by-step guide:
- The Grip: Grab the bar with a shoulder-width grip, palms facing you. Keep your hands about as far apart as your shoulders.
- Start Position: Start by hanging from the bar. Make sure your arms are fully extended. Your body should be straight, and avoid swinging.
- The Pull: Pull yourself up by driving your elbows down towards the ground. Imagine trying to tuck them into your back pockets. Continue to pull until your chin clears the bar.
- The Lower: Slowly lower yourself back to the start position, maintaining control throughout the movement.
Neutral Grip Pull-ups
Following chin-ups, we have another powerful exercise on the list: neutral grip pull-ups.
While similar in motion, the shift in grip places a new set of demands on your biceps.
With numerous benefits and a challenging execution, this exercise makes a substantial impact on your muscle-building journey.
Let's explore why this move is a win for your biceps and the correct method to pull it off.
Benefits of Neutral Grip Pull-ups
Neutral grip pull-ups are a true powerhouse when it comes to building bicep muscle, and for several reasons:
- Full Muscle Engagement: Much like chin-ups, neutral grip pull-ups are a compound exercise, working multiple muscle groups at once. This includes the biceps, back muscles, and even your forearm and shoulder muscles.
- Emphasizes Bicep Brachialis: The neutral grip position, where palms face each other, places additional emphasis on the brachialis, a muscle that lies underneath the biceps brachii. This muscle plays a significant role in the overall appearance of your arm size.
- Wrist and Shoulder-Friendly: The neutral grip puts less strain on your wrists and shoulders, making it a great option for those with joint issues or those looking to reduce the risk of strain or injury.
- Improved Strength: As with any pull-up, neutral grip pull-ups can significantly increase your overall upper body strength, which can benefit your performance in other exercises and daily activities.
Correct Method to Perform Neutral Grip Pull-ups
Now that we've seen the benefits, let's dive into how to do this exercise correctly:
- The Grip: Find a bar with parallel handles, or if your gym has a pull-up bar with neutral grips, even better. Grab the handles with your palms facing each other.
- Start Position: Start by hanging from the handles, feet off the ground, and arms fully extended. Keep your body as still as possible—no swinging.
- The Pull: Pull yourself up, focusing on driving your elbows down and back. Continue until your chin is level with your hands, or higher if you can manage.
- The Lower: Lower yourself with control back to the fully extended start position.
Supinated Cable Lat Pulldown
Switching gears from pull-ups, let's dive into the realm of cable exercises with the supinated cable lat pulldown.
This bicep-building powerhouse cleverly combines a common back exercise with a twist that brings your biceps into the spotlight.
So, how does this exercise uniquely target the biceps, and how do you ensure you're doing it right? Let's unroll the blueprint.
How Supinated Cable Lat Pulldown Targets the Biceps
The supinated cable lat pulldown is essentially a traditional lat pulldown performed with a supinated grip (palms facing you).
This grip shift subtly transforms the exercise from a back-dominant movement to one that heavily involves the biceps.
When you pull the bar down, the primary muscles at work are your latissimus dorsi (your lats, in gym lingo).
However, the supinated grip recruits your biceps to share the load.
The pulling motion and weight resistance challenge your biceps and stimulate growth.
What's more, this exercise encourages a full range of motion for your biceps.
Each repetition starts with your arms fully extended overhead and ends with your hands by your shoulders—a complete stretch and contraction of the biceps.
Instruction for Execution
Now, how exactly do you perform a supinated cable lat pulldown? Follow these steps:
- Setup: Sit at a cable station fitted with a straight bar attachment. Adjust the knee pad to fit snugly against your thighs to prevent your body from lifting as you pull the weight.
- The Grip: Grab the bar with a shoulder-width, supinated grip (palms facing you).
- Start Position: Start with your arms fully extended, leaning slightly back to maintain balance. Keep your chest up and your back straight.
- The Pull: Pull the bar down to about chest level by driving your elbows straight down and back. Imagine trying to squeeze a pencil between your shoulder blades. This mental image helps ensure you're engaging the right muscles.
- The Return: Slowly extend your arms back to the starting position. Maintain control during this phase, resisting the pull of the weight.
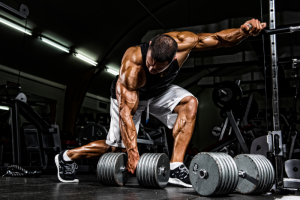
One-arm Bent-over Cable Pull
As we delve deeper into the variety of exercises available to bolster your biceps, we meet the one-arm bent-over cable pull.
This exercise may not be as widely recognized as the chin-up or the barbell curl, but its unique mechanics provide some distinct benefits for those on a quest for more muscular arms.
So, what makes this move a standout, and how do you perform it effectively? Let's dissect the details.
Benefits of the One-Arm Bent-over Cable Pull
The one-arm bent-over cable pull provides several unique benefits:
- Unilateral Movement: As a one-sided exercise, it allows you to focus on one arm at a time. This can help address and correct any strength imbalances you might have between your two arms.
- Muscle Engagement: Besides targeting your biceps, this exercise also engages your lats, delts, and even your core, making it a comprehensive upper body exercise.
- Constant Tension: Because of the nature of cable exercises, your bicep remains under constant tension throughout the entire movement. This can lead to greater muscle growth compared to exercises that allow the muscle to relax at certain points.
- Variability: With a cable machine, it's easy to adjust the weight, allowing for flexibility in training intensity.
Step-by-Step Guide
Now, let's explore how to execute the one-arm bent-over cable pull:
- Setup: Stand sideways to a cable machine, feet hip-width apart. The cable pulley should be set to the highest position.
- The Grip: Grab the handle with the hand furthest from the machine. Your palm should face inwards.
- Start Position: Bend your knees slightly and hinge forward from the hips, keeping your back straight. Extend your arm fully towards the cable machine.
- The Pull: Keeping your elbow close to your body, pull the cable handle towards you until your hand is beside your hip. Your elbow should pass just behind your torso.
- The Return: Slowly extend your arm back to the starting position, maintaining control against the weight's resistance.
Dumbbell Zottman Curls
Taking a step away from the cable machine, we encounter an exercise with a quirky name but serious bicep-building potential: the Dumbbell Zottman Curl.
This old-school move adds a twist to the traditional curl, literally, to give your biceps a fresh challenge.
What is this exercise all about, and why is technique so crucial here? Let's unwrap these questions.
Explaining the Dumbbell Zottman Curl
The Dumbbell Zottman Curl is a hybrid exercise of sorts.
It combines the regular bicep curl and the reverse curl into one seamless movement, engaging not just your biceps brachii but also your brachialis and brachioradialis, muscles that can contribute to the overall appearance of larger, stronger arms.
The Zottman Curl starts like a regular curl, but at the top of the movement, you rotate your hands so your palms face down (a pronated grip), and then you lower the weights.
This twist in grip means you're lifting the weight with a stronger bicep curl and lowering it with a weaker reverse curl.
As a result, you can overload the eccentric part of the exercise (the lowering phase), which can lead to significant muscle growth.
Importance of Technique
With the Dumbbell Zottman Curl, technique is everything.
Proper execution ensures you reap the muscle-building benefits and reduce the risk of injury.
Here's a step-by-step guide:
- Setup: Stand with feet hip-width apart, holding a dumbbell in each hand with your arms fully extended and palms facing forward.
- The Curl: Keep your elbows close to your torso, curl the weights while contracting the biceps as you breathe out. Continue to raise the weights until your biceps are fully contracted and the dumbbells are at shoulder level. Hold the contracted position for a brief pause as you squeeze your biceps.
- The Twist: Here's where the Zottman curl differs from the traditional curl. Twist your wrists at the top so that your palms are facing down.
- The Lower: Lower the dumbbells slowly to the initial position with your palms still facing down.
- Reset: Rotate your wrists back to the starting position (palms facing up).
Cable Drag Curls
As we venture back to the cable machine, let's discuss an exercise that may not be the most common but can pack a punch when it comes to bicep development: the Cable Drag Curl.
What makes this particular exercise stand out in the bicep-training arena, and how can you perfect your technique to maximize benefits? Let's delve into it.
Insight into Why Cable Drag Curls are Good for Bicep Muscles
Unlike traditional curls, where you lift the weights directly in front of you, in a cable drag curl, you're pulling the bar in a backward motion along the line of your body.
This unique movement pattern has some specific benefits:
- Bicep Isolation: The dragging motion forces your biceps to work harder by keeping them under constant tension, and it limits the involvement of other muscles, leading to greater bicep isolation.
- Full Muscle Activation: The backward movement offers a greater range of motion. As a result, you're engaging the entirety of your biceps, from the insertion to the origin, which can lead to more balanced muscle development.
- Reduced Shoulder Strain: Due to the backward pulling motion, there's less chance of the front deltoids becoming overly involved, which often happens in traditional curls. This makes drag curls a good option if you have shoulder issues.
Technique Explanation
Let's break down how to perform the Cable Drag Curl:
- Setup: Stand tall in front of a cable machine with a straight bar attached to the low pulley.
- The Grip: Grab the bar with an underhand grip, palms facing forward. Your hands should be shoulder-width apart.
- Start Position: Start with your arms fully extended and the bar resting against your thighs.
- The Curl: Pull the bar up towards your upper abdominals by bending at your elbows and dragging the bar up against your body. Keep your elbows close to your torso throughout the movement.
- The Hold and Return: Hold the contraction at the top for a second and squeeze your biceps. Then, gradually lower the bar back to the starting position, maintaining the tension in your biceps.
- Repetition: Repeat for the desired number of reps.
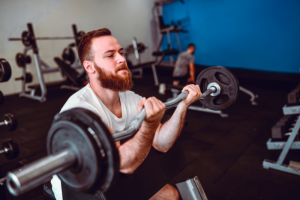
Barbell Curl

Switching gears from cable-based exercises, let's swing the spotlight onto a classic that is widely embraced by fitness enthusiasts across the globe: the Barbell Curl.
A staple in any bicep workout, this move is simple but highly effective.
Why has it stood the test of time as a favorite for bicep training, and what are the key points to remember when executing this exercise? Let's dive in.
Why Barbell Curl is a Popular Choice for Bicep Training
The Barbell Curl is a timeless exercise, and here's why it continues to be a go-to for bicep growth:
- Simplicity: Unlike some exercises that require intricate movements, the Barbell Curl is straightforward and easy to learn, making it ideal for beginners and seasoned lifters alike.
- Effectiveness: The Barbell Curl targets both heads of the biceps brachii and the brachialis, promoting balanced, full bicep development.
- Load Adjustment: The ability to adjust the weight loaded on the barbell makes this exercise adaptable to various training intensities and progression over time.
- Equipment Accessibility: Barbells are commonly available in gyms, making it easy for most people to incorporate this exercise into their workouts.
Form and Method Discussion
Now, let's talk about how to perform the Barbell Curl correctly:
- Setup: Stand up straight with a barbell in your hands, palms facing forward. The grip should be shoulder-width apart.
- The Curl: Keep your elbows close to your torso. Now, use your biceps to curl the barbell until your biceps are fully contracted and the bar is at shoulder height. Ensure that your upper arms are stationary, and the movement comes solely from the elbows bending.
- Hold and Return: Hold the contracted position and squeeze your biceps at the top for a moment. Then, slowly begin to bring the bar back to the starting position.
- Repetition: Repeat for the recommended number of repetitions.
Reverse Curl
Let's now turn our attention to a slight twist on the classic curl that can pay big dividends in your bicep-building pursuit: the Reverse Curl.
This variation switches up your grip to unlock different muscle engagement.
So, what's the scoop on its benefits, and how can you master the technique? Read on to find out.
Unpacking the Benefits of Reverse Curls
While traditional curls zero in on the biceps brachii, the Reverse Curl brings some other key players into the game:
- Brachioradialis Engagement: The overhand grip in Reverse Curls heavily recruits the brachioradialis, a muscle of the forearm. Developing this muscle can enhance the overall look of your arms.
- Brachialis Development: This exercise also effectively targets the brachialis, a muscle that lies underneath the biceps brachii. A well-developed brachialis can push your biceps up more, making them appear larger.
- Wrist Stability: The overhand grip can improve your grip strength and wrist stability, beneficial for other lifting exercises and functional strength.
How to Correctly Do Reverse Curls
Mastering the Reverse Curl is not overly complicated but does require attention to form:
- Setup: Stand up straight with a barbell or EZ curl bar in your hands, palms facing down (overhand grip). Your hands should be shoulder-width apart.
- The Curl: Keeping your elbows tucked in close to your torso, bend your elbows to lift the bar toward your shoulders. Be sure to keep your upper arms stationary—the movement should come only from your forearms.
- Hold and Return: At the top of the lift, hold for a second and squeeze your biceps. Then, lower the bar slowly back down to the starting position.
- Repetition: Continue for the desired number of repetitions.
Dumbbell Hammer Curl
Shifting from barbells to dumbbells, let's examine another bicep builder that incorporates a unique twist—quite literally—in hand positioning: the Dumbbell Hammer Curl.
This curl variation can offer new ways to stimulate muscle growth, but what are its specific benefits, and how can you ensure you're doing it right?
Let's roll up our sleeves and get down to business.
Discussing the Unique Benefits of Dumbbell Hammer Curl
The Hammer Curl earns its name from the hammer-like grip you use when performing it.
This seemingly minor modification has some significant benefits:
- Brachialis and Brachioradialis Activation: Similar to the Reverse Curl, the Hammer Curl targets the brachialis and the brachioradialis. The neutral grip used in Hammer Curls engages these muscles more than a traditional curl does, contributing to more balanced arm development.
- Wrist and Forearm Strength: The hammer grip increases the demand on your forearms and can help improve wrist stability and strength.
- Joint Comfort: Some people find the neutral grip used in Hammer Curls to be more comfortable for their wrists and elbows, allowing them to lift heavier weights without discomfort.
Tutorial for Proper Form in Dumbbell Hammer Curl
Here's your step-by-step guide to nailing the Dumbbell Hammer Curl:
- Setup: Start by standing up straight with a dumbbell in each hand, arms fully extended, and palms facing your torso. This is your starting position.
- The Curl: Keep your upper arms stationary, exhale and curl the weights while contracting your biceps. Continue to raise the weights until your biceps are fully contracted and the dumbbells are at shoulder level. Keep your palms facing each other throughout the movement.
- Hold and Return: Hold the contracted position for a brief pause as you squeeze your biceps. Then, inhale and slowly begin to lower the dumbbells back to the starting position.
- Repetition: Repeat for the recommended amount of repetitions.
The Importance of Exercise Variation
As we wrap up our deep dive into each exercise, it's essential to circle back to a cornerstone principle in any successful muscle-building regimen: exercise variation.
Though you now have a solid repertoire of bicep exercises at your disposal, understanding why and how to use these moves in varied ways can supercharge your progress.
Let's unpack the importance of exercise variation and provide some tips on integrating this concept into your workout routine.
Explaining Why Varying Exercises is Crucial for Muscle Growth
Exercise variation is not just about staving off boredom (although that's a nice bonus!). It's a fundamental strategy for boosting muscle growth:
- Overcoming Plateaus: Our bodies are excellent at adapting. While initially, you might see significant progress from a new exercise, over time, your body becomes efficient at the movement, and muscle growth can slow. Varying your exercises can “shock” your muscles into adapting to new stimuli, pushing through plateaus.
- Targeting Muscles Differently: Different exercises target the same muscle in slightly different ways due to variations in grip, range of motion, and angle. Incorporating a variety of exercises ensures you're working your biceps from all angles for balanced development.
- Preventing Overuse Injuries: Repeating the same exercises can overtax specific muscles and joints, leading to potential overuse injuries. Variation reduces this risk by spreading the workload across different muscle fibers and joint angles.
Suggesting How to Implement Variety in a Workout Routine
So how can you inject more variation into your routine? Here are some ideas:
- Rotate Exercises: Don't stick to the same set of exercises every workout. Rotate among the exercises we've discussed. For instance, you could switch between Barbell Curls, Hammer Curls, and Reverse Curls from one workout to the next.
- Change the Order: The order in which you perform your exercises can impact muscle growth, with exercises performed early in your workout receiving the most energy. Don't always save the same exercise for last—mix it up!
- Adjust Reps and Sets: Changing the number of repetitions and sets can also vary the stimulus on your biceps. Higher reps (10-15) at a lower weight can help improve muscle endurance, while lower reps (6-8) with a higher weight can boost muscle strength and size.
- Use Supersets or Circuits: Supersets (doing two exercises back-to-back with no rest) or circuits (a series of exercises performed in a row with minimal rest) can add variety and intensity to your workout.
Conclusion
Building robust and powerful biceps isn't a secret reserved for elite athletes or professional bodybuilders—it's an achievable goal for anyone armed with the right information.
Now, you're equipped with 11 proven exercises and the understanding of why and how to vary them.
So go on, step into your next workout with confidence, and remember, the journey to stronger biceps is not a sprint but a marathon.