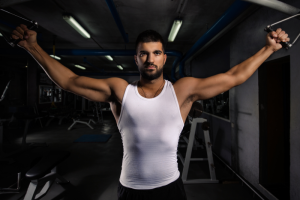
To do the Z Press, sit on the floor with your legs extended straight in front of you, grip a barbell at shoulder width, then press it directly overhead while maintaining a completely upright torso and tight core throughout the movement.
Keep reading for detailed setup instructions, the five critical mistakes that undermine your results, and how to program this no-nonsense exercise for maximum shoulder strength.
What Is the Z Press and Why Does It Work?
The Z Press is an overhead press performed while seated on the floor with your legs extended straight in front of you.
This simple position change transforms a familiar movement into something entirely different—and significantly more demanding.
Lithuanian strongman Žydrūnas Savickas created this exercise to improve his competitive log press.
His credentials give the movement serious credibility: four-time World's Strongest Man champion, eight-time Arnold Strongman Classic winner (more than anyone in history), and holder of the all-time log press world record at 228 kg (502.5 lbs).
The exercise takes its name from his nickname “Big Z,” and what worked for one of history's strongest overhead pressers deserves your attention.
Here's what makes the Z Press different from every other shoulder exercise you've tried: it eliminates all the little cheats your body naturally uses to move weight overhead.
You can't lean backward to turn it into an incline press.
You can't generate momentum with leg drive. You don't get any support from a bench propping up your spine.
Your core must hold your torso upright while your shoulders do the actual work of pressing the weight.
This brutal honesty reveals problems you didn't know you had.
Mobility restrictions in your hips or thoracic spine become immediately obvious.
Technique flaws that standing presses let you hide—excessive back arch, inconsistent bar path, poor scapular control—all surface within the first few reps.
You'll use 40-60% less weight than your standing overhead press, and that's exactly the point.
The Z Press forces simultaneous demands that few exercises match:
- Your shoulders press the weight overhead (isotonic work)
- Your entire core fights to keep you upright (isometric work)
- Your scapular stabilizers coordinate to maintain proper shoulder blade position
- Your hip flexors and hamstrings work just to hold the seated position
This combination builds the kind of pressing strength that actually transfers to other movements, not just the ability to heave weight overhead using whatever compensation pattern your body can find.
How to Set Up and Execute the Z Press Correctly
Your setup determines whether you'll get the training effect this exercise offers or just struggle through awkward reps. Start with these positioning details:
Floor Position
- Sit with your torso completely upright and legs extended straight in front
- Place feet hip-width to shoulder-width apart with toes pointed upward
- Rest your weight primarily on your hamstrings, not your glutes—this subtle shift helps you maintain a tall spine
- Dig your heels into the ground for stability throughout the movement
Barbell Setup
- Position yourself inside a power rack with safety pins set at chin height when seated
- Grip the bar at shoulder width or slightly wider
- Check that your forearms are perfectly vertical when viewed from both the front and side
- Use a pronated (overhand) grip with the bar resting in the base of your palm near your wrists
- Keep your elbows at roughly 45 degrees from your torso—not flared wide, not pinched tight
The Press Itself
Before you move the bar, create tension.
Compress your ribcage downward to activate your obliques and abdominals.
Squeeze your glutes hard. Take a deep diaphragmatic breath and hold it.
Now press the bar directly overhead, keeping it close enough to your face that it nearly skims your nose.
This isn't comfortable, but it's correct.
As the bar clears your forehead, push your head and chest “through the window” between your arms.
This cue puts your spine directly under the bar for proper loading instead of leaving it behind the weight.
Lock out completely at the top:
- Arms fully extended
- Biceps aligned with your ears
- Shoulders actively shrugged toward the ceiling
Lower the bar with control while maintaining every bit of core tension you created at the start.
Don't collapse—the eccentric portion builds as much strength as the press.
Breathing Pattern
Your breathing needs to support core stability, not undermine it.
Inhale deeply before you press, then hold that breath through the entire lift. Exhale only after you lock out at the top.
Take another breath before you lower the bar or start your next rep.
This breathing pattern keeps your core braced when it matters most.
Muscles Worked and Key Benefits for Shoulder Strength
Your anterior deltoid serves as the primary force producer during the Z Press, working alongside the lateral deltoid and the clavicular head of your pectoralis major.
Your triceps take over during the lockout phase, driving your arms to full extension.
What separates this exercise from standard overhead pressing is the exceptional demand on your core.
Your rectus abdominis, obliques, erector spinae, and transverse abdominis work continuously to prevent your torso from collapsing backward or rotating.
This isn't occasional engagement—it's sustained tension through every rep.
Supporting Cast
The Z Press recruits stabilizers that coast through easier variations:
- Scapular stabilizers (rhomboids, middle and lower trapezius, serratus anterior) coordinate to support thoracic extension and maintain proper shoulder blade positioning
- Rotator cuff muscles work harder than in supported pressing due to the inherent instability
- Hip flexors and hamstrings engage significantly just to hold the seated position with legs extended
This creates simultaneous isometric and isotonic demand that you can't replicate with other overhead pressing movements.
Your core stabilizes while your shoulders press—two different tasks happening at once under meaningful load.
Why This Builds Stronger, Healthier Shoulders
The Z Press forces proper overhead mechanics because compensation isn't an option.
You can't lean back to turn it into an incline press.
You can't use momentum to get the bar moving.
This teaches correct pressing rhythm—the precise timing of when your elbows flare and when your head pushes through between your arms.
If you tend toward excessive lumbar extension during standing presses, the Z Press corrects this pattern automatically.
The floor position won't let you hyperextend your lower back, so you learn what a neutral spine feels like under load.
Overhead motion injuries rank among the most common training injuries.
The Z Press helps protect your shoulders by reinforcing proper scapular control under load.
Your rotator cuff and scapular stabilizers work harder than they would in a supported press, building the joint integrity that prevents injury during heavier movements.
When you perform the exercise one arm at a time, it exposes side-to-side strength imbalances that bilateral movements mask.
Your weaker side can't hide behind your stronger side when each arm presses independently.
The strict nature of the movement means strength gains transfer directly to other pressing variations.
You're building genuine pressing power—the kind that shows up when you return to standing overhead presses or push presses—not just getting better at using momentum and compensation to move weight.
Five Critical Mistakes That Sabotage Your Z Press
These errors strip away the exercise's benefits and can set you up for injury. Watch for them in your own training.
1. Leaning Backward
When your torso drifts back during the press, you've transformed the Z Press into a seated incline press. This removes the shoulder emphasis and dumps stress into your lower back instead. If you can't press without your torso angle changing, the weight is too heavy. Drop the load, bear down into your core, and focus on pressing straight up while keeping your torso position fixed.
2. Flaring Your Ribcage
Jutting your chest toward the ceiling signals insufficient core engagement and usually means the load exceeds your capacity. Your ribcage should stay tucked down throughout every rep. Compress it before you press and maintain that compression. Think about pulling your ribcage toward your pelvis rather than expanding your chest.
3. Letting Your Feet Float
When your heels lift off the ground, you've lost stability and core tension. Drive your heels into the floor and actively press the backs of your knees downward while you press overhead. This creates the stable base the movement requires. Your entire lower body should feel engaged, not relaxed.
4. Bending Your Knees
Even a slight knee bend makes the exercise easier by reducing the hip mobility demands and providing artificial stability. Keep your legs completely straight. This is non-negotiable if you want the core challenge the Z Press offers.
5. Rounding Your Lumbar Spine
A rounded lower back happens when your hip or hamstring mobility isn't sufficient to maintain a neutral spine with legs extended. Don't force it.
Elevate your seated position by sitting on a step platform or stacked bumper plates until your mobility improves.
The goal is to progress toward floor level over time, not to compromise spinal position for the sake of doing the exercise “right.”
How to Program the Z Press Plus Variations for Every Level

The Z Press functions best as an accessory lift rather than a primary strength builder.
The floor position and core demands mean you'll never move the kind of weight that drives maximum strength gains, and that's fine—this exercise serves a different purpose.
Programming Guidelines
For muscle growth, use 3-4 sets of 8-12 reps with 60-90 seconds rest between sets.
For strength emphasis, structure your training around 4-6 sets of 3-6 reps with 2-3 minutes rest.
Place the Z Press after your main pressing work in a shoulder or push workout.
A well-structured session might look like standing overhead press for 3 sets of 4-6 reps as your primary lift, followed by Z Press for 3 sets of 6-8 reps as the accessory, then isolation work like lateral raises to finish.
Avoid loading above 90% of your Z Press one-rep max.
At high intensities, your core strength or hip mobility becomes the limiting factor rather than your pressing strength, which defeats the exercise's purpose.
Include the Z Press 1-2 times per week, and consider alternating it with your regular shoulder press every 8-10 weeks of training to keep your programming fresh.
Variations That Match Your Ability
The landmine Z Press offers the most beginner-friendly entry point.
The anchored barbell creates an arc-shaped bar path that's easier on your shoulder joints and provides more inherent stability.
This works well if you have mobility restrictions or are still building core strength.
Dumbbell and kettlebell versions allow your wrists to rotate throughout the movement, making them more shoulder-friendly for some people.
Dumbbells don't require a rack, so they're more accessible for home gym setups.
Kettlebells create an off-center load with the bell resting on your forearms, demanding additional stabilizer engagement.
Single-arm pressing increases the anti-rotation challenge significantly.
Your core works overtime to prevent your torso from twisting as one side presses while the other stays loaded.
This variation excels at exposing and correcting strength imbalances between sides.
You can also modify your stance to adjust difficulty.
Wider legs provide more stability if you have structural hip limitations, while bringing your legs closer together channels more pressure to your core.
Progression Path
Master the standing overhead press first, then work through these stages:
- Seated press with back support
- Landmine Z Press
- Dumbbell or kettlebell Z Press
- Barbell Z Press
This progression lets you build the mobility, core strength, and pressing mechanics you need before attempting the full movement.
Who Benefits Most—and Who Should Proceed With Caution
Strength and power athletes gain the most from the Z Press.
Powerlifters use it to improve hip mobility (which benefits heavy squats) and pressing strength.
Strongman competitors train their shoulders and core without accumulating excessive fatigue in programs already heavy with log and strict pressing.
Olympic weightlifters improve the upright torso position needed for jerks and overhead squats.
If you tend toward excessive lumbar extension during standing presses, the Z Press automatically corrects this pattern.
Anyone wanting to improve overhead pressing technique without the ability to cheat benefits significantly.
Skip the Z Press if you have:
- Insufficient hip or hamstring flexibility to maintain a neutral spine while seated with legs extended
- Pre-existing shoulder impingement or strain
- Inadequate baseline core strength
- Pain during overhead movements (work with a physiotherapist first)
Complete beginners should develop baseline upper body and core strength through standing and supported overhead pressing before attempting the Z Press.
You need the ability to sit tall with legs extended, full overhead shoulder range of motion, and proficiency with basic overhead pressing before this exercise makes sense.
Required Equipment
For barbell work, you need a power rack with adjustable safety pins set at seated chin height, an Olympic barbell, and weight plates.
Position the pins no more than six inches above your starting position.
Dumbbells and kettlebells require only flat floor space—no rack needed.
This makes them the more accessible option for home gyms or when you're traveling.
If hip mobility limits your ability to sit tall, elevate your surface using a step platform, stacked bumper plates, or a thin mat.
The goal is to progress toward floor level as your mobility improves.
How the Z Press Compares to Other Shoulder Exercises
Understanding where the Z Press fits among other pressing movements helps you program it intelligently rather than treating it as just another shoulder exercise.
Z Press vs. Standing Overhead Press
The standing overhead press lets you move significantly more weight and involves more total muscle mass, making it the better choice for building maximum strength.
The Z Press uses less weight but creates higher core activation and eliminates every opportunity to cheat.
The standing version builds raw pressing power; the Z Press refines technique and isolates weaknesses.
You don't need to choose between them. Use both.
The Z Press works well as a prep movement before overhead pressing or as an accessory afterward.
Each serves a distinct purpose in a complete training program.
Z Press vs. Seated Press With Back Support
The seated press with back support lets you fatigue your shoulders before your core gives out, making it better for pure hypertrophy work when muscle growth is your only goal.
The Z Press demands far more from your core but allows less weight as a result.
Think of the supported version as an appropriate regression if you're not ready for Z Press demands. It still trains your shoulders hard while removing the mobility and core strength requirements.
Z Press vs. Push Press
These occupy different training categories entirely.
The push press is an explosive movement that uses leg drive to move heavy weight overhead quickly.
The Z Press is strict pressing only—no momentum, no assistance.
The Z Press builds the foundation of pressing strength that transfers into better push press performance.
Your strict strength ceiling determines how much weight you can accelerate with leg drive, so improving one improves the other.
Putting It All Together
For most people, programming 3-4 sets of 8-12 reps after main pressing work, 1-2 times weekly, delivers the technique refinement and core strength benefits this exercise offers.
Start with dumbbells or the landmine variation if mobility is limited, and progress to barbell work as your capacity increases.
The investment in this challenging accessory pays dividends across all your pressing movements.
The strict mechanics you develop, the core stability you build, and the mobility improvements you gain all transfer directly to heavier, more complex lifts.
Conclusion
The Z Press stands alone as perhaps the most honest overhead pressing variation you can do.
It reveals mobility limitations, exposes technique flaws, and demands genuine pressing strength without allowing compensation.
Start light, focus on position over weight, and watch how quickly the strength you build here shows up in every other press you perform.