If you're dealing with back pain, you can still strengthen your core safely with the right exercises that avoid spinal flexion and maintain neutral spine positioning.
The five most effective back-safe ab strengthening moves are dead bugs, modified plank variations, bird dogs, pelvic tilts, and bridges – all designed to build deep core stability without aggravating your back pain.
Keep reading for detailed step-by-step instructions, safety guidelines, and progression strategies to help you implement these exercises effectively and start building the core strength you need for long-term spinal health.
Dead Bug – The Foundation Exercise for Back-Safe Core Training
The dead bug stands as the cornerstone exercise for anyone looking to rebuild core strength while protecting their spine.
This movement specifically targets the transverse abdominis and other deep stabilizing muscles that traditional crunches miss entirely, making it the go-to choice for physical therapists and spine specialists worldwide.
Why Dead Bug is the Gold Standard
Research consistently shows that dead bugs significantly reduce chronic lower back pain through improved muscle endurance and control.
What makes this exercise revolutionary is its ability to strengthen your entire core system without a single moment of spinal flexion – the movement pattern that often worsens back pain in traditional ab exercises.
For anyone recovering from herniated discs, sciatica, or general lower back issues, the dead bug offers the safest entry point into core strengthening.
The exercise maintains your spine in its natural, neutral position while systematically activating the deep muscles responsible for spinal stability.
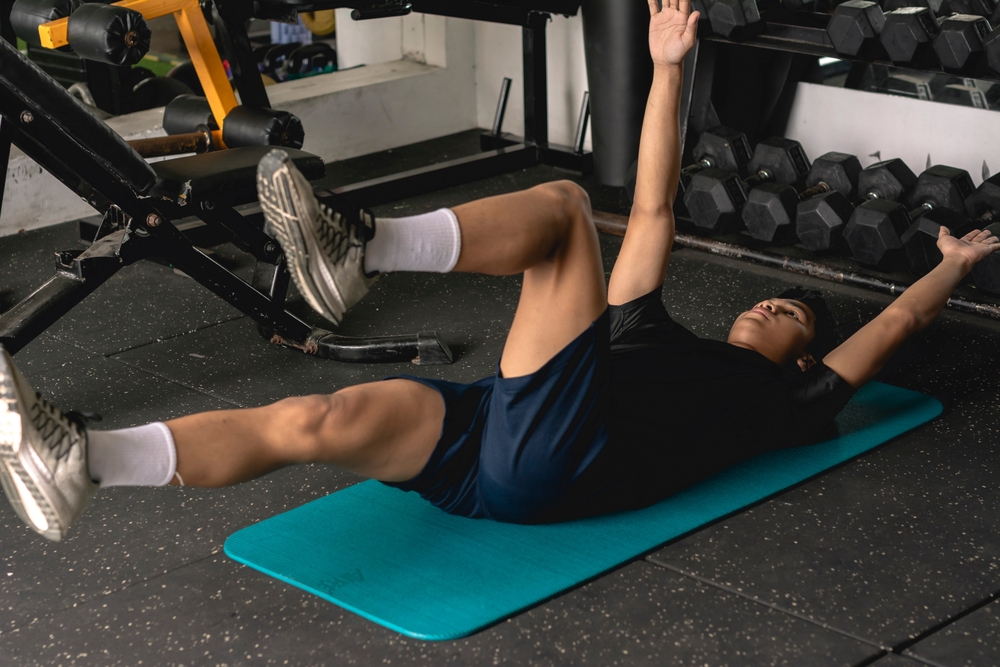
Step-by-Step Execution
Starting Position:
- Lie on your back with knees bent at 90 degrees
- Extend arms straight toward the ceiling, directly above your shoulders
- Press your lower back firmly into the floor
The Movement:
- Simultaneously extend your right leg forward while raising your left arm overhead
- Keep the movement slow and controlled – this isn't a race
- Maintain that crucial lower back contact with the floor throughout
- Return to starting position with the same controlled pace
- Switch sides: left leg extends as right arm goes overhead
Volume and Timing: Perform 5-10 repetitions per side, focusing entirely on movement quality rather than hitting higher numbers. Each repetition should feel deliberate and controlled.
Critical Safety and Form Points
The most dangerous mistake you can make is allowing your back to arch away from the floor during the movement.
This single error transforms a spine-protecting exercise into a potentially harmful one, especially if you're already dealing with back pain or sciatica.
Form Checklist:
- Maintain continuous abdominal contraction without holding your breath
- Keep your lower back glued to the floor – imagine someone could slide a piece of paper under it
- Move your limbs slowly enough that you can stop the movement at any point
- Stop immediately if you feel any back discomfort
Progression Indicators: You're ready to advance the difficulty when you can complete 10 repetitions per side while maintaining perfect form and keeping your back pressed to the floor.
Common progressions include adding resistance bands or extending hold times at the extended position.
Warning Signs: If you experience back pain during the exercise, you're likely allowing your spine to move out of neutral position or pushing beyond your current strength capacity.
Scale back the range of motion or return to the starting position more frequently until your strength improves.
Modified Plank Variations – Building Progressive Core Strength
The plank has earned its reputation as a core-strengthening powerhouse, but it can become your enemy when performed incorrectly or attempted too early in your back pain recovery.
Standard planks demand significant core strength and perfect form – requirements that often exceed what someone with back pain can safely meet.
Why Standard Planks Can Aggravate Back Pain
When you lack sufficient core strength or proper form awareness, planks create a dangerous scenario where your lower back compensates for weak abdominal muscles.
Your spine sags into extension, placing excessive stress on already irritated structures and potentially worsening your pain.
The mistake most people make is attempting full planks immediately, treating them as a beginner exercise when they actually require considerable strength and body awareness.
This approach often leads to frustration and increased back discomfort, creating a negative association with core training when you need it most.
Modified versions solve this problem by reducing the load on your core while teaching proper alignment patterns.
These variations allow you to build strength progressively rather than overwhelming your system from day one.
Knee Plank Progression Method
The knee plank offers the perfect middle ground between accessibility and effectiveness, dramatically reducing stress on your lower back while maintaining the essential movement pattern.
Setup Process:
- Start on hands and knees in a tabletop position
- Lower to your forearms, keeping elbows directly under shoulders
- Step your knees back until your body forms a straight line from knees to head
Proper Alignment: Your hips, legs, and torso must maintain perfect alignment – imagine a straight board running from your knees through the top of your head.
Simultaneously engage your abdominal muscles by gently drawing your belly button toward your spine while activating your glutes to prevent hip sagging.
Hold Parameters: Begin with 5-30 second holds based on your current ability level.
Quality trumps duration every time – a perfect 10-second hold beats a sloppy 30-second attempt.
Structure your workout as 2-3 sets with adequate rest between holds to maintain proper form.
Wall Plank Alternative Option
Wall planks provide an even gentler introduction to plank mechanics, perfect for those in acute pain phases or complete beginners to core training.
Positioning Technique: Place your hands flat against the wall at shoulder height and step back 2-3 feet, creating an angled body position.
The greater the angle, the easier the exercise becomes – adjust your foot position based on your comfort and strength level.
This angled position maintains the essential plank movement pattern while significantly reducing the load your core muscles must support.
You're still learning proper alignment and muscle activation, but within a much more forgiving framework.
Choosing Your Variation:
- Wall planks: Best for acute back pain phases or absolute beginners
- Knee planks: Ideal once you can hold a wall plank for 30+ seconds comfortably
- Progression timeline: Most people can advance from wall to knee planks within 2-4 weeks
The Complete Progression Path: Start with wall planks until you achieve 30-60 second holds, advance to knee planks for several weeks, then gradually progress to full planks only when you can maintain perfect form throughout longer holds.
This methodical approach builds genuine strength rather than compensatory patterns that might hurt you later.
Bird Dog – Multi-Directional Stability Training

The bird dog exercise represents the perfect marriage of safety and effectiveness for back pain sufferers.
This deceptively simple movement challenges your core in multiple planes while maintaining the spine-protective benefits that make it a cornerstone of rehabilitation programs worldwide.
The Science Behind Bird Dog Effectiveness
A landmark 2012 study measuring lumbar compressive forces during various core exercises found that bird dogs create minimal stress on spinal structures – significantly less than traditional exercises like sit-ups or crunches.
This research validated what physical therapists had observed clinically: the quadruped position naturally stabilizes the spine without excessive loading.
The exercise delivers multi-dimensional benefits that extend far beyond basic core strengthening.
You're simultaneously activating deep abdominal muscles, strengthening your back extensors, and training the intricate coordination between opposite limbs that's essential for real-world movement patterns.
This comprehensive approach addresses the root causes of back pain rather than just treating symptoms.
Detailed Movement Breakdown
Starting Position Setup: Begin in a tabletop position with hands placed directly under your shoulders and knees positioned under your hips.
This alignment creates optimal stability and ensures proper force distribution throughout the movement.
Core Activation Technique: Contract your abdominal muscles as if someone were about to punch you in the stomach – this isn't about hollowing or sucking in, but rather creating genuine muscular tension that protects your spine.
This activation must remain constant throughout the entire exercise.
The Movement Sequence:
- Simultaneously extend your right arm forward and left leg backward
- Hold this extended position for 6-8 seconds to maximize stability benefits
- Lower both limbs with complete control back to starting position
- Switch sides: left arm and right leg extend together
- Continue alternating for your prescribed repetitions
Volume Structure: Perform 3 sets of 5 repetitions per side.
This relatively low volume prioritizes movement quality and neuromuscular control over pure strength building, which is exactly what your recovering back needs.
Form Mastery and Common Mistakes
The cardinal rule of bird dog execution is maintaining a completely stable lower back throughout the movement.
Your spine should remain as motionless as if it were encased in concrete – any movement here transforms a therapeutic exercise into a potentially harmful one.
Critical Form Points:
- Leg movement pattern: Push your leg straight back rather than lifting it up, which prevents dangerous back extension
- Hand placement: Keep hands flat and weight evenly distributed to maintain shoulder stability
- Knee positioning: Maintain hip-width spacing to ensure optimal base of support
Visual Alignment Check: Imagine a glass of water balanced on your lower back – it should remain perfectly level throughout the entire movement.
Any tilting, rotating, or shifting indicates you're moving beyond your current stability capacity.
Progression Readiness Indicators: You've mastered the basic bird dog when you can complete all repetitions while maintaining perfect spinal stability and holding each position for the full 6-8 seconds without trembling or compensating.
Advanced variations might include adding resistance bands or extending hold times, but only after achieving complete movement mastery.
Red Flag Warning Signs: Stop immediately if you feel any lower back discomfort or notice your spine moving during the exercise.
These signals indicate you're either moving too quickly, extending too far, or attempting the exercise before your stability system is ready.
Pelvic Tilts – Gentle Activation and Mobility Foundation
Pelvic tilts prove that the most powerful movements are often the smallest ones.
This foundational exercise teaches your body the subtle art of core activation while simultaneously addressing the postural imbalances that frequently contribute to lower back pain.
Understanding Pelvic Tilt Benefits
The magic of pelvic tilts lies in their ability to activate intrinsic core stabilizers – the deep muscles that work automatically in a healthy spine but often shut down when you're experiencing back pain.
When these stabilizers engage properly, they reduce the excessive strain your superficial back muscles have been carrying, creating a more balanced and sustainable support system.
Small movements yield disproportionately large stability improvements because they target the precise muscle activation patterns your body needs for optimal spinal alignment.
The exercise directly addresses anterior pelvic tilt, a common postural dysfunction where your pelvis tips forward, creating excessive lower back arch and subsequent pain.
The Core Connection: Your pelvis serves as the foundation for your entire core system.
When positioned correctly, it allows your deep abdominal muscles, pelvic floor, and diaphragm to work in perfect coordination.
This integration transforms isolated muscle strengthening into functional stability that translates directly to pain reduction and improved movement quality.
Execution Technique and Breathing Pattern
Setup Position: Lie on your back with knees bent and feet planted flat on the floor, hip-width apart.
This position provides optimal stability while allowing your pelvis to move freely through its natural range of motion.
The Movement Coordination:
- Exhale phase: As you breathe out, gently tilt your pelvis forward
- Contact point: Press your lower back firmly into the floor
- Engagement: Pull your navel toward your spine – imagine zipping into tight pants
- Hold: Maintain this position for 5 seconds while continuing to breathe normally
- Release: Slowly return to neutral position
Breathing Integration: The exhale timing isn't arbitrary – it naturally facilitates deep abdominal muscle activation while preventing you from holding your breath and creating unnecessary tension.
This breathing pattern mirrors the way your core should function during daily activities.
Volume and Rhythm: Perform 10-12 controlled repetitions per set, focusing on the quality of muscle activation rather than the speed of movement.
Each repetition should feel deliberate and controlled, never rushed or mechanical.
Progression Strategies
Once you can consistently hold the basic pelvic tilt with proper muscle activation, adding movement components transforms the exercise from a static hold into a dynamic stability challenge.
This progression forces your core stabilizers to work harder while maintaining the spine-protective benefits of the original movement.
Movement Progressions:
- Arm movements: Add gentle arm raises while maintaining the pelvic tilt
- Leg slides: Slowly slide one foot along the floor while holding the position
- Breathing challenges: Extend hold duration while maintaining normal breathing patterns
Integration Strategy: Pelvic tilts serve as an excellent warm-up for other exercises in your program.
Master this movement first, then use it to prepare your core for more challenging exercises like bridges or modified planks.
The neuromuscular activation patterns you develop here directly transfer to more complex movements.
Advancement Indicators: You're ready for progression when you can complete 12 repetitions while maintaining consistent lower back contact with the floor and experiencing the distinct sensation of deep abdominal engagement.
The movement should feel automatic rather than forced, indicating that your stabilizing muscles are responding appropriately to the demand.
Bridges – Posterior Chain Integration for Complete Core Stability
The bridge exercise serves as the perfect capstone to your back-safe core program, transforming the foundational work you've built with pelvic tilts into a dynamic, multi-muscle movement that addresses the full spectrum of spinal support needs.
Why Bridges Complete Your Back-Safe Core Program
While your previous exercises focused primarily on anterior core muscles, bridges engage your glutes and hamstrings alongside your deep abdominals, creating the balanced muscular support system your spine desperately needs.
This posterior chain activation is crucial because weak glutes often force your lower back muscles to work overtime, contributing directly to pain and dysfunction.
The bridge brilliantly integrates the pelvic tilt principles you've already mastered with dynamic movement, teaching your body to maintain core stability while generating force through your hips.
This combination directly translates to improved function in daily activities like standing up from chairs, climbing stairs, or lifting objects from the ground.
Addressing Multiple Deficits: Most people with back pain suffer from both core weakness and hip muscle imbalances – particularly weak glutes that have been inhibited by prolonged sitting.
Bridges target both issues simultaneously, making them exceptionally efficient for comprehensive spinal health improvement.
Proper Bridge Technique
Starting Position Setup: Lie on your back with knees bent and feet placed hip-width apart, ensuring your heels are positioned directly under your knees at roughly 90 degrees.
This alignment optimizes force transfer and prevents unwanted stress on your knee joints.
The Activation Sequence:
- Heel pressure: Press your heels firmly into the floor to activate your glutes
- Core engagement: Maintain the deep abdominal activation you learned with pelvic tilts
- Hip drive: Lift your pelvis by squeezing your glutes, not by arching your back
- Alignment check: Create a straight line from your knees through your hips to your shoulders
Critical Form Points:
- Avoid back extension: Maintain your natural lumbar curve rather than forcing excessive arch
- Glute dominance: The lifting force should come from your hip muscles, not your lower back
- Controlled tempo: Take 2 seconds to lift, hold for 2 seconds at the top, then lower with control
Volume Structure: Perform 8-12 repetitions per set, focusing on perfect glute activation with each rep.
Quality muscle recruitment matters far more than hitting higher numbers with compensatory movement patterns.
Advanced Single-Leg Progression
Single-leg bridges represent a significant jump in difficulty, introducing unilateral stability challenges that more closely mirror real-world movement demands.
Attempt this progression only after mastering the two-leg version with perfect form and adequate strength.
Readiness Assessment: You're ready for single-leg progression when you can complete 12 two-leg bridges while maintaining perfect alignment and feeling the work primarily in your glutes rather than your lower back.
Execution Technique:
- Setup: Begin in standard bridge position
- Lift phase: Raise into bridge position using both legs
- Leg extension: Slowly extend one leg until it forms a straight line with your torso
- Hold: Maintain this position while keeping your hips level
- Return: Lower the extended leg back to starting position before lowering your hips
Unilateral Challenges: Single-leg bridges demand significantly more core stability to prevent hip hiking, pelvic rotation, or trunk shifting.
These stability challenges make the exercise exponentially more effective for developing real-world functional strength.
Safety Considerations:
- Progress gradually: Start with shorter hold times and build duration slowly
- Monitor form: Stop immediately if you feel lower back stress or notice hip hiking
- Equal training: Always perform equal repetitions on both sides to prevent imbalances
- Regression option: Return to two-leg bridges if single-leg variations cause any discomfort
The bridge progression teaches your body to coordinate multiple muscle groups while maintaining spinal stability – a skill set that directly translates to reduced back pain and improved movement quality in your daily life.
Implementation Strategy and Safety Guidelines
Having the right exercises means nothing without a smart implementation strategy that respects your body's current limitations while systematically building the strength and stability you need for long-term spinal health.
Essential Safety Protocols
The Golden Rule: Pain Stops Everything Any exercise that triggers back pain should be immediately discontinued, regardless of how “therapeutic” it's supposed to be.
Pain during movement indicates that your body isn't ready for that particular demand or that your form has broken down beyond safe parameters.
Starting Protocol: Begin with just one or two exercises from the program rather than attempting all five immediately.
Your nervous system needs time to learn new movement patterns, and your muscles require gradual conditioning to handle even these gentle demands safely.
Form Over Everything: A perfect 5-second plank hold trumps a sloppy 30-second attempt every single time.
When your form begins to deteriorate – whether from fatigue, distraction, or pushing too hard – that's your cue to stop the set. Quality repetitions build strength; poor repetitions build dysfunction.
Fatigue Recognition Signs:
- Trembling or shaking during holds indicates neuromuscular fatigue
- Inability to maintain spinal alignment signals core strength depletion
- Breath holding suggests you're working beyond your current capacity
- Compensatory movements like hip hiking or back arching mean immediate cessation
Medical Clearance Requirements: Consult your healthcare provider before beginning this or any exercise program, especially if you have a history of disc herniation, spinal stenosis, or recent back injury.
These exercises are generally safe, but your specific condition may require modifications or professional supervision initially.
Programming and Progression Framework
Optimal Training Frequency: Perform these exercises 2-3 times per week with at least one day of rest between sessions.
Your core stabilizers respond better to consistent, moderate stimulation than to intense, sporadic training that overwhelms your recovery capacity.
Realistic Timeline Expectations: Most people notice improvements in core strength and movement quality within 2-4 weeks of consistent practice.
However, significant changes in chronic back pain patterns typically require 6-12 weeks of dedicated training as your nervous system rewires and your deep stabilizers regain their protective function.
Session Structure Options:
Standalone Routine (15-20 minutes):
- Pelvic tilts (2 sets) – activation and warm-up
- Dead bugs (2 sets each side) – foundational stability
- Modified planks (2-3 sets) – endurance building
- Bird dogs (3 sets each side) – coordination training
- Bridges (2 sets) – posterior chain integration
Warm-Up Integration: Experienced gym-goers can use these exercises as a comprehensive warm-up before strength training, ensuring optimal core activation and spinal stability before loading the system with heavier demands.
Progression Indicators:
- Form mastery: Perfect technique maintained throughout all repetitions
- Duration targets: Ability to hold positions for prescribed times without fatigue
- Pain absence: Complete comfort during and after exercise sessions
- Strength sensation: Feeling the work in target muscles rather than compensatory areas
Long-Term Success Strategies
Consistency Trumps Intensity Three moderate sessions per week for six months will produce far better results than daily intense sessions for three weeks followed by burnout and abandonment.
Sustainable progress requires sustainable habits.
Building Comprehensive Spinal Health: These exercises form just one component of a complete back health strategy.
Combine them with proper ergonomics, regular movement breaks, stress management, and adequate sleep for optimal results.
Address all contributing factors rather than relying solely on exercise to solve complex pain patterns.
Professional Guidance Indicators: Seek physical therapy or specialized care if you experience:
- Worsening pain despite proper exercise execution
- Radiating symptoms into your legs or arms
- Numbness or tingling in extremities
- No improvement after 6-8 weeks of consistent practice
Integration with Other Strategies:
- Movement variety: Combine with walking, swimming, or yoga for comprehensive conditioning
- Posture awareness: Apply core activation principles during daily activities
- Stress management: Address psychological factors that contribute to muscle tension
- Professional support: Work with qualified practitioners for complex cases
Prevention Mindset: Once your acute pain resolves, maintain these exercises as a preventive measure rather than abandoning them entirely.
Your core stabilizers require ongoing training to maintain their protective function, especially if your lifestyle includes prolonged sitting or repetitive activities that challenge spinal stability.
The path from back pain to spinal health isn't just about getting better – it's about building resilience that prevents future episodes and supports an active, pain-free lifestyle for years to come.
Conclusion
These five exercises provide a scientifically-backed pathway to core strength that works with your back pain rather than against it.
Start slowly, prioritize perfect form over intensity, and maintain consistency to build the deep stability your spine needs for long-term health.
Remember that sustainable progress comes from patience and persistence – your back will thank you for taking the gentle, methodical approach that leads to lasting results.