You learn Olympic lifting by first proving you can hit every overhead, squat, and split stance with a PVC pipe, then following a 12-week progression that gradually adds weight only after each snatch and clean-and-jerk rep looks identical on video.
Keep reading for the complete gear checklist, mobility fixes, drill sequence, and sample program that walk you through that process step by step.
What Counts as an Olympic Lift?
When people say “Olympic lift,” they don’t mean any barbell move that happens to feel athletic—they mean one of only two exercises that show up on the international competition platform, each judged to strict standards.
Everything you practise in the gym—no matter how scaled, segmented, or slowed down—should point back to mastering these lifts exactly as they’re contested.
Meet the Two Competition Movements
The snatch moves the bar from the floor to a locked-out overhead position in a single explosive sweep.
Lifters start with a wide grip so the bar finishes directly over the centre of the foot, allowing a deep overhead squat to stabilise the load before recovery.
A good snatch is judged on three things: no press-out of the elbows, hips and knees extended at the finish, and the lifter standing still until the down-signal—criteria you’ll want to keep in mind even when you’re drilling with a PVC pipe.
The clean & jerk is a two-stage lift that lets you handle roughly 20–30 % more weight than the snatch.
In the clean, you pull the bar to the shoulders with elbows whipping forward so it rests on the front delts.
After catching and standing up, you reset your breath, dip straight down, and drive the bar overhead in the jerk, normally into a split stance that positions the bar slightly behind the ears for balance.
Judges look for a smooth lift-off from the platform, elbows locked before the feet start to recover, and the same motionless finish rule as the snatch.
Why Every Drill Should Trace Back to These Phases
Breaking the Olympic lifts into smaller chunks isn’t busywork—it’s targeted practice.
Each drill you see in a beginner program zeroes in on one of the lift’s four universal checkpoints:
- First pull: From the floor to mid-thigh. Exercises like clean pulls or snatch deadlifts reinforce a constant back angle and teach patience off the ground.
- Second pull (extension): Mid-thigh to full hip and knee extension. High-hang power snatches or cleans drill speed and vertical force without the distraction of the initial lift-off.
- Pull under and catch: Moving yourself under the bar, not the other way around. Tall snatches, tall cleans, and snatch/clean balances groove a fast turnover and solid receiving posture.
- Recovery and support: Standing up or stabilising overhead. Front squats, overhead squats, and jerks from blocks build the leg and trunk strength that keeps heavy attempts from folding you.
Whenever you choose a new accessory, ask two quick questions: “Which checkpoint am I reinforcing?” and “How will this show up in my next full snatch or clean & jerk session?”
If you can’t answer both, pick a different drill. That simple filter keeps your training economy high and ensures every rep—no matter how light—moves you closer to a confident, competition-legal lift.
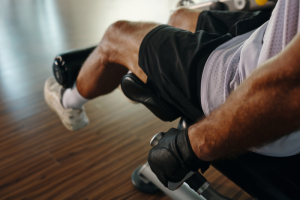
Gear and Space Checklist Before You Load a Bar
A solid start in Olympic lifting doesn’t come from piling plates on the bar—it comes from setting up an environment that lets you learn safely and repeat technical reps without distraction.
Dial in the basics below and you’ll spend more time improving positions and less time fighting slippery shoes or a sluggish bar.
Non-Negotiables
- Weightlifting shoes with a raised heel
A firm heel of roughly 0.75 in (19 mm) pitches the torso upright so you can sit deeper while keeping the bar balanced over mid-foot. Look for a wooden or high-density TPU heel rather than compressible foam; the stiffer the base, the more reliably you’ll hit the same receiving position every rep. - An Olympic barbell that spins freely
Pick the size that matches your federation standard—15 kg for women, 20 kg for men. Quality bars use needle or roller bearings in the sleeves so the plates rotate instead of torquing your wrists during turnover. A tensile strength above 190 k psi and medium-sharp knurling (with dual IWF grip marks) will last years before bending or losing bite. - Full-diameter bumper plates
Rubber plates built to the IWF diameter of 450 mm let every load, even a single 10-kg plate per side, rest at the same height for consistent pulling mechanics. They also protect the sleeves when you drop the bar from overhead; aim for at least one pair each of 10, 15, and 20 kg to cover beginner percentages.
Nice-to-Haves
Chalk dries the hands so hook grip stays locked without crushing the knurl; a small block in a Tupperware beats loose dust everywhere.
Thumb tape extends hook-grip stamina on high-volume days and saves skin for tomorrow’s session.
A dedicated plywood-and-rubber lifting platform (about 2.5 m square) keeps the bar level, muffles noise, and spares your gym’s flooring—handy, but not a deal-breaker if you’re on stall mats that won’t shift.
No Equipment Yet? No Problem
Until those pieces arrive, a 28–30 mm PVC pipe or broomstick lets you groove the very same motor patterns: shoulder rotation on the turnover, footwork in the split, and timing from hip extension to catch.
Stack sturdy books or low boxes as makeshift blocks for high-hang drills, film each attempt to check bar path, and build your base with goblet squats, overhead lunges, and strict presses.
When the real gear shows up you’ll already move like a lifter—now you simply add iron.
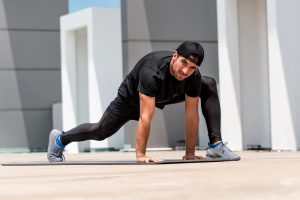
Mobility Screen: Can Your Joints Hit the Required Positions?
A barbell only rewards positions you can actually reach, so a quick mobility audit beats forcing depth and risking injury.
Run through this simple screen before worrying about kilos—if any checkpoint fails, shift your focus to loosening up rather than loading up.
Quick Four-Point Self-Test
- Thoracic extension – Stand tall, raise both arms straight overhead, and lock your elbows without letting the ribs flare forward. If your chest pops out or you feel your lower back arch, overhead stability will crumble the moment the bar gets heavy.
- Lat length – Lie on your back, knees bent, and try to drop straight arms overhead until thumbs touch the floor. Strained shoulders or bent elbows signal tight lats that will drag the bar forward in the snatch.
- Ankle dorsiflexion – Kneel by a wall, keep the heel planted, and drive the knee forward until it taps the wall. You want at least 10 cm between big toe and wall; less than that forces you onto your toes in the catch.
- Hip flexion and extension – Sink into a full-depth air squat (hips below knees) without pinching or butt-winking, then step into a split stance and drop the back knee. Any pain or wobble here will limit clean or jerk positions.
Pass all four and you’re cleared to load a bar; miss even one and your first PR needs to be mobility, not weight.
Missing a Check Mark? Here’s the 2-to-4 Week Fix
Tight spots usually yield with short, targeted work layered into warm-ups and off-days.
Think small doses done often, not marathon stretching sessions.
- Thoracic roadblock
- Foam-roll mid-back for 60 s, then place the roller across the scapulae and perform ten slow thoracic extensions.
- Stubborn lats
- Use a peanut or lacrosse ball on the outer rib cage for 30 s per side, then add three sets of ten wall-slide “angel” reps.
- Sticky ankles
- Alternate 20 ankle rocks—knee forward, heel planted—with a 30-second calf stretch against the wall; repeat for three rounds.
- Hip depth issues
- Two minutes per side of couch stretch to open the hip flexors, followed by three sets of ten tempo goblet squats focusing on keeping the torso upright.
During the mobility block, replace loaded lifts with pattern builders: overhead PVC squats for shoulder position, and light goblet squats or lunges to keep strength ticking over.
Film yourself weekly; once each test passes under video proof, re-introduce the barbell and you’ll find the correct bottom positions feel natural instead of forced.
Step-By-Step Learning Progressions

A full lift looks like a single burst of power, but the safest way to learn it is to bolt together smaller skills in a strict order.
Follow the progressions below and you’ll layer speed on top of rock-solid positions instead of rushing straight to heavy metal.
Snatch: Top-Down Roadmap
Start with an empty bar (or PVC) and only climb by 2–5 kg once every rep on video matches the previous one.
- Snatch-grip strict press
Groove an unbreakable overhead lock-out while teaching the shoulders to stay stacked over the hips. Three sets of eight from a rack at the very start of each session work well. - Power snatch balance
Add a short dip-drive, then press yourself under the bar into a partial squat. Use triples at light weight to coordinate footwork with the bar’s landing. - High-hang power snatch
Pull from mid-thigh; this removes the first pull so you can focus on snapping hips and brushing the bar vertically. Stay crisp with five sets of three. - Snatch balance
Now drop into a full overhead squat. Fight for depth and instant elbow lock; if the bar wanders forward, film a side view and correct your torso angle. - High-hang full snatch
Tie extension and quick pull-under together. Catch below parallel every time before thinking about load. - Full snatch from the floor
Only when the earlier steps are automatic do you add the first pull. Pause just off the floor on early reps to check back angle, then flow into normal speed.
Keep each drill in the warm-up even after you “graduate” it—treat them as daily movement quality insurance.
Clean & Jerk: Phase-Focused Build-Up
Think of the clean and the jerk as two separate lifts that share the same bar.
Master their pieces individually, then bolt them together for weight.
Clean sequence
- Setup – Shoulders over the bar, hips lower than a deadlift, full hook grip.
- First pull – Ground to mid-thigh: back angle unchanged, knees shift back to clear the path.
- Second pull – Violent triple extension plus shrug, straight up—not back.
- Pull under – Elbows whip around; meet the bar, don’t chase it.
- Front-squat receive – Sit tall, chest up, stand before breathing.
Jerk sequence
- Set – Open palms, elbows a touch forward so the bar rests on the shelf of your shoulders.
- Dip-drive – Hips stay under the bar, heels rooted; power goes straight down then straight up.
- Split receive – Front shin vertical, back knee soft, bar just behind the ears.
- Recovery – Front foot back, back foot forward, then settle before lowering the bar.
Recommended drill order
- Front-squat + press – Teaches rack position and leg drive.
- Power clean – Adds hip extension without a deep catch.
- Push press – Loads the dip-drive without footwork.
- Power jerk – Introduces punching the bar overhead while landing tall.
- Full clean & jerk – Combines everything; limit work sets to doubles until each phase is reflexive.
As with the snatch, film from the side and front every week.
Move up in weight only when you can freeze any video frame and still see textbook positions.
Patience here pays off later when the kilos start piling on.
Programming Your First 12 Weeks
A good beginner program feels almost boring—steady practice, small weekly jumps, and lots of video review—but that’s exactly why it works.
Follow the framework below and you’ll stack twelve weeks of consistent, technically-sound training that sets the stage for heavier lifts later on.
Frequency, Order, and Load Guidelines
Training three to four days a week is enough stimulus for new lifters without tipping you into chronic soreness or sloppy reps.
Open each session with your Olympic-lifting drills while legs and nervous system are fresh, slot squats or pulls next, then finish with accessory work and mobility.
Stick to sets of six to ten reps at first, starting with an empty bar if needed, because volume—not max effort—drives motor learning.
Review a few clips after every workout; if at least nine out of ten reps look textbook, feel free to nudge the load up no more than three percent the following week.
Technique slips below that threshold?
Hold the weight, refine the movement, and retest the camera before progressing.
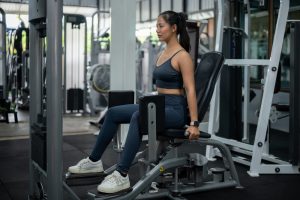
Foundational Strength Work
Strong legs and a stable trunk turn good positions into confident catches, so dedicate two days a week to classic barbell basics.
Rotate back and front squats for quad and postural strength, pair them with overhead presses to reinforce lock-out mechanics, and add Romanian deadlifts to bulletproof the posterior chain.
Use moderate weights you can control for five to eight reps; the goal is reinforcing movement patterns that translate directly to heavier snatches and cleans down the road.
Sample Four-Day Micro-Cycle
Below is a template you can plug into any calendar. Percentages reference the most weight you can lift with flawless form—if you’re unsure, err light.
| Day | Main Lift Focus | Supporting Work |
|---|---|---|
| 1 | Block power snatch 5 × 3 @ ≈ 65 % | Overhead squats 3 × 5, back squats 3 × 5 |
| 2 | Muscle clean 5 × 3 | Power jerk 3 × 5, clean pulls 3 × 5, core circuit |
| 3 | High-hang snatch complex (pull + power + full) 4 sets | Front squats 4 × 5, horizontal row + press superset |
| 4 | Block power clean 5 × 3 | Push press 3 × 5, clean deadlifts 3 × 5, farmer carries |
Keep rest periods short enough to stay warm yet long enough to maintain crisp technique—about two minutes is plenty for most beginners.
Log each session, re-watch key sets, and let the feedback—not ego—decide the next week’s load.
A dozen steady weeks of this approach gives you both the movement fluency and base strength to pursue heavier singles with confidence.
Troubleshooting and the 90-Day Action Plan
A hitch in technique shows up long before the bar feels heavy, so spotting and correcting small faults early saves months of frustration later.
Pair the quick fixes below with a clear 90-day roadmap and you’ll stay on track from stick work to solid doubles.
Common Rookie Errors and Quick Cues
- Early arm bend – Pulling with the elbows before the hips finish kills vertical force. Think “push the floor, elbows long” until the bar passes mid-thigh, then let the shrug take over.
- Outward swing – A loopy path means you’ve lost contact with the legs. Brush the bar up the thighs and film a side view to ensure the plates track close to the shins and torso.
- Soft catch – Crashing beneath the bar rather than snapping under it often leads to missed lifts. Spend five minutes on tall-snatch or tall-clean triples to rehearse an aggressive pull-under.
- Fingertip rack on the jerk – Dipping with loose hands steals power and strains wrists. After standing from the clean, re-set palms and rotate elbows slightly forward so the bar rests on the delts before you dip.
- Wide landings – Jumping the feet outside squat stance limits depth and stability. Chalk two parallel lines for your ideal stance and stick every power or split landing between them.
90-Day Timeline at a Glance
- Weeks 1–2 – Daily PVC skill sessions and targeted shoulder-ankle mobility; no added load.
- Weeks 3–6 – Introduce top-down snatch and clean drills; pair each session with squats or presses twice a week.
- Weeks 7–10 – Transition to light full lifts at or below 40 % of body-weight, filming every work set for technique review.
- Weeks 11–12 – Accumulate doubles and triples around 60 % of your technically solid max; attempt singles only if every warm-up rep is flawless.
- Post-Month 3 – Seek feedback from a USAW-certified or national-level coach—whether in person or via remote video—to fine-tune bar path and plan your next progression.
Stick to the timeline, keep the camera honest, and each phase will build smoothly into the next without the need to unlearn bad habits.
Conclusion
Olympic lifting rewards patience: nail your mobility first, gather the right gear, and drill flawless patterns before chasing numbers.
Follow the 12-week progression, log videos, and correct small errors as soon as they appear.
Stay consistent and you’ll build a technical foundation that supports heavy, confident lifts for years to come.