If you’re looking to build upper chest size and strength without weights, three push-up variations stand out: the Decline Push-Up, Incline Archer Push-Up Hellset, and Wide/Narrow-Grip Decline Push-Ups.
These moves shift more load to the upper pecs and create the muscle tension needed for real growth—keep reading to see exactly how they work and how to use them.
Understanding Upper Chest Push-Up Mechanics
If your upper chest is lagging, it’s not by accident—it’s often overlooked because most bodyweight exercises don’t naturally emphasize that area.
To effectively target and grow the clavicular head of the pecs, you need to understand how small adjustments in body position can completely change the stimulus your muscles receive.
Why the Upper Chest Needs Specific Attention
The upper chest, or clavicular portion of the pectoralis major, is responsible for lifting the arm upward and inward from a low position—like when you're doing incline presses or upward chest fly movements.
Standard push-ups primarily hit the mid- and lower chest because your body is parallel to the ground, so the angle doesn’t favor upper chest involvement.
That’s why many people, even those who train consistently, struggle to build mass in this area. To fix that, you need movements that angle your body so the upper pecs do more of the work.
How Push-Up Angles Change Chest Activation
The angle of your body during a push-up determines where most of the tension lands.
When your feet are on the floor and your body is horizontal, the load distribution spreads evenly across the chest, shoulders, and triceps.
But when you elevate your feet, your torso tilts downward, changing the line of push.
This downward press more closely mimics what happens during an incline bench press—where the upper chest is the primary mover.
The higher your feet are, the steeper the angle, and the more the exercise demands from the upper chest.
Around a 45° decline is a sweet spot: it’s steep enough to shift the focus to the clavicular pecs while still allowing for strong mechanical leverage.
At that angle, you’re also pushing against up to 90% of your body weight, making each rep significantly more demanding than a standard push-up.
Why Foot Elevation Mimics Incline Pressing
Foot-elevated push-ups don’t just simulate incline pressing in muscle activation—they also engage supporting muscle groups similarly.
For example, just like in an incline barbell press, your shoulders and triceps still assist, but the angle ensures the upper chest takes the lead.
The pressing path starts from below your shoulders and finishes above the head line, just like a dumbbell incline press would.
That’s why this small adjustment—just elevating your feet—makes a major difference.
How Each Variation Redirects Load to the Upper Chest
Not all push-up variations target the upper chest in the same way, even if they involve a decline.
Here’s a breakdown:
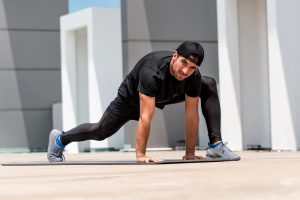
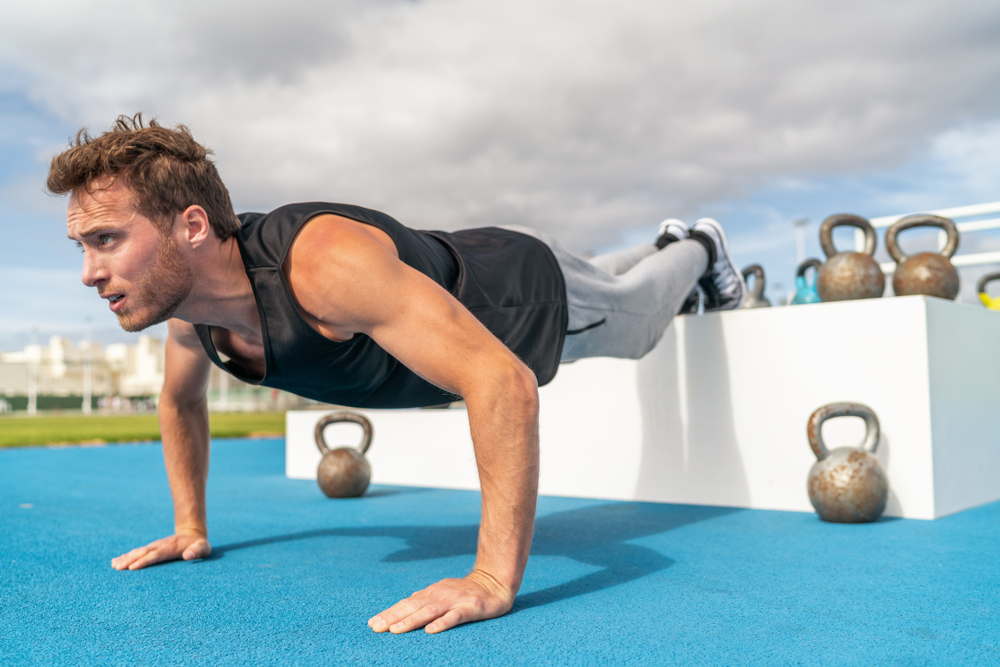
- Decline Push-Up: This is the most straightforward method—feet elevated, hands on the floor. The body angle shifts the emphasis to the upper chest by default, especially when the core and glutes are tight to keep a rigid line.
- Incline Archer Push-Up Hellset: This takes it further by isolating one side at a time and adding volume through a built-in superset. The incline positioning ensures upper pecs stay active throughout, while the side-to-side motion creates unilateral tension and better muscle control.
- Wide vs. Narrow Decline Push-Ups: Both are done on a decline, but grip width affects muscle emphasis. Wide grip stretches the pecs more, deepening the upper chest contraction. A narrow grip places the load where the triceps and upper pecs work together, increasing overall muscle fiber engagement along the upper torso.
Understanding these mechanics is what sets apart just doing push-ups from training your upper chest with intention.
When you know how angles, grip, and body positioning affect muscle loading, you can turn simple movements into targeted, progressive workouts that deliver real results.
Decline Push-Up: Simple Shift, Bigger Load
The decline push-up is one of the most efficient ways to load the upper chest using just your body weight.
By slightly changing your body angle, you can dramatically increase muscle recruitment where it matters most—without adding any equipment beyond a bench or chair.
When you elevate your feet to around a 45° angle, the movement begins to replicate an incline press, redirecting the push line to the upper pecs.
At this angle, your body also becomes heavier to lift—up to 90% of your total weight—creating a more demanding stimulus for strength and hypertrophy.
That increase in mechanical load helps build both size and control in the upper chest area, especially when you're consistent with your form and progression.
Proper technique is non-negotiable if you want this variation to actually benefit your chest instead of overloading your shoulders or lower back.
Your body should form a straight line from your heels to your shoulders throughout the entire rep.
Keeping your core braced and your glutes squeezed helps you stay rigid and maintain this alignment.
If your hips sag or your back arches, the emphasis shifts away from the chest and into your spine or delts, which defeats the purpose.
Also, be deliberate with your shoulder positioning: pull your shoulder blades back and down to prevent the front delts from taking over.
Over time, you can increase the challenge by raising the height of your foot platform.
This adds to the decline angle and boosts the force needed to complete each rep.
Just be sure to do this gradually—jumping to a very high surface too early can lead to poor form or joint strain.
If you’re already controlling 90% of your body weight with solid technique, progressing the angle slowly and intentionally keeps you improving without needing extra equipment.
For training volume, 3 to 5 sets of 8 to 12 reps, two to three times per week, hits the sweet spot for strength and growth.
As always, quality comes before quantity. If your reps start to lose depth or control, reduce the number or lower the elevation slightly until your form is solid again.
Incline Archer Push-Up Hellset: Targeted Isolation Meets Volume
The Incline Archer Push-Up Hellset isn’t just a cool name—it’s a brutal yet highly effective way to build upper chest mass and strength.
This variation blends unilateral loading with strategic volume, forcing each side of your chest to work independently before layering on fatigue with incline presses.
Done correctly, it delivers both muscle isolation and intensity in one seamless sequence.
What makes the archer push-up so effective is the lateral shift of your body weight.
As you lower yourself over one arm, that side bears the majority of your body load, allowing for focused contraction and deeper range of motion.
This unilateral approach helps correct imbalances, improves control, and creates more upper chest tension than standard push-ups ever could.
By adding a pause just above the ground, you remove any momentum and increase time under tension—two things that drive hypertrophy.
But there’s another layer to this variation: incline positioning.
By elevating your feet and keeping your upper body angled downward, you recreate the upper chest bias of an incline press, which you simply don’t get on flat ground.
The combination of archer-style loading and an incline body position makes this variation ideal for overloading the clavicular pec fibers.
Each rep starts with you in a wide stance at the top of a push-up.
Shift your weight toward one side, bend the elbow, and lower your chest until you're just above the floor—pause here to hold tension—then return to the starting position.
Immediately follow that with a controlled incline push-up (still with your feet elevated), pausing again at the bottom before pushing back up.
This pairing makes each set feel like two exercises rolled into one, stacking both intensity and time under load.
To stay efficient and protect your form, remember two key things.
First, keep your core and glutes tight—this stops your hips from sagging and preserves the decline angle that keeps the upper chest engaged.
Second, maintain your shoulder blades retracted throughout the set.
If they flare or collapse forward, your shoulders will start stealing the work.
A full set consists of 6–8 archer push-ups per side, with 4–6 incline presses after each one.
That’s one “round” per side. Rest about 30 seconds between each round, and aim for 3 total sets per side.
It’s a tough workload, but that’s the point—it combines control, isolation, and volume in a way few push-up variations can match.
Wide and Narrow Decline Push-Ups: Chest Loading vs. Triceps Synergy
Changing your hand placement during decline push-ups is more than just a minor tweak—it directly changes which muscles dominate the movement.
The wide grip and narrow grip variations target the upper chest differently, and using both strategically can help you build a fuller, more balanced upper torso.
With a wide grip, your hands move slightly beyond shoulder-width.
This opens up your chest and stretches the pecs more deeply during the lowering phase.
The increased stretch under load boosts muscle tension across the upper chest, especially when your elbows track at about a 45° angle from your torso.
This angle protects your shoulders while still allowing full pec engagement.
It's particularly useful for improving the width and fullness of the chest since the wider range of motion better activates the outer pec fibers.
On the flip side, the narrow grip—with hands at or just inside shoulder-width—pulls in more triceps involvement, but on a decline, it also creates a strong synergy between your upper chest and triceps.
Because the push line is steeper and your elbows stay closer to your body, the upper pecs must work harder to drive the press.
This makes the narrow grip especially effective when you're trying to build strength and density in the upper-inner chest, not just size.
Regardless of which grip you’re using, keeping your shoulder blades retracted is essential.
Letting them protract or shrug up as you push will shift the load to your front delts and limit how much the pecs contribute.
This is especially important during wide grip sets, where improper form can quickly turn the movement into a shoulder-dominant grind.
There are two smart ways to incorporate both grips into your training.
One is alternating between wide and narrow grips from set to set—this gives each pattern full attention without overwhelming fatigue.
Another is using them as a superset: perform one set of wide-grip decline push-ups, rest briefly, then move right into a narrow-grip set.
This pairing hits the chest from two angles in one focused sequence and can be especially effective for maximizing muscle recruitment without needing extra equipment.
For programming, stick to the same structure as your standard decline push-ups: 3 to 5 sets of 8 to 12 reps, performed two to three times per week.
Prioritize form over rep count, and don’t rush through the transitions between hand positions—each version deserves your full attention to get the most out of it.
Programming and Progression: Weekly Structure for Gains
To build real upper chest size and strength with these push-up variations, how you structure your training week matters just as much as how you perform each rep.
A smart, rotating routine keeps your muscles challenged, reduces the risk of plateaus, and allows you to apply progressive overload without constantly increasing volume or risking burnout.
A two-week rotation works well for maintaining variety while still reinforcing movement quality.
In Week 1, the focus shifts toward higher-volume, more balanced work using the standard, wide, and narrow decline push-up variations.
These give you a controlled environment to build strength and size through both chest-dominant and triceps-integrated patterns.
You can alternate grip styles between sets or use supersets to enhance density.
Week 2 turns the intensity up with Incline Archer Push-Up Hellsets.
These combine unilateral focus, increased mechanical tension, and higher time under tension per set.
Because of their complexity and volume, you don’t need as many total sets to make them effective—these workouts are shorter but far more demanding.
This built-in variation between weeks keeps your nervous system fresh while consistently targeting the upper pecs from multiple angles.
Progression doesn’t always mean doing more reps.
Instead, you can increase difficulty through other overload strategies that preserve form while amplifying muscular demand. One approach is gradually raising the height of your feet.
This increases the decline angle, forcing the upper chest to work harder with each progression.
If you're starting with a low step or chair, moving up to a bench or box over time is a clear, scalable path forward.
Another progression method is adding pauses at the bottom of each rep.
Pausing kills momentum, making your muscles generate more force to complete the movement.
You can also experiment with slowing down the eccentric phase—lowering yourself in 3–5 seconds—creating more time under tension and improving control.
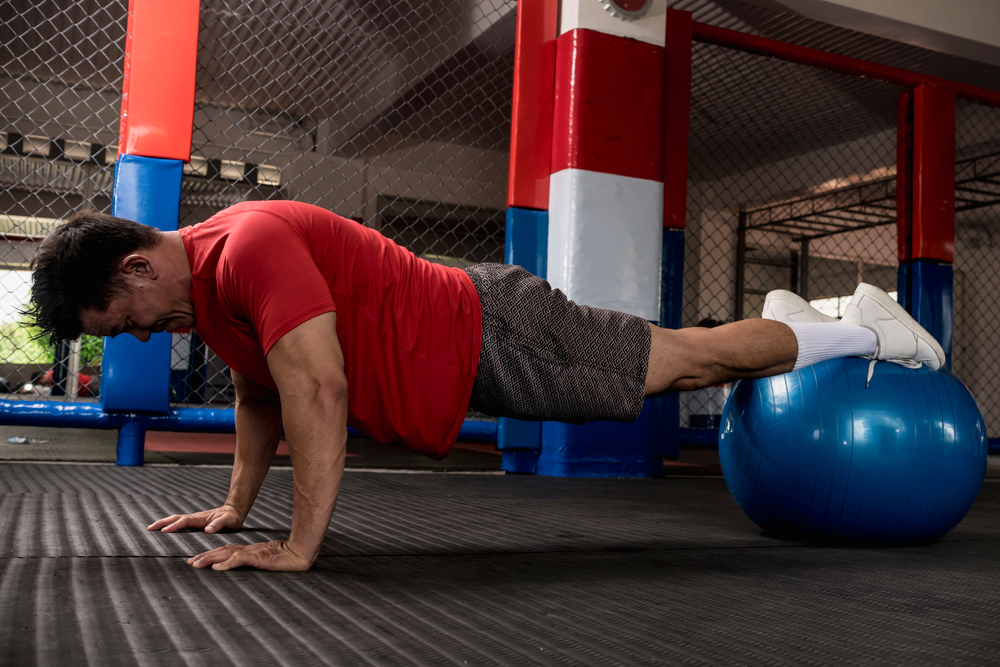
For a more advanced challenge, introduce instability.
Performing these movements with your feet on a Swiss ball or similar unstable surface forces your stabilizers to work harder, while still keeping the primary load on the upper chest.
Just be sure to master the basics first—instability is only useful when your form is already dialed in.
This kind of weekly variation, combined with intelligent progression, keeps your training adaptable and sustainable.
It pushes your muscles to grow and adapt without needing to overhaul your entire routine.
Sticking with this structure consistently—rotating weekly, dialing up difficulty slowly, and keeping reps high quality—puts you in a strong position to see long-term progress with just your bodyweight.
Execution, Volume, and Long-Term Progress
The best results don’t come from pushing harder—they come from pushing smarter.
Building a stronger, fuller upper chest with bodyweight training means dialing in your form, managing volume wisely, and committing to gradual improvement over time.
For most people, training the upper chest two to three times per week strikes the right balance between stimulation and recovery.
Each session should include 3 to 5 sets of 8 to 12 reps per variation, depending on your current strength level and how well you’re maintaining form.
These ranges work well for both hypertrophy and control, giving you room to focus on quality without rushing to hit arbitrary numbers.
What separates real progress from wasted effort is execution.
Chasing rep counts can quickly lead to compromised form, especially when fatigue sets in.
Instead, focus on making each rep count.
That means controlling the movement from top to bottom, hitting full depth, and maintaining constant muscular tension throughout the set.
If your last rep looks drastically different from your first, it's a sign you're moving into junk volume territory—back off and focus on consistency.
Form-wise, a few cues make all the difference:
- Keep your core and glutes tight. This keeps your spine in a neutral position and prevents sagging hips, which not only protects your lower back but also keeps the load on your chest.
- Maintain about a 45° angle at the elbows. Letting them flare wide stresses your shoulders, while tucking them too close turns the push-up into more of a triceps exercise. The middle ground allows for optimal pec activation and joint safety.
- Retract your scapula (shoulder blades). This sets your upper back in a strong, stable position and helps keep the tension on your pecs rather than letting your front delts take over. It also reinforces a more controlled, chest-driven push.
When it comes to long-term progress, the key is consistency—not just in how often you train, but in how well you perform each session.
Stick to the weekly rotation, challenge yourself with gradual progressions, and keep your reps crisp.
You won’t need to reinvent your routine every month if you’re steadily improving the way you execute each movement.
That’s what turns bodyweight training from maintenance work into a tool for serious upper chest development.
Conclusion
You don’t need a gym to build a stronger, more defined upper chest—just smart push-up variations and consistent execution.
Focus on form, rotate your training weekly, and apply progressive overload over time.
Stick with it, and the results will follow.