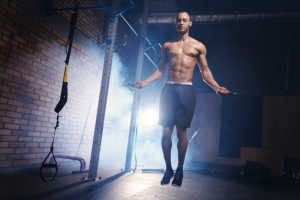
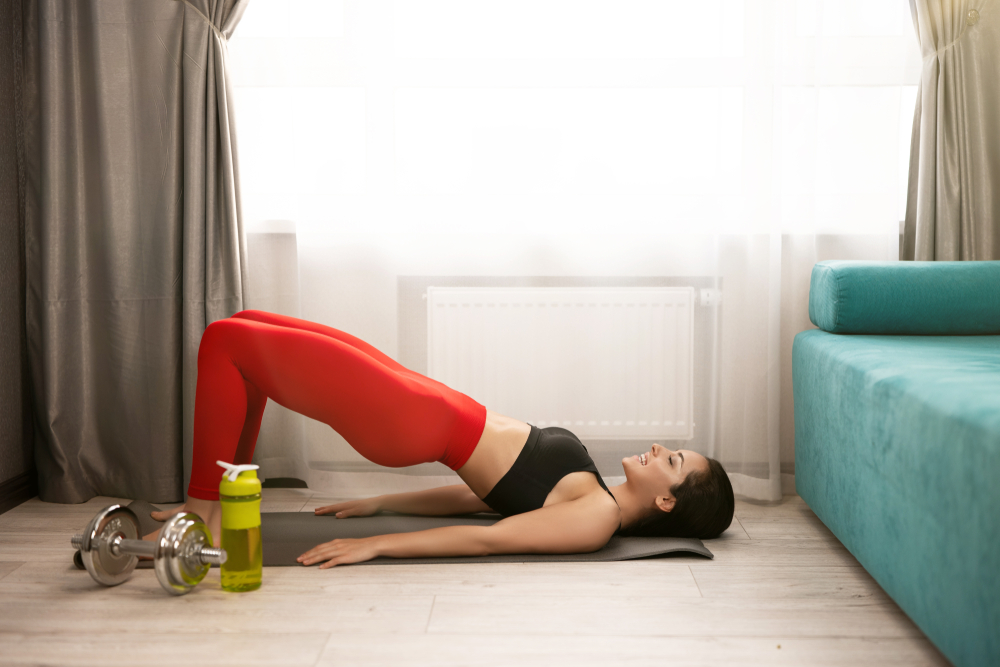
Frog pumps are a glute-focused exercise where you lie on your back, press your feet together, let your knees fall open, and lift your hips by squeezing your glutes.
To do them correctly, maintain a neutral spine, engage your core, and avoid pushing through your lower back—keep reading for a full breakdown of proper form, mistakes to avoid, and how to progress.
What Are Frog Pumps and Why They’re Worth Doing
Frog pumps look simple, but they’re deceptively effective when done right.
They’re a targeted glute activation move that helps isolate and strengthen the glute muscles without putting unnecessary strain on your lower back or hamstrings.
At a glance, frog pumps are a variation of the classic glute bridge.
But instead of keeping your feet flat and knees up, you press the soles of your feet together and allow your knees to drop outward into a butterfly-like position.
This external rotation of the hips completely changes how the movement feels—and more importantly, which muscles are doing the work.
That small change in leg position shifts the focus away from the lower back and hamstrings and places it directly onto your glutes—especially the gluteus maximus, medius, and minimus.
You’re not just lifting your hips; you’re actively using the entire glute group to drive the movement.
This is a big deal if you’re someone who usually ends up feeling glute bridges in your hamstrings or lower back. Frog pumps help correct that pattern.
What makes them even more valuable is their role in “waking up” underused glutes.
Many people experience what’s often called “dead butt syndrome,” where the glutes don’t activate properly due to too much sitting or poor movement habits.
Since the frog pump forces you into external hip rotation and an abducted position, the glutes don’t really have a chance to sit this one out—they’re pulled into the equation right from the start.
And it’s not just the glutes that get involved.
That butterfly position engages your hip abductors (the muscles that move your legs away from your body) and groin stabilizers.
These areas often don’t get enough direct attention, but they’re essential for overall hip stability, joint alignment, and healthy movement patterns.
So whether you’re trying to build stronger glutes for performance, reduce pain from muscle imbalances, or simply improve posture and efficiency during bigger lifts like squats or deadlifts, frog pumps are a smart addition.
They help train your body to fire the right muscles at the right time—something that pays off across just about every lower-body movement you do.
Step-by-Step Guide: How to Perform Frog Pumps With Perfect Form
Getting the most out of frog pumps starts with dialing in your setup and paying attention to the small details that often get overlooked.
While the movement itself is short and simple, doing it with the right form ensures you’re targeting your glutes—not compensating with your lower back or hamstrings.
Start by lying flat on your back.
Bring the soles of your feet together so they’re touching, then pull them in toward your hips.
Let your knees fall outward naturally into a butterfly or frog-like position. You want your feet to stay connected and your knees comfortably splayed without forcing the stretch—just enough to create external hip rotation.
This leg setup is what gives the frog pump its name and its effectiveness.
Your arms can lie flat at your sides, palms down, or you can bend your elbows and point your forearms upward if it helps keep your shoulders engaged and grounded.
Either position is fine, as long as it keeps your upper body stable and relaxed.
Before you move, brace your core.
Draw your belly button down gently—like you're tightening a belt—so you’re not arching your lower back.
Keep your spine in a neutral position throughout the movement, and tuck your chin slightly to avoid strain on your neck.
Your shoulders should stay pressed into the ground with no tension in the neck or upper back.
To start the rep, press the outer edges of your feet into each other and into the floor.
Squeeze your glutes and lift your hips until your knees, hips, and shoulders form a straight line.
At the top, engage in a slight posterior pelvic tilt—this means your tailbone should tuck slightly under, not flare upward.
You’re aiming for full glute contraction here, not just going through the motion.
Pause briefly at the top, maintaining tension in your glutes.
Then lower your hips with control, not speed.
You can either let your hips hover just above the ground or come to a full rest between reps depending on your goal—continuous reps keep the glutes under tension longer, while brief resets may help reinforce form.
Keep your breathing steady. Inhale on the way down, exhale as you squeeze and lift.
Avoid holding your breath, especially if you're doing high-rep sets, and stay mindful of your rhythm.
Rushing through the motion can reduce its effectiveness, while staying connected to your breath helps maintain form and focus.
The key throughout every rep is control—both in how you move and how you engage your muscles.
If your glutes lose tension at any point, slow down and reset.
Proper form will always beat high rep counts when it comes to results.
Avoid These Common Mistakes That Sabotage Your Glute Gains
Even a well-targeted movement like the frog pump can become ineffective—or even counterproductive—if your form slips.
These mistakes may seem small, but they add up fast and can take the load off your glutes, shift stress to the wrong areas, and limit the overall benefit of the exercise.
One of the most common issues is overextending your hips at the top of the movement.
If you’re pushing so high that your lower back arches and your ribs flare upward, you’re no longer relying on your glutes to drive the lift.
Instead, you’re shifting the effort into your lumbar spine.
This can lead to discomfort, poor muscle activation, and reduced gains.
The solution is to stop just short of hyperextension and focus on creating a strong glute squeeze at the top with a slight posterior pelvic tilt.
That’s what keeps the tension exactly where it belongs.
Another frequent mistake is poor spine positioning, both at the bottom and top of the movement.
A sagging spine at the bottom often comes from letting go of core engagement.
You want to avoid collapsing into the ground, which not only reduces glute involvement but also puts unnecessary pressure on the lower back.
On the other end, arching too much at the top—as already mentioned—also disengages the glutes and recruits compensating muscles.
Keeping a neutral spine throughout with your core lightly braced is the fix here.
It’s also easy to lose glute tension partway through a set, especially during high-rep work.
When this happens, other muscles—often the groin or hamstrings—start stepping in to pick up the slack.
That usually means you’re either letting your knees drift inward, pushing through your heels instead of the edges of your feet, or simply going too fast.
Staying intentional with your reps and maintaining outward knee pressure can help.
If you find yourself struggling to feel your glutes working, try adding a light resistance band just above your knees.
It adds external feedback and makes it easier to keep everything properly engaged.
Don’t overlook neck and upper back positioning, especially if you have any cervical spine issues.
A common error is craning the neck or pressing the head forcefully into the floor, which can create strain or even dizziness.
Keep your chin gently tucked and your head resting naturally.
If you’re working on a hard surface, use a mat or pad for support—comfort plays a role in consistency.
Fixing these form errors doesn’t just make the movement safer—it makes it more effective.
If your goal is stronger, fuller glutes, then paying attention to these details isn’t optional.
It’s part of what makes your reps count.
Programming Tips: Sets, Reps, and When to Add Resistance
Frog pumps might be simple in movement, but how you program them makes all the difference in results.
Whether you're just starting out or using them as a targeted tool in an advanced glute routine, adjusting reps, sets, and load strategically is key to making consistent progress.
If you're new to frog pumps, begin with 2 to 3 sets of 12 to 20 reps using just your bodyweight.
Focus on mastering the form, building mind-muscle connection, and maintaining glute tension from start to finish.
Don’t worry about volume or speed early on—quality reps matter more than quantity at this stage.
For more experienced lifters or those looking to build endurance and metabolic stress in the glutes, ramping up the rep range works well.
Three sets of 30 to 50 reps is a solid target.
You can also try AMRAP (as many reps as possible) in one minute.
This creates a serious burn and floods the muscles with blood, which is great for hypertrophy and activation before or after heavier lifts.
Once you’re able to consistently hit higher-rep sets with control and good form, that’s a signal you can start adding resistance.
A small dumbbell, kettlebell, or mini barbell placed across the hips works well.
You’ll want to drop your reps back down to around 3 sets of 15 to 20 once weight is introduced, since the goal now shifts from endurance to strength and muscle growth.
Continue emphasizing glute squeeze and range of motion over how much weight you're moving.
In terms of placement within your workout, frog pumps are incredibly flexible.
They work well as a glute activation drill in your warm-up, especially before compound lifts like squats or deadlifts.
Doing a few high-rep bodyweight sets can wake up the glutes and reinforce proper movement patterns.
You can also plug them into the middle of a workout to complement heavier glute exercises.
For example, pairing weighted hip thrusts (mechanical tension) with bodyweight frog pumps (metabolic stress) hits both ends of the hypertrophy spectrum.
And of course, they’re a great choice as a finisher—especially with bands or light weight—to fully exhaust the glutes and get that final burn.
Foot placement is another variable worth adjusting as you progress.
Keeping your feet closer to your hips puts more tension directly on the glutes and increases the difficulty of each rep.
On the other hand, sliding your feet slightly farther away will start to recruit the hamstrings more.
Neither position is wrong—it just depends on what you’re targeting.
For pure glute work, closer is usually better.
With thoughtful programming and progression, frog pumps can stay relevant in your routine long after they stop feeling “easy.”
The key is knowing how to keep the challenge up while staying focused on quality movement and glute engagement.
Who Should Modify or Avoid Frog Pumps?
While frog pumps are a highly effective glute movement for most people, they’re not ideal for everyone in their standard form.
Certain limitations or discomforts can make the exercise less effective—or even counterproductive—if they’re not addressed or adjusted properly.
If you have limited hip mobility or experience discomfort in the butterfly position (soles of the feet together, knees splayed out), the frog pump setup can feel awkward or even painful.
This isn’t uncommon, especially if your hips are tight or your inner thighs are overly restricted.
Forcing your knees into external rotation without enough range can strain the groin or hips and reduce glute activation.
In this case, a traditional glute bridge—with feet flat and knees bent—offers a safer and more manageable starting point.
Once your hip mobility improves through stretching and gradual exposure, you can revisit frog pumps with a modified range.
Another reason to steer clear of frog pumps—at least temporarily—is neck or cervical spine discomfort.
Because the movement requires lying on your back with your head in contact with the floor, anyone dealing with neck stiffness, disc issues, or pressure sensitivity may find the position aggravating.
If that’s you, pressing your head back or lifting aggressively through the neck can lead to strain.
Until those issues are resolved, skip floor-based glute work like frog pumps and focus on upright or quadruped alternatives, such as standing kickbacks or banded hip abductions.
It’s also worth paying attention to how your body compensates during lower-body exercises.
If your quads or hamstrings consistently take over in movements meant to target the glutes, jumping straight into frog pumps might not fix the problem—it could reinforce it.
In this case, it's better to first incorporate glute-isolation drills like clamshells, prone leg lifts, or banded glute bridges, which build the foundation for proper glute recruitment.
Once your brain learns to fire the right muscles, frog pumps become a much more effective tool rather than just another repetition of faulty movement patterns.
The bottom line: frog pumps are incredibly useful—but only when your body’s ready for them.
If mobility, discomfort, or compensation patterns are getting in the way, adjusting the movement or choosing a more suitable alternative will help you get the results you’re after without the risk.
How to Make Frog Pumps Work for You: Customization & Integration
Frog pumps are adaptable, which makes them easy to slot into almost any lower-body training plan.
Whether you're warming up, chasing a glute pump, or finishing off a heavy day, how you use them matters just as much as how you perform them.
One of the most effective ways to integrate frog pumps is as part of a three-phase glute session.
You might start with bodyweight frog pumps as an activation drill—doing 2 sets of 20 reps to wake up the glutes and prep the hips before loading up on squats, deadlifts, or hip thrusts.
From there, you can shift into heavy compound lifts to drive mechanical tension.
Then, finish with banded or weighted frog pumps to push the glutes into fatigue.
This approach combines different types of muscle stimulus for well-rounded development.
Pairing frog pumps with other glute-dominant exercises can also enhance the results.
For example, after completing a set of heavy hip thrusts, drop immediately into high-rep frog pumps for a potent mechanical tension + metabolic stress combo.
This pairing keeps the glutes under tension longer and drives better muscle engagement.
Another smart pairing is frog pumps followed by single-leg movements like lunges or Bulgarian split squats—this helps reinforce glute activation through more dynamic, balance-challenging work.
If bodyweight reps start to feel too easy, you have several progression options.
One is to slow down your tempo, especially on the lowering phase—counting 3–4 seconds down increases time under tension and forces better muscle control.
You can also add a resistance band just above the knees to keep the abductors firing throughout the set, which reduces the tendency for the groin or hamstrings to take over.
Another variation is to elevate your feet slightly by placing them on a low platform or yoga block, which changes the angle and can increase glute demand, especially during the top of the lift.
As you continue to progress, keep reinforcing the same key movement cues: press the edges of your feet into each other and the ground, keep your knees driving outward, and squeeze your glutes fully at the top of every rep.
These details don’t change with load or volume—they’re what make the movement work in the first place.
Perhaps most importantly, use frog pumps regularly to improve your mind–muscle connection with your glutes.
That ability to feel and control your glutes working carries over into more complex movements.
Over time, that builds better movement patterns, helps prevent injury, and leads to better results across your entire lower-body routine.
Conclusion
Frog pumps are a simple but powerful way to target your glutes with precision.
When done correctly and programmed thoughtfully, they can improve activation, strength, and muscle growth.
Use them consistently, stay focused on form, and they’ll earn a lasting spot in your glute training routine.