If you want stronger glutes, focus on exercises that directly target and activate the gluteus maximus through hip extension and controlled resistance.
The five best moves for this are barbell hip thrusts, Romanian deadlifts, Bulgarian split squats, step-ups, and glute bridges—each designed to build strength where it counts.
Keep reading for a deeper look at how each one works and how to do them right.
Why Glute Strength Matters More Than You Think
You might associate strong glutes with aesthetics, but their role goes far beyond how you look in jeans.
The glute muscles—particularly the gluteus maximus—are central to how you move, stabilize, and protect your body, both in the gym and throughout daily life.
The Glutes: More Than Just a Muscle Group
The gluteus maximus is the largest and most powerful muscle in the human body, and for good reason—it’s responsible for hip extension, which is a fundamental part of almost every movement involving walking, standing, jumping, or lifting.
Alongside it, the gluteus medius and minimus help with lateral movement and pelvic stability.
Together, these muscles play a key role in keeping your body upright, aligned, and moving efficiently.
When the glutes are strong and functioning well, they act like a powerhouse that supports your lower back, stabilizes your hips, and creates force for explosive movement.
This is why glute strength isn’t just useful for athletes—it’s foundational for anyone who moves, stands, or sits for extended periods.
The Real-World Benefits of Strong Glutes
You don’t have to be training for a marathon or lifting heavy weights to benefit from stronger glutes.
Here’s how they impact both your everyday life and athletic performance:
- Better posture: Weak glutes often contribute to an exaggerated arch in the lower back (anterior pelvic tilt), which throws off your posture and places strain on your spine.
- Reduced risk of injury: Proper glute function offloads pressure from your lower back and knees, making you less prone to common issues like lower back pain or knee instability.
- Improved balance and coordination: Because the glutes help stabilize your pelvis, they’re essential for keeping you steady during single-leg movements or uneven terrain.
- More efficient movement: Whether you’re walking, climbing stairs, or sprinting, strong glutes reduce energy waste by helping you move more powerfully and efficiently.
- Enhanced performance: In sports, the ability to generate force through your hips is directly tied to actions like sprinting, jumping, changing direction, or lifting weights.
Are Your Glutes Actually Doing Their Job?
It’s not always obvious when your glutes aren’t firing the way they should, especially because your body is great at compensating.
That compensation, however, often leads to discomfort and inefficient movement.
Some common signs that your glutes may be underactive include:
- Lower back tightness after workouts or long periods of sitting
- Knee pain during squats or running
- Hamstring or quad dominance during exercises meant to target the glutes
- Visible pelvic tilt or swayback posture
- Poor balance during single-leg movements like lunges or step-ups
If you notice these signs, your body may be relying too much on surrounding muscles while the glutes take a back seat.
Activation work and glute-focused strength training can correct this over time.
Gluteus Maximus: The Engine Behind Hip Extension
The primary job of the gluteus maximus is hip extension—that is, driving your hips forward from a flexed position.
Think about what happens when you stand up from a chair, climb stairs, or finish a deadlift—those actions are all powered by hip extension.
Without strong glutes, those movements become inefficient and can shift load to the lower back or knees.
It’s also important to understand that just using the glutes isn’t enough; they need to be trained with intention.
That means exercises that load the hip through its full range of motion, promote full contraction at the top of the movement, and minimize compensation from other muscles.
Exercise #1: Barbell Hip Thrust – Maximum Glute Activation
When it comes to directly targeting the glutes, few exercises are as effective or efficient as the barbell hip thrust.
This movement is designed to load the glutes through a full range of motion, allowing for a powerful contraction at the top and progressive strength gains over time.
Why the Hip Thrust Works So Well
The barbell hip thrust is all about isolating the glutes and challenging them in their primary function: hip extension.
Unlike squats or deadlifts, which also engage the quads and lower back, the hip thrust keeps the focus squarely on the gluteus maximus.
By keeping the knees bent and the movement grounded in a horizontal plane, it removes some of the contribution from the hamstrings and emphasizes glute contraction at the top of the lift.
The mechanics of the movement are simple but impactful: you sit on the ground with your upper back supported on a bench, feet flat and about shoulder-width apart.
With a barbell resting across your hips (ideally with a pad for comfort), you drive your hips upward until your thighs are parallel to the ground and your torso is in line with them.
At the top, the glutes should be fully contracted and supporting most of the load.
What makes this exercise so effective for hypertrophy is the position of peak tension.
Because the glutes are most challenged at full contraction—when your hips are fully extended—it encourages high levels of muscle activation right where it matters most.
This is a key difference from squats or deadlifts, where the tension tends to shift as you move through the range.
Setup Tips for Better Results and Less Discomfort
Proper setup can make or break this movement—not just in terms of comfort, but also effectiveness.
Here’s what to pay close attention to:
- Bench height: The bench should be roughly knee height. If it’s too high or low, it can throw off your mechanics and reduce glute engagement.
- Barbell padding: Use a thick pad or hip thrust cushion to avoid bruising or pain from the bar resting on your hip bones.
- Shin alignment: At the top of the movement, your shins should be vertical. If your feet are too far forward or pulled too far back, you'll reduce glute involvement and may strain your knees or back.
- Neck and torso position: Keep your chin tucked slightly and eyes forward rather than looking up. This helps keep the ribs down and core engaged, which stabilizes your spine throughout the movement.
- Full lockout: Make sure you're not just lifting your hips but actually squeezing your glutes hard at the top. That final squeeze is where most of the benefit lies.
Programming for Strength or Growth
You can adjust your hip thrust training based on your specific goals:
- For hypertrophy (muscle growth):
Perform 3 to 4 sets of 8–12 reps, using a weight that challenges you by the final few reps without compromising form. Prioritize time under tension—controlled movements and a solid pause at the top help maximize muscle recruitment. - For strength development:
Reduce reps and increase weight. Aim for 4 to 5 sets of 5–8 reps, with longer rest periods between sets. Focus on explosive hip drive while still maintaining glute control at the top.
Whether you’re training for size or strength, the barbell hip thrust should be a staple in your routine if stronger, more active glutes are the goal.
When done with intention and proper form, it delivers consistent, measurable progress—and can often make the difference between glutes that simply look good and glutes that actually perform.
Exercise #2: Romanian Deadlift – Posterior Chain Power
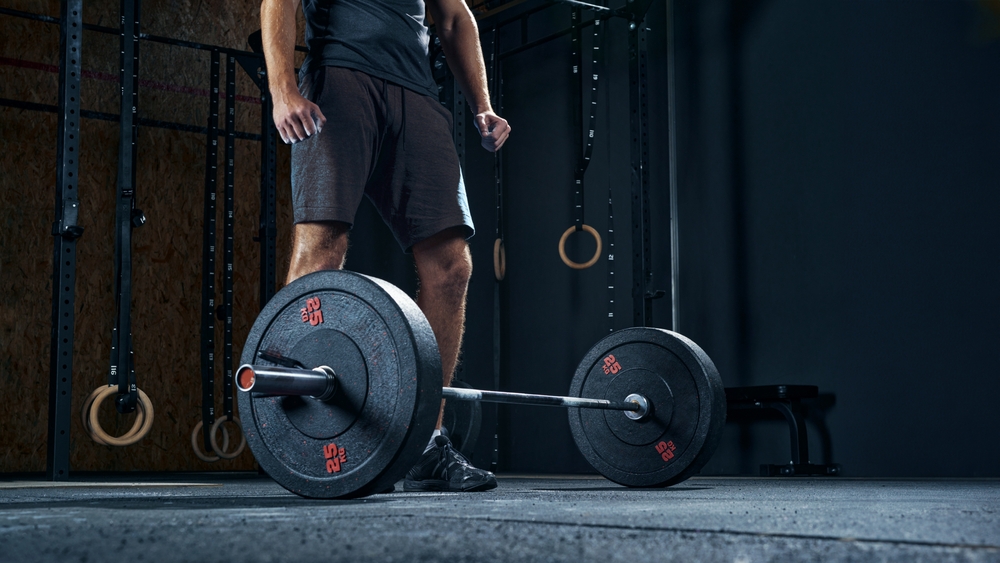
The Romanian deadlift (RDL) is one of the most effective exercises for building strength through the entire backside of your body, especially the glutes.
Unlike conventional deadlifts, RDLs emphasize the hip hinge and maintain tension throughout the lift, making them ideal for developing strong, resilient glutes without excessive strain on the spine.
Why the Hip Hinge Is a Game-Changer for Glute Growth
At the core of the RDL is the hip hinge—a movement pattern where the hips shift backward while the spine stays neutral.
This isn’t just good form; it’s essential for targeting the glutes.
Hip hinging loads the glutes in a stretched position and forces them to fire as you return to standing, directly strengthening their role in hip extension.
Many people over-rely on squats for glute work, but squats are quad-dominant.
If your goal is stronger glutes, incorporating hip hinge patterns is non-negotiable.
The key here is movement quality. Unlike explosive lifts, RDLs are about control.
The slower, more deliberate pace allows the glutes to stay under tension longer—one of the primary drivers of muscle development.
More Than Just Glutes: A Dual Focus on Strength and Mobility
One of the reasons RDLs are such a valuable tool is that they target two often neglected areas at once: glute strength and hamstring flexibility.
As you lower the barbell, the hamstrings stretch under load, which not only improves mobility over time but also strengthens the muscles through a lengthened range.
This stretch–contract cycle, especially when performed with good form, reinforces coordination between the glutes and hamstrings.
Over time, this reduces the risk of injury in both lifting and athletic settings, where those muscle groups are often under pressure to work together.
Technique Tips That Keep You Safe and Effective
To get the most out of the RDL—and protect your lower back—attention to detail matters.
Here’s how to fine-tune your setup and execution:
- Start from standing with the barbell held in front of your thighs, hands about shoulder-width apart.
- Keep a soft bend in your knees—you’re not squatting, so the bend should be enough to unlock the knees but not enough to shift the focus away from the glutes.
- Push your hips back as you lower the bar down the front of your legs. Think of closing a car door with your hips.
- Keep the bar close to your body, nearly grazing your legs throughout the movement.
- Maintain a flat, neutral spine at all times. Avoid rounding your back—if your range of motion forces you to lose spinal position, you’ve gone too far.
- Stop the descent once you feel a strong stretch in your hamstrings and your torso is roughly parallel to the floor (though this will vary depending on flexibility).
- Drive through your heels to return to standing, squeezing your glutes at the top without leaning back.
Grip choice can vary—double overhand is fine for moderate weights, but a mixed grip or straps may be needed for heavier loads to avoid grip fatigue limiting your glute work.
Protecting Your Back While Building Strength
Because the RDL places the load in front of your body and involves forward torso movement, it can put stress on the lower back if done incorrectly.
But when form is dialed in, it’s actually a back-friendly lift. The key is avoiding momentum and maintaining tension throughout the movement.
Don’t jerk the weight up or down—treat it as a slow, controlled motion from start to finish.
If you’re new to the RDL, start with lighter weights or even a pair of dumbbells to learn the pattern.
It’s also smart to pair RDLs with core stability work in your training week to reinforce spinal alignment and strength under load.
RDLs are versatile enough to include in a variety of training goals—whether you're after muscle size, athletic power, or injury prevention.
For most people aiming to strengthen their glutes, performing 3 sets of 10–12 reps at a moderate weight is a solid starting point.
The stretch you feel at the bottom? That’s your glutes and hamstrings doing exactly what they’re supposed to.
Exercise #3: Bulgarian Split Squat – Unilateral Strength & Balance
The Bulgarian split squat is a deceptively simple movement that delivers serious results for glute development.
By working one leg at a time, it forces each glute to pull its weight—literally—while improving balance, control, and stability in the process.
Why This Single-Leg Squat Variation Hits the Glutes Hard
Unlike traditional squats, which often shift much of the workload to the quads or can be dominated by the stronger leg, the Bulgarian split squat demands more from the supporting leg, especially the glutes.
With the rear foot elevated, the movement creates a longer range of motion and deeper stretch in the front leg, which places more tension on the glutes as you lower and rise.
One of the standout features of this movement is its ability to build strength through control.
There’s no bouncing out of the bottom like in a barbell back squat—you need to stay balanced, keep the movement smooth, and maintain alignment from top to bottom.
That all adds up to more time under tension and more muscle recruitment, particularly in the gluteus maximus.
The Forward Lean Trick That Makes a Big Difference
How you position your torso dramatically changes what muscles you emphasize.
Staying fully upright will recruit more quads, while a slight forward lean shifts the focus to your glutes.
This lean shouldn’t come from rounding your back—instead, it comes from hinging slightly at the hips while keeping your chest up and core braced.
This posture keeps the hips engaged and increases glute activation, especially as you drive up through the front heel.
Combined with the extended range from the rear foot elevation, this small adjustment creates a much more glute-focused variation of a classic movement.
Solving Strength Imbalances, One Leg at a Time
One of the biggest advantages of unilateral training is the ability to identify and correct asymmetries between sides.
Most people have a dominant leg that takes over during bilateral movements like squats or deadlifts.
The Bulgarian split squat forces both sides to work independently, helping to build balanced strength and reduce injury risk over time.
The movement also demands a high level of core engagement.
Since your base of support is narrow and staggered, your core must stabilize your spine and prevent you from tipping or twisting during the descent and ascent.
That added stability work enhances the transferability of strength to real-world movement.
Technique Tips for Better Results and Safer Form
There are a few setup details that can make or break this movement. Here’s how to stay aligned and focused where it counts:
- Foot placement: Your front foot should be far enough forward that when you lower into the squat, your front knee stays stacked directly over your ankle—not drifting too far forward or collapsing inward. If your knee shoots past your toes or caves in, reposition your stance.
- Rear foot elevation: Use a bench or box that’s about knee height. Keep the top of your foot resting flat, rather than balancing on your toes, to reduce ankle strain.
- Depth control: Lower until your back knee hovers just above the ground. Don’t rush this—move with control, especially at the bottom, where the glutes are most engaged.
- Weight distribution: Drive through the heel of your front foot as you rise. You should feel the work happening in your glute and hamstring, not your toe or back leg.
- Balance support: Holding dumbbells at your sides can help anchor your body and provide more balance than a barbell. You can also start with bodyweight if you're new to the movement.
For effective glute-focused training, aim for 3 sets of 8–10 reps per leg, adjusting the weight to match your control and range.
If one side feels significantly weaker, you can add an extra rep or two to that side each session until balance improves.
The Bulgarian split squat isn’t just a test of leg strength—it’s a diagnostic tool and performance enhancer rolled into one.
Mastering it can lead to stronger, more symmetrical glutes and better overall movement quality.
Rounding Out the Routine: Step-Ups and Glute Bridges
While barbell lifts and split squats build major strength, step-ups and glute bridges provide critical support—they reinforce stability, help correct movement patterns, and offer low-impact ways to keep your glutes engaged.
These two movements bring balance to a glute-focused routine, whether you’re a beginner or looking to fine-tune performance.
Step-Ups: Functional Strength That Transfers to Real Life
Step-ups are as practical as they are effective.
They mimic everyday movements like climbing stairs or stepping over objects, but when loaded correctly, they can deliver a serious challenge to the glutes—particularly the gluteus maximus.
Because they train one leg at a time, they also improve coordination and help reduce left-right strength differences.
A key detail that often gets overlooked is platform height.
The higher the step, the more the hip is flexed at the start of the movement, which increases the demand on the glutes during extension.
Ideally, aim for a height where your front knee is at or just below 90 degrees when your foot is on the platform.
Anything higher can compromise balance and shift stress to the lower back if your mobility isn't ready for it.
Another essential cue is how you push off the front foot.
Driving through the heel, not the toe, activates the glutes far more effectively.
If you find yourself using momentum or pushing off the back foot, try slowing down the ascent and focusing on pressing up with intent—this makes a noticeable difference in glute engagement.
You can use dumbbells at your sides for added load or perform step-ups with just your body weight for higher reps.
Either way, control the motion on both the way up and the way down.
That eccentric control—lowering yourself back to the ground—is where much of the muscle-building benefit happens.
For balanced glute work, perform 3 sets of 10–12 reps per leg, ensuring each rep is deliberate and driven by the working glute.
Glute Bridges: Building the Foundation from the Ground Up
The glute bridge is often the first glute-focused movement people learn—and with good reason.
It’s simple, safe, and effective for isolating the glutes without loading the spine.
That makes it ideal not just for beginners, but also as a warm-up or burnout exercise to reinforce glute activation before or after more intense lifts.
To perform a basic glute bridge, lie on your back with your knees bent, feet flat and shoulder-width apart.
Press through your heels to lift your hips, squeeze your glutes hard at the top, and hold for a brief pause before lowering under control.
Your shoulders and feet should stay grounded throughout.
What makes this movement so valuable is how it reinforces glute control and endurance.
Holding the top position teaches you to engage the glutes without compensating with the lower back or hamstrings—something many people struggle with during more complex lifts.
For added challenge, there are several progressions you can layer in:
- Single-leg glute bridges: These increase the demand on each glute individually and challenge pelvic stability.
- Elevated glute bridges: Placing your feet on a bench increases the range of motion, creating more stretch and contraction.
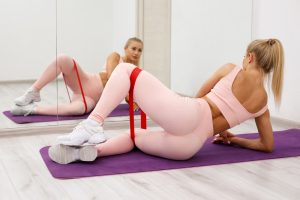
- Banded bridges: Adding a resistance band around your knees engages the gluteus medius and helps correct knee tracking issues.
Start with 3 sets of 15–20 reps, focusing on quality and control rather than speed.
If your glutes aren’t firing well during heavier movements, inserting glute bridges into your warm-up can help “wake them up” so they contribute more effectively during your main lifts.
Together, step-ups and glute bridges reinforce the muscle patterns you need for long-term glute development.
They may not look as intense as barbell movements, but their impact—especially when done consistently—is anything but minor.
Making Progress: Programming, Form, and Long-Term Gains
Building stronger glutes isn’t just about picking the right exercises—it’s about how you use them over time.
Smart programming, focused execution, and a consistent routine are what actually lead to results that last.
Progressively Overload or Plateau
Your glutes—like any other muscle group—respond best to progressive overload.
That means gradually increasing the challenge of your workouts by adding weight, reps, or improving technique over time.
But progress doesn’t mean jumping straight to heavy weights each week.
Small, steady increases are far more sustainable and safer.
Here are a few simple ways to apply overload:
- Increase weight in small increments when your current load feels manageable across all sets.
- Add 1–2 more reps per set, particularly for bodyweight movements like glute bridges or step-ups.
- Slow down the tempo—especially during the eccentric (lowering) phase—to increase time under tension.
- Add a pause at the point of peak contraction (like at the top of a hip thrust or glute bridge) to intensify muscle recruitment.
The goal isn’t to max out—it’s to make the muscles work harder than they did the previous week, without sacrificing technique.
Train Often Enough, but Recover Fully
Glutes can be trained multiple times per week, but they still need time to recover between sessions to rebuild and grow.
A good rule of thumb is 2–3 focused sessions per week, allowing at least 48 hours of rest between those sessions.
This spacing gives your muscles the downtime they need to recover and helps prevent overtraining symptoms like joint pain or chronic soreness.
You can still train on the other days—just avoid overlapping muscle groups or using high-intensity movements that indirectly fatigue the glutes (like long-distance running or heavy squatting on back-to-back days).
Good Form Isn’t Optional—It’s the Foundation
Progress doesn’t count if you’re doing the movements wrong.
Pushing too much weight with poor form doesn’t just reduce effectiveness—it increases your risk of injury and slows long-term development.
Common signs you’re sacrificing form include:
- Relying on momentum instead of controlled movement
- Arching your lower back to finish a rep
- Using your quads or lower back instead of your glutes
When in doubt, lighten the load and dial in your technique.
The more accurately you train the glutes, the faster they’ll respond.
Consistency Beats Intensity
You won’t see progress from one great workout—it’s what you do week after week that builds real results.
Consistency with your routine, rest, and nutrition matters far more than any individual session.
If you want to track your progress effectively, keep it simple:
- Record your weights, reps, and notes on form each session
- Revisit previous weeks to see what’s improved (or what hasn’t)
- Monitor how exercises feel—a stronger mind-muscle connection is a solid sign you’re doing things right
Even when progress feels slow, showing up consistently and doing the work right always adds up over time.
When to Bring in a Pro
If your results stall or you’re unsure whether your form is on point, it’s worth investing in a qualified trainer—even just for a few sessions.
A good coach can spot issues you may not feel or see and can help you troubleshoot sticking points in your technique or programming.
This is especially useful if you're lifting heavier loads or dealing with previous injuries.
Whether you're just starting or refining an established program, expert feedback can fast-track your progress and give you confidence in your approach.
Conclusion
Stronger glutes don’t come from guesswork—they come from smart, consistent training with the right exercises.
Focus on form, apply gradual progression, and give your body time to recover.
Stick with it, and you’ll build strength that shows up both in and out of the gym.


