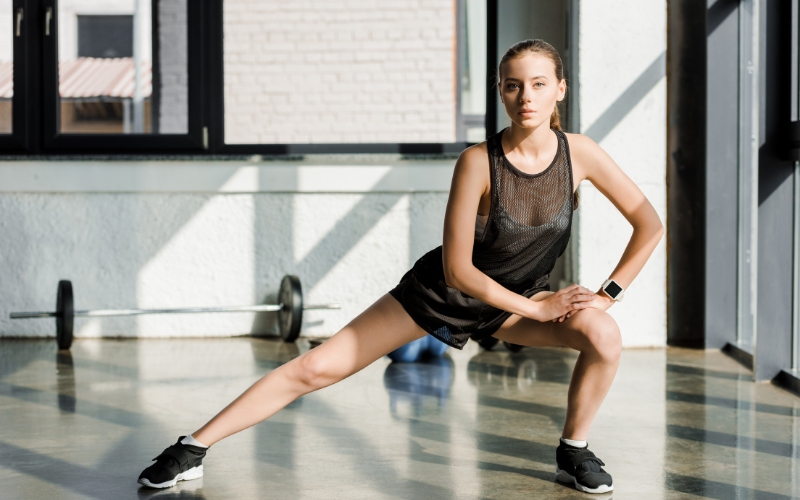
Your body needs the lateral lunge because it's the simplest way to train side-to-side movement, a direction your squats, deadlifts, and forward lunges almost completely skip, and doing so builds the hip and groin strength tied to fewer knee and groin injuries plus better balance on uneven ground.
Keep reading to see exactly how it works and how to add it to your training.
What Makes the Lateral Lunge Different From Every Other Lunge
Your body moves through three planes of motion, and most gym programs only train one of them. The sagittal plane covers forward and backward movement, the frontal plane covers side-to-side movement, and the transverse plane covers rotation.
Squats, deadlifts, and forward or reverse lunges all live in that first category — they load your legs as you move straight ahead or straight back, which means your body gets plenty of practice going forward but almost none going sideways.
That's the gap the lateral lunge fills. It's a unilateral, frontal-plane movement, meaning you work one leg at a time while shifting your weight side to side instead of front to back. The mechanics are straightforward once you break them down:
- You step wide to one side rather than forward
- Your hips push back as you sink into the stepping leg, essentially performing a single-leg squat
- The opposite leg stays straight and long, anchoring you as your weight shifts laterally
- You drive back through the working leg to return to center
That sideways weight shift is what sets it apart from its close cousin, the stationary lateral squat. In the lateral squat, your feet stay planted the whole time, which lets you handle more load but removes the balance challenge.
The lateral lunge adds a stepping phase, so on top of the strength demand, you're also controlling momentum and stability as your body moves through space — a “stability factor” the stationary version doesn't ask for.
One naming note worth clearing up: side lunge, side-step lunge, and lateral lunge all refer to the same stepping movement and get used interchangeably.
The lateral squat is the odd one out — same muscles, same plane, but a distinct, more stable exercise because the feet never leave the floor.
The Muscles It Trains and Why They're Usually Neglected
The working leg does most of the heavy lifting here. Your glutes drive hip extension as you push back to standing, your quads control the descent and extend the knee, and your hip adductors — mainly the adductor magnus and adductor longus — lengthen under load as you sink into the lunge and pull yourself back toward center.
A layer of secondary muscles keeps everything stable while that happens:
- Glute medius and minimus, which stop the working knee from caving inward
- Hamstrings, which assist hip extension and help brake your descent
- Calves, along with the small muscles of the foot and ankle that stabilize your base
- Core muscles — transverse abdominis, obliques, and erector spinae — that keep your torso from folding forward or rotating
What makes this exercise unusual is what happens to the trailing leg. While the working leg squats, the straight leg on the other side gets stretched through its adductors in a lengthened, loaded position — closer to a resistance stretch than a typical muscle contraction.
Very few common exercises ask the inner thigh to work this way, which is part of why the lateral lunge feels different from anything sagittal-plane training offers.
That novelty points to a bigger issue: most people simply don't move sideways very often. Daily life and standard workout programs are built around forward motion — walking, running, squatting, lunging forward — so the muscles responsible for frontal-plane control get very little practice.
Over time, that translates into weakness and tightness in the adductors and glute medius specifically, since nothing in a typical routine asks them to do real work.
The research on exactly how hard these muscles fire during a lateral lunge is thinner than you'd expect. The one study that measured adductor activation during a true side lunge found it ranked third out of six common hip exercises for adductor recruitment, behind side-lying hip adduction and ball squeezes — meaningful, but not the top adductor exercise available.
That same study only looked at the adductor longus. No published research has directly measured glute, quad, or hamstring activation for the lateral lunge itself, so claims about those muscles are based on general biomechanics and movement pattern, not hard EMG data.
The Real Benefits — Injury Prevention, Mobility, and Performance
This is where the lateral lunge earns its place in a program instead of staying a nice-to-have accessory move.
Knee protection starts with hip control. Dynamic knee valgus — when the knee caves inward during a squat, jump, or cut — is one of the strongest predictors of ACL injury risk. It happens when the glute medius and other hip abductors aren't strong enough to keep the femur properly aligned, letting it rotate inward under load. Because the lateral lunge trains those exact muscles in the exact plane where valgus occurs, building strength here directly targets one of the more modifiable risk factors for a serious knee injury.
Groin strains follow a similar pattern. Research on hockey and soccer players has tied groin and adductor strains to a specific imbalance: when adductor strength drops too far below abductor strength, injury risk climbs sharply. The lateral lunge loads the adductors directly, particularly in that lengthened position on the trailing leg, making it a practical tool for closing that strength gap before it becomes a strain.
The same lengthened position also builds mobility. As you sink into the lunge, the trailing leg's adductors stretch under tension rather than just holding a static position. That loaded stretch improves hip range of motion over time, which tends to show up as better depth and control in your squat and hinge patterns, too.
Balance and asymmetry get addressed almost as a side effect. Since you're on one leg through most of the movement, your body has to manage a real weight shift instead of staying centered, which sharpens proprioception and lateral balance. Training unilaterally also exposes side-to-side strength differences that bilateral lifts tend to mask, giving you a chance to correct them before they show up somewhere else.
On the field or court, this translates directly to performance. Cutting, shuffling, and changing direction are frontal-plane skills at the core of basketball, soccer, tennis, hockey, and pickleball. Athletes in these sports change direction constantly — soccer players cut hundreds of times a game, basketball players cover similarly high volumes of lateral movement — and the lateral lunge builds the strength and control those movements demand.
Off the field, the benefits look a little different but matter just as much:
- Stepping sideways to avoid an obstacle or make room for someone
- Getting in and out of a car without straining a hip or knee
- Catching your balance on a curb, gravel, or a patch of ice before it turns into a fall
None of these are dramatic athletic feats, but they're the moments where frontal-plane strength quietly does its job — or where its absence becomes obvious.
How to Perform the Lateral Lunge With Proper Form
Setup
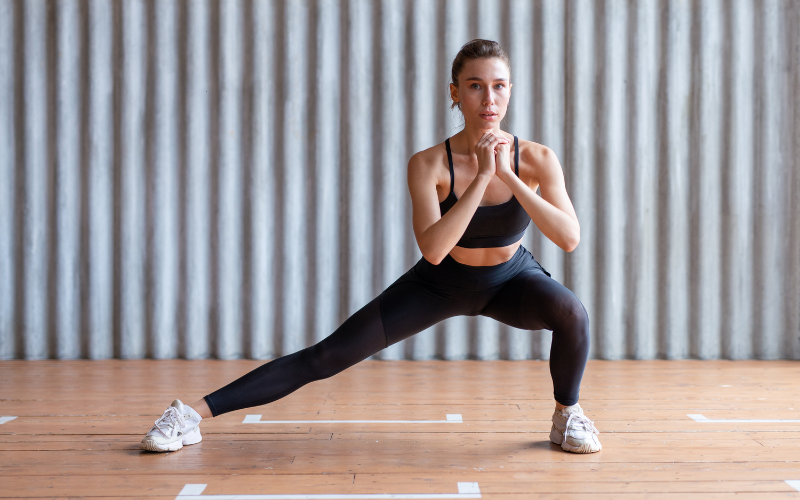
Start standing tall with your feet hip-width apart, facing forward. Brace your core like you're about to take a light punch to the stomach, and keep your hands clasped at chest height or resting on your hips for counterbalance.
This isn't just a formality — a sloppy starting position tends to produce a sloppy lunge, since you're already compensating before you even step.
Stepping out
Take a wide step directly to one side — roughly double the width of your normal squat stance — and plant that foot flat on the ground, toes pointing mostly forward with only a slight turn-out if needed. The opposite leg stays straight and long, anchoring you as your weight shifts.
The descent
The cue that matters most here is hips back before knee forward. Rather than dropping straight down, push your hips back and to the side as if sitting into a chair positioned next to you, bending the working knee as you go.
Lower until that thigh approaches parallel to the ground, or stop earlier if you notice your chest dropping, your heel lifting, or your knee drifting inward.
The shin on your working leg should stay close to vertical, with the knee tracking over your second toe, and both heels should stay flat on the floor throughout.
Breathing and the return
Inhale as you step out and lower into the lunge. Then push through the heel and midfoot of your working leg, squeezing the glute and inner thigh, to drive back to standing — exhaling as you push. Keep your torso upright the entire time; a slight forward lean is fine, but folding at the waist isn't.
Common mistakes to watch for
- Stepping too wide, which makes it impossible to keep the shin vertical and pulls the knee inside the foot — the single most common error, and the fix is simply shortening the step
- Letting the knee cave inward toward the midline, which stresses the inner knee and groin
- Dropping straight down instead of hinging the hips back, which jams the knee forward and shifts load away from the glutes and adductors
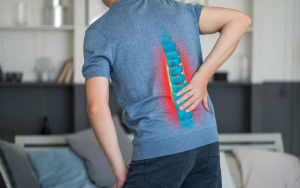
- Rounding or folding the back forward, which shifts stress to the lower back
- Rotating the trunk during the movement instead of keeping it purely side-to-side
- Letting the trailing leg bend, which cuts the stretch on the adductors and reduces the whole point of the movement
If mobility is limiting your depth
Most people simply haven't loaded their hips and ankles sideways before, so limited mobility in those joints can cap how deep you're able to go with good form.
Warm up the adductors, ankles, and hips specifically before your working sets, and only descend as far as you can control — depth should always be earned, not forced.
Programming — Sets, Reps, Progressions, and Variations
Sets and reps by experience level
- Beginner: 2–3 sets of 6–10 reps per side, supported or to half-depth, 90–120 seconds rest, 2–3 sessions per week
- Intermediate: 3–4 sets of 8–12 reps per side through the full bodyweight range, 120–180 seconds rest, 2–4 sessions per week
- Advanced: 3–5 sets of 6–12 reps per side with added load, tempo work, or a slider, 180–240 seconds rest, 2–4 sessions per week
Where it fits in your training
Frequency generally falls between one and three times a week, and where you place it depends on your goal. Used as an activation movement, it goes early in a session — right after your warm-up and before heavy squats or deadlifts — to wake up the hips and prime lateral stability.
Used as an accessory, it comes after your main compound lifts, when you're not trying to move maximal load and can focus purely on control and range of motion.
Either placement works; what matters is that you're not treating it as a primary strength builder the way you would a squat, since instability naturally caps how much weight you can handle.
The progression ladder
Build through this order rather than jumping straight to load:
- Supported or half-depth lunge — holding a rack, wall, chair, or TRX for balance while lowering only partway; ideal for beginners or anyone still building confidence and hip mobility
- Full bodyweight lateral lunge — aim for about three clean sets of 8–12 reps per side before adding any external load
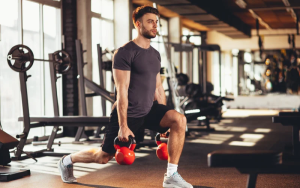
- Goblet lateral lunge — holding a dumbbell or kettlebell at chest height, which also helps keep the torso upright as demand increases
- Front-rack kettlebell lunge — a single weight racked at one shoulder, adding an anti-rotation core challenge on top of the leg work
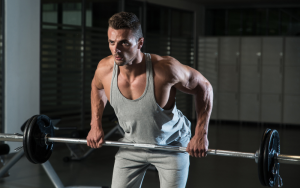
- Barbell lateral lunge — the most advanced loading option, reserved for once goblet and front-rack versions are no longer challenging
- Slider variation — a towel or slider under the trailing foot, sliding it out and back to keep constant tension on the adductors throughout the rep
Variations and what they emphasize
- Stationary lateral squat: feet stay planted the entire time, allowing heavier load with less balance demand — best for pure adductor and frontal-plane strength
- Curtsy lunge combo: pairs the side step with a crossing step behind, hitting the glute medius and pelvic control from a different angle
- Reach or toe-touch version: reaching the opposite hand toward the working foot adds a mobility and conditioning component on top of the strength work
- Skater lunge: a dynamic, often plyometric version that mimics a crossover cutting motion, building rate of force development and single-leg landing control
- Cossack squat: a deeper, more mobility-intensive stationary variation for those with the hip and ankle range to support it
Rep ranges by goal
If strength is the priority, stick to roughly 2–4 sets of 6–8 reps loaded as heavy as clean form allows. If hypertrophy or endurance is the focus, 2–4 sets of 10–15 reps works better.
You'll rarely see this movement programmed below 6 reps per side, since its main value lies in stability and mobility rather than moving maximal weight — dropping the reps too low defeats the purpose of the exercise.
Who Should Modify It and How to Progress Safely
The lateral lunge works well for most healthy adults, but a handful of situations call for caution, modification, or a different exercise entirely. As always, check with a clinician for guidance specific to your situation.
Conditions that call for modification
- Knee pain, meniscus irritation, or ligament instability: the wide stance and deep bend create lateral force that can aggravate the medial knee, especially if it caves inward. Shorten the stance, stay to half-depth, use support, or switch to reverse lunges until knee tracking is reliable.
- Groin strain or irritated adductors: since the movement loads the inner thigh in a lengthened position, an already-strained adductor won't tolerate it well. Drop back to sumo squats or short-range side lunges until the area can handle a loaded stretch.
- Hip impingement or labral symptoms: deep side lunges close the working hip into flexion, which can provoke pinching in someone with FAI. Reduce depth, turn the toes out slightly, or substitute glute bridges while rebuilding hip control.
- Recent knee, hip, ankle, or groin surgery: get clearance before adding this in. Most return-to-training plans restore bilateral patterns like squats before reintroducing unilateral, lateral ones.
- Pregnancy or early postpartum: use a supported stance, a smaller step, and less depth. Stop immediately and check with a pelvic-floor physical therapist if you notice pressure, heaviness, leakage, or pelvic pain.
- Vertigo or balance disorders: the sideways weight shift raises fall risk. Hold onto a stable support or stick to the stationary lateral squat until balance improves.
- Limited ankle or hip mobility: insufficient range forces compensation elsewhere, often at the knee. Address mobility first, elevate the target foot slightly, or default to the stationary lateral squat instead.
The rule that overrides all of this
Regardless of your starting point, let form set the ceiling on depth and load — never the other way around. Stop the set the instant you notice the knee caving inward, the working heel lifting off the ground, the torso folding forward, or the trailing leg bending because the stance is too wide. Sharp joint pain is a stop signal, not something to push through.
When to progress or pull back
- Progress load, depth, or complexity when you can complete all prescribed reps with clean form and feel no joint irritation the next day
- Regress — shorten the stance, reduce depth, add support, or switch to the stationary lateral squat — the moment you notice pain, instability, or a breakdown in form
- Any of the cautionary conditions listed above should prompt a clinician check before you add load laterally
The bigger picture
If your training consists mostly of squats, deadlifts, and forward lunges, you're almost certainly sagittal-plane dominant, and the lateral lunge is the most direct way to close that gap.
Used consistently and progressed carefully, it builds the frontal-plane strength and control that the rest of your program simply doesn't touch.
Conclusion
The lateral lunge closes a gap that most training programs leave wide open, giving your hips, adductors, and knees the side-to-side strength and control that squats and deadlifts simply don't build.
Start with bodyweight reps, master the hip-back pattern, and progress load only as your form stays clean.
Add it consistently, and you'll move better in every direction, not just forward and back.