To do a deficit-to-shoulder-tap pushup correctly, elevate your hands on a dumbbell, blocks, or parallettes, lower your chest below hand level with your elbows tucked at roughly a 45-degree angle, press back up powerfully, then pause at lockout to lightly tap your opposite shoulder while keeping your hips and shoulders completely square.
Keep reading for a full breakdown of the setup, common mistakes, and how to progress into this move safely.
What Makes This Pushup Different
This exercise is really two separate challenges stacked on top of a normal pushup. The first is a deficit: elevating your hands on a dumbbell, parallettes, blocks, or plates so your chest can drop below hand level instead of stopping at the floor.
That extra distance stretches your chest, shoulders, and triceps more than a standard pushup allows. The second challenge comes at the top of the rep, once you've pressed back up to lockout.
That's when you lift one hand off its support and tap it to your opposite shoulder, momentarily balancing on three points instead of four.
You'll run into two versions of this move, and they're not quite the same exercise:
- Single-arm (asymmetrical) version — You grip one dumbbell with one hand while the other stays flat on the floor. This creates a deficit on only one side, and you tap with the free hand.
- Symmetrical version — Both hands are elevated on matching supports, and you alternate which hand taps each rep.
The single-arm setup adds an extra layer of instability since your load isn't even side to side, while the symmetrical version keeps things balanced but still demands the same anti-rotation control during the tap.
Each half of the movement is doing its own job. The deficit is there to buy you range of motion and a deeper stretch — it's a chest and shoulder builder.
The tap, on the other hand, has almost nothing to do with your chest at all. It's a core drill disguised as an upper-body exercise, forcing your obliques and deep trunk muscles to keep your hips and shoulders from twisting open the instant you remove a hand from the ground.
One more thing worth knowing before you start: this isn't a move you rush through. It's built around power and control, not speed. The goal is a fast, forceful press out of the bottom followed by a stable, controlled tap — not a race to bang out reps.
Step-by-Step Setup and Execution
Getting this move right starts before you even lower your body. Your equipment choice and setup determine how much depth you can safely access, so it's worth getting that piece right first.
Choosing and placing your implement
Dumbbells, push-up bars, parallettes, and blocks all work, but they behave differently:
- Dumbbells (Forzaglia's preferred tool) work well for the single-arm version, though round ones can roll if you're not careful
- Push-up bars and parallettes give you a neutral wrist grip, which is easier on the joints over time
- Blocks and plates are simple substitutes if you don't have specialized equipment
Space your supports slightly wider than shoulder-width, leaving enough room for your chest to pass between them on the way down.
Building your starting position
Set up in a high plank with your hands directly beneath your shoulders. Your feet should sit just beyond hip-width — wider than you'd use for a standard pushup — since that extra width gives you a more stable base for resisting rotation later.
From here, create tension through your whole body: squeeze your shoulder blades together, brace your abs, and clench your glutes so your spine stays in a straight, rigid line from head to heels.
Keep your eyes on the floor slightly ahead of you rather than looking up, which keeps your neck neutral and your shoulder blades in a better position.
The descent and bottom position
Lower yourself under control, tucking your elbows in so they bend at roughly a 45-degree angle through the armpit rather than flaring out to the sides.
Let your chest travel past where the floor would normally stop you, dropping below the level of your hands. Pause briefly at the bottom — this is where the deficit pays off, giving your chest and shoulders a deeper stretch than a standard pushup ever could.
Don't let your shoulders collapse or shrug up toward your ears here; stay tight even at your lowest point.
Pressing back up
Drive through your palms with real force, extending your elbows until you're back at a firm, locked-out plank. Your hips and shoulders should reach that top position at the same moment — if your hips lag behind or shoot up first, you've lost some of the rigidity you built at the start.
The tap
Once you're fully locked out, shift your weight slightly onto the supporting hand, lift the other one, and tap it lightly against your opposite shoulder. Hold that position for about a second, keeping your hips and shoulders completely still and square. Then place your hand back down and move into your next rep.
Breathing
Inhale as you lower into the deficit, then exhale forcefully as you press back up and through the tap. This isn't just about oxygen — a controlled exhale on the way up helps you maintain the trunk stability you need to keep the tap clean.
Common Mistakes and How to Fix Them
Most breakdowns in this exercise happen at one of two moments: the tap, where you lose a point of contact, or the descent, where the deficit tempts you to cut corners. Here's what tends to go wrong and how to clean it up.
Hip rotation during the tap
This is the most common flaw, and it's almost unavoidable if you're not actively fighting it. The moment you lift one hand, your torso wants to twist toward that side.
Fix it by widening your foot stance for a more stable base, bracing your core hard right before you lift your hand — as if you're anticipating a punch to the stomach — and slowing the whole movement down.
If your hips still shift noticeably even with these adjustments, the variation is currently too advanced for you, and it's worth regressing to a simpler version until your control catches up.
Sagging or piking hips
A drooping midsection usually means your core and glutes have checked out. Correct this by tucking your ribs down and thinking about tilting your pelvis slightly backward, as if drawing your belt buckle toward your chin, while squeezing your glutes on every single rep.
The moment you can't hold a straight line anymore, that's your signal to end the set rather than grinding out a sloppy rep.
Elbow flare
Letting your elbows drift out into a wide “T” shape puts unnecessary stress on your shoulders. Keep them tucked in toward your body, pointing back toward your feet rather than out to the sides.
Cutting the range short
If you stop your descent early, you're skipping the entire benefit of using a deficit in the first place. The chest needs to travel below hand level — within what your shoulder mobility comfortably allows — or you're just doing a regular pushup with extra equipment underneath you.
Rushing the tap
A fast, sloppy tap defeats the purpose of the anti-rotation demand and often breaks your pushup form in the process. Pause for a full second with your hand on your shoulder before resetting, and resist the urge to speed through this part just to get more reps in.
Wrist positioning
A flat palm on the floor forces your wrist into a sharp bend under load, which isn't ideal for everyone. Using dumbbells, push-up bars, or parallettes lets your wrist stay in a more neutral position.
If you are going flat-palmed, keep your hands under or slightly wider than your shoulders with fingers spread and pointed forward or slightly outward.
Looking up
Craning your neck to look forward extends your spine and pulls your shoulder blades out of position. Keep your gaze fixed on the floor a short distance ahead of you throughout the entire movement.
Muscles Worked and Why It's Effective
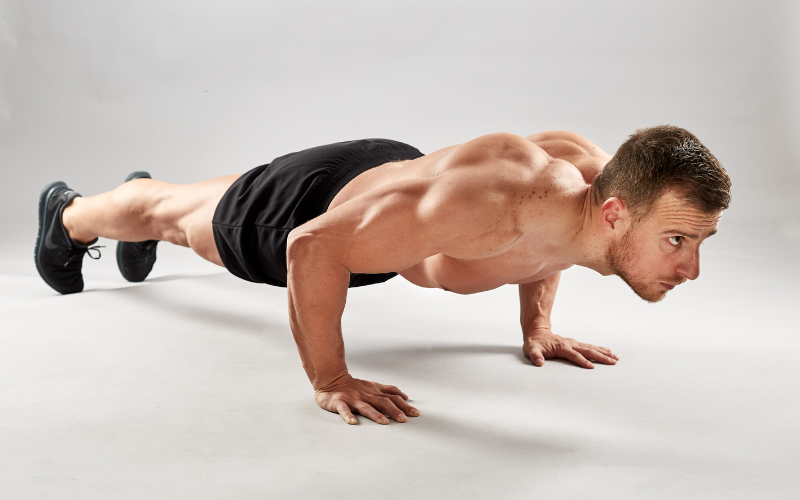
This exercise trains two distinct systems at once, which is part of what makes it so efficient. Understanding which muscles do what helps you appreciate why the deficit and the tap are both worth the extra difficulty.
Primary movers
The pressing portion of the movement relies on three main muscle groups:
- Pectoralis major — all three heads (upper/clavicular, mid/sternal, and lower/abdominal) drive the press and get a deeper stretch thanks to the extended range
- Anterior deltoids — assist heavily with the pressing motion, especially through the bottom portion of the rep
- Triceps brachii — all three heads extend the elbow to lock out each rep
One small study measured muscle activation in elevated versus grounded pushups using an 18-centimeter push-up bar with 20 male athletes.
Elevated pushups produced a higher average pectoralis major activation than grounded ones, though the difference didn't reach statistical significance.
Treat this as a suggestive data point rather than proof — it lines up with what the deeper range should theoretically produce, but it's not a definitive finding.
Core and anti-rotation muscles
This is where the tap earns its place in the exercise. The moment you lift one hand, these muscles kick in to keep your torso from twisting:
- Rectus abdominis and obliques (both internal and external) resist the rotational force created by removing a point of support
- Transverse abdominis provides deep trunk stability throughout the entire rep
- Erector spinae keeps your spine stabilized and prevents it from sagging or rounding
Supporting stabilizers
A few additional muscles work in the background to keep everything aligned. The serratus anterior helps stabilize and protract your shoulder blades during the press, while your glutes and quads keep your pelvis level and your lower body rigid throughout the set.
How it stacks up against other pushup variations
Compared to a standard pushup, you're getting a longer range of motion, a deeper stretch through the chest and shoulders, and a substantially higher core demand thanks to the tap.
Compared to a standard deficit pushup — one without any tap involved — you keep all the range and stretch benefits but add a real anti-rotation and shoulder-stability challenge on top.
That combination carries over well to other pressing movements, building the kind of trunk control and shoulder-girdle stability that supports bench pressing, overhead pressing, and eventually single-arm pushup work.
Programming, Progressions, and Regressions
Once your form is solid, the next question is how to actually build this into your training. Here's how to structure sets, adjust for your goals, and know when to make the move harder or easier.
A solid starting benchmark
A well-known prescription for this exercise is 3 to 4 sets of 8 reps per side. That's a reasonable target to aim for once you've got the mechanics down, and it works as a useful reference point whether you're just starting out or looking to compare your current output against a standard.
Adjusting rep ranges by goal
Your set and rep scheme should shift depending on what you're training for:
- Strength — lower reps, roughly 4 to 6 per side, with more sets
- Hypertrophy — moderate reps, around 8 to 12 per side
- Endurance — higher reps, in the 15 to 20 range per side
- Power — low reps performed explosively, prioritizing speed off the bottom over total volume
Where it fits in your training
This move works well in a few different contexts. Use it as accessory or finisher work at the end of a push day, after your heavier compound pressing is done. It also slots naturally into bodyweight circuits or a dedicated core and anti-rotation block, since the tap portion is doing as much for your trunk as your chest.
Rest and progression
Rest between 30 and 60 seconds, extending that if your form starts breaking down before the set ends. Only add reps once every single rep in a set keeps your hips and shoulders square — chasing volume before your control catches up just reinforces bad movement patterns.
Regressing the movement
If the full version is still out of reach, several regressions let you build toward it:
- Perform pushups from your knees to reduce load
- Reduce the deficit height or remove it entirely, working from the floor instead
- Practice shoulder taps from a static plank, without the pressing portion
- Use an incline setup, with hands elevated on a bench or box
- Widen your foot stance further for extra stability
Progressing the movement
Once the standard version feels controlled, you can increase the challenge in stages:
- Increase the deficit height
- Add a pause at the bottom of each rep
- Narrow your foot stance to demand more anti-rotation control
- Elevate your feet for a decline angle
- Add external load, such as a weighted vest
- Work toward reach-unders and eventually the one-arm pushup
Deficit height guidelines
Start conservatively at around 2 to 4 inches while you're still building control. Once your form is clean, progress to about 5 to 6 inches.
Anything beyond 8 inches is advanced territory and requires strong shoulder mobility and stability before attempting it — increase height gradually and back off if you feel any shoulder discomfort or notice your form breaking down.
Safety, Prerequisites, and Who Should Modify This Move
Before you add this exercise to your routine, it's worth being honest about whether your body is actually ready for it. This isn't a move where you can fake your way through weak spots — the deficit and the tap both expose gaps in strength and control fast.
Baseline requirements
You should be able to do the following comfortably before attempting the full movement:
- 10 to 15 clean standard pushups with good form
- A stable plank hold without your hips sagging
A benchmark worth testing
A useful checkpoint is 20 controlled plank shoulder taps, performed with a completely still torso. If you can hit that without your hips twisting or swaying, you're in a good position to start layering in the deficit and building toward the full exercise.
Shoulder considerations
The combination of a deep range of motion and single-arm loading puts real demand on your shoulders. If you have a history of impingement, rotator cuff issues, or general shoulder instability, this move carries meaningfully more risk than a standard pushup, and it's worth avoiding or heavily modifying until those issues are resolved.
Wrist considerations
Because the tap repeatedly shifts your full bodyweight onto one wrist, anyone dealing with wrist strain, arthritis, or limited wrist extension should stick to neutral-grip tools like dumbbells, push-up bars, or parallettes rather than going flat-palmed on the floor.
When to stop a set
Watch for the moment when your tap stops looking like a controlled rep and starts looking like a balance rescue — your torso swaying or lurching to keep you from falling over. That's your cue to end the set immediately rather than pushing through a few more sloppy reps.
A final reminder
Just because this exercise uses only your bodyweight doesn't mean it's inherently safe. A provocative position is still provocative regardless of load, and the deep range combined with reduced points of contact means this move deserves the same respect you'd give any advanced strength exercise.
Conclusion
The deficit-to-shoulder-tap pushup rewards patience: build your foundation first, then layer in the deficit and tap only once your form stays rock-solid at each step.
Progress gradually by adjusting one variable at a time, whether that's deficit height, foot stance, or added load, and always prioritize clean reps over rushing through volume.
Get the basics right, and this move becomes one of the most efficient ways to build chest strength and core stability at the same time.