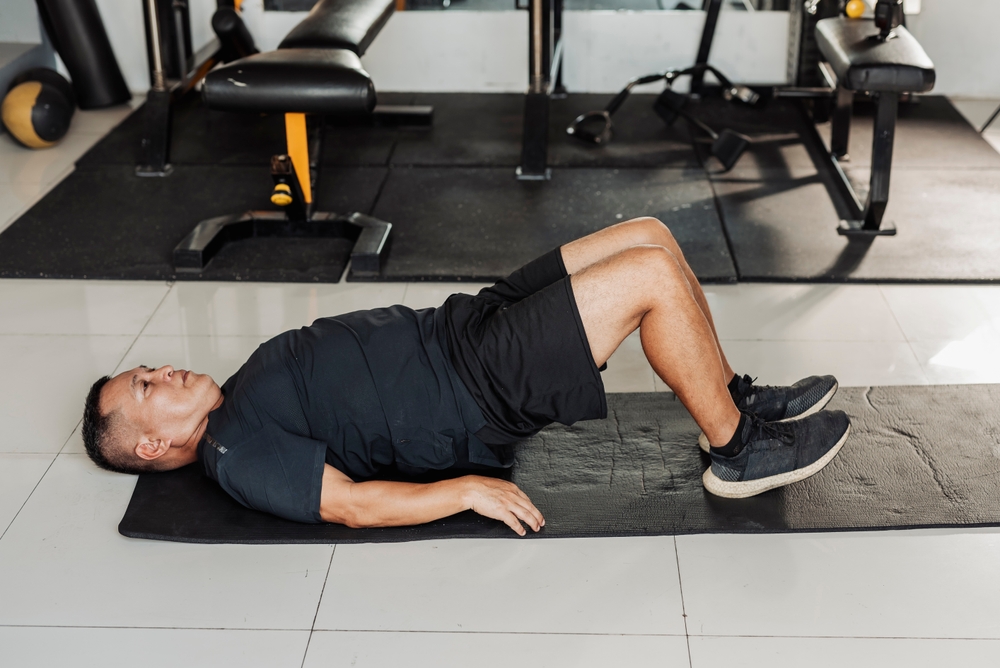
The glute bridge is performed by lying on your back with knees bent, then lifting your hips to create a straight line from your shoulders to your knees while squeezing your glutes.
This simple exercise is critically important because it strengthens weak glutes, prevents lower back pain, improves posture, and enhances athletic performance by targeting the muscles that stabilize your pelvis and power your movements.
Keep reading for the complete step-by-step technique, programming guidelines, and progressive variations that will help you master this fundamental exercise and transform your posterior chain strength.
Understanding the Glute Bridge: Your Gateway to Stronger Glutes
Think of the glute bridge as your entry point into serious posterior chain development.
You lie face up with your knees bent, then lift your hips until your body forms a clean line from shoulders to knees.
What makes this movement so valuable isn't complexity—it's the pure focus on hip extension while your glutes do the heavy lifting.
The glute bridge differs fundamentally from its stronger cousin, the hip thrust:
- Glute bridge: Bodyweight focus, perfect for muscle activation and endurance
- Hip thrust: Loaded barbell work, designed for maximum strength gains
This distinction matters more than you might think.
When you're just starting out or need to wake up dormant glutes, the bridge gives you that mind-muscle connection without overwhelming your system.
The hip thrust comes later, when you're ready to pile on serious weight.
Your body craves hip extension—it's one of the most fundamental movement patterns humans perform.
Every time you stand up from a chair, climb stairs, or sprint, you're using this same motion.
The glute bridge teaches your nervous system how to fire these muscles properly, creating a foundation that supports everything from deadlifts to jump squats.
Here's what sets the glute bridge apart from other exercises:
The accessibility factor changes everything.
You can drop down anywhere—your living room, a hotel room, the gym—and knock out a set without any equipment or lengthy preparation.
No weights to load, no machines to adjust, no excuses.
This simplicity makes the glute bridge suitable for everyone.
A complete beginner can start building strength and coordination, while elite athletes use it for activation work before their main training sessions.
The same movement pattern scales from rehabilitation to high-performance training, which explains why you'll find it in programs across every fitness level.
Most importantly, the glute bridge serves as your gateway to more advanced posterior chain work.
Master this pattern, and you'll have the foundation needed for hip thrusts, Romanian deadlifts, and other glute-dominant exercises that require solid hip hinge mechanics and proper glute activation.
Step-by-Step Technique: Mastering Perfect Glute Bridge Form
Perfect glute bridge execution starts before you even lift your hips.
The setup determines whether you'll feel this exercise in your glutes or waste energy fighting poor positioning.
The Foundation Setup
1. Position your body: Lie flat on your back with knees bent, feet planted firmly on the ground
2. Dial in your foot placement: Space your feet hip-width apart with toes pointing straight ahead—no duck feet or pigeon toes
3. Find your optimal heel distance: Place your heels 6-8 inches from your glutes, roughly where your fingertips touch when your arms are extended
This heel placement is critical. Too close and you'll cramp. Too far and your hamstrings take over, stealing the work from your glutes.
4. Set your arms: Let them rest by your sides with palms facing up toward the ceiling—this creates stability without tension
The Movement Execution
The lift sequence matters more than most people realize. You're not just throwing your hips up and hoping for the best.
5. Initiate with intention: Simultaneously squeeze your glutes and tighten your abs before any movement begins
6. Drive the lift: Push through your heels (never your toes) while lifting your hips toward the ceiling
7. Find your peak: Stop when you achieve a straight line from your knees through your hips to your shoulders—no higher
Going beyond this straight line shifts the work from your glutes to your lower back, which defeats the entire purpose.
The Critical Details
Breathing coordination: Exhale as you lift, inhale as you lower. This timing helps maintain core tension and supports the movement.
The pause principle: Hold the top position for one full breath. This brief pause ensures you're actually engaging your glutes rather than bouncing through the range of motion.
Controlled descent: Lower slowly and deliberately. The eccentric portion builds just as much strength as the lift itself.
Throughout every rep, keep your core engaged like someone's about to poke your stomach. This core tension prevents your lower back from taking over and keeps the focus squarely on your glutes where it belongs.
The difference between an effective glute bridge and a waste of time comes down to these technical details. Master them, and you'll feel the difference immediately.
The Critical Importance: Why Your Body Needs Glute Bridges
Your glutes aren't just about aesthetics—they're the powerhouse that keeps your entire kinetic chain functioning properly.
When they're weak, everything else pays the price.
The Foundation Problem
Think of your glutes as the foundation of a house.
When that foundation cracks, problems show up everywhere else.
Weak glutes force your body into compensation patterns that create a cascade of dysfunction.
Your core stability depends heavily on strong glutes.
These muscles work together with your deep abdominal muscles to create the foundational strength that supports proper exercise form and daily movement function.
Without this foundation, every squat, deadlift, and even simple movements like getting out of a chair become inefficient and potentially harmful.
The postural connection runs deeper than most people realize.
Your glutes and erector spinae work as a team to maintain your upright posture throughout the day.
When you strengthen these muscles through glute bridges, you're building the muscular endurance needed to stand and sit properly for hours without fatigue.
The Pain Prevention Factor
Lower back pain represents the largest single cause of disability, and weak glutes are often the hidden culprit.
Here's why: your glutes stabilize your pelvis and hip.
When they can't do their job, your back muscles get recruited to pick up the slack, creating unnecessary strain through your thoracic, lumbar, and sacrum sections.
Glute bridges directly address this problem by teaching your glutes to fire properly and providing the pelvic stability that prevents overloading.
Instead of your back compensating for weak glutes, you develop the strength where it's supposed to be.
The Performance Connection
The research tells a compelling story.
Elite sprinters possess 45% larger gluteus maximus muscles compared to sub-elite athletes.
This isn't coincidence—it's cause and effect.
Strong glutes enhance hip extension, which powers:
- Every squat variation (back, front, low bar)
- All posterior chain pulls (deadlifts, Romanian deadlifts, cleans, snatches)
- Explosive movements like jumping and sprinting
- Athletic performance across virtually every sport
When you master the glute bridge, you're building the foundation for these more complex movements.
The hip extension pattern you develop here directly transfers to heavier, more demanding exercises.
The Modern Lifestyle Solution
Prolonged sitting creates a perfect storm of dysfunction.
Your hip flexors tighten while your glutes weaken and essentially “turn off.”
This combination leads to decreased hip mobility, and your body starts overcompensating with improper movement patterns that affect everything from walking to athletic performance.
Glute bridges combat both sides of this problem simultaneously.
They strengthen your weak glutes while stretching your tight hip flexors, essentially undoing the damage from hours spent in chairs.
The compensation cascade works like this: Weak glutes can't provide adequate support, so they call on your back muscles to take over.
This creates muscle imbalances that lead to improper movement mechanics, which eventually result in pain and injury.
Glute bridges interrupt this cascade by restoring proper function where it belongs—in your glutes.
When these muscles can do their job of stabilizing your pelvis, everything else in your kinetic chain can work as designed.
Programming Your Glute Bridge Training: Sets, Reps, and Frequency
Programming glute bridges correctly makes the difference between building strength and just going through the motions.
The key lies in understanding when to push and when to back off.
The Foundation Protocol
Start with the standard approach that works for most people: three sets of 15-20 reps with 3-5 second holds at the peak position.
This combination builds both strength and endurance while teaching your nervous system proper glute activation patterns.
For general strength building, aim for 10-15 reps per set, but here's the critical part—stop 2-3 reps before your form starts breaking down.
Quality trumps quantity every time.
When you feel your lower back taking over or your hips starting to wobble, that's your cue to end the set.
Frequency Strategy: Daily vs. Strength Sessions
Glute bridges offer unique programming flexibility that most exercises don't:
Daily activation use: You can perform light glute bridges most days of the week as a way to wake up dormant glutes. Think of these as movement prep rather than strength training.
Strength-focused sessions: When you're using glute bridges as a primary strength exercise, allow 1-2 days of recovery between sessions. Your muscles need time to adapt and grow stronger.
This dual approach lets you get frequent glute activation while still building serious strength when you need it.
Weekly Volume Guidelines
Current strength and conditioning research points to 10-20 work sets per week as the sweet spot for strength improvements, spread across a minimum of two weekly sessions.
This volume range gives you room to adjust based on your goals and recovery capacity.
If you're just starting out, begin closer to 10 sets per week.
More advanced trainees can push toward 20 sets, especially when combining different variations and intensities.
Isometric Progression System
Phase 1: Start with 15-20 second holds at the peak position Phase 2: Progress to 30-60 second holds as your strength improves
Between isometric sets, rest for a full minute.
These holds demand more from your muscles than regular reps, so adequate recovery prevents form breakdown and maintains training quality.
Isometric holds build a different type of strength than regular reps—they teach your muscles to maintain tension under fatigue, which translates directly to better performance in other exercises.
Strategic Workout Integration
Pre-workout activation: Use glute bridges before compound lifts like squats and deadlifts. Two to three light sets wake up your glutes and improve the quality of your main lifts.
Post-workout reinforcement: End leg-focused training sessions with glute bridges to reinforce proper activation patterns and build muscular endurance when you're already fatigued.
Pre-activity preparation: Before running or cycling, a few sets of glute bridges improve neuromuscular connection and help prevent your hip flexors from dominating the movement patterns.
The beauty of this exercise lies in its versatility.
You can use it as activation work, strength training, or corrective exercise depending on how you program the sets, reps, and intensity.
Match your approach to your immediate needs, and adjust as those needs change.
Avoiding Critical Mistakes: Common Errors That Sabotage Results
The difference between an effective glute bridge and a waste of time often comes down to subtle technical details.
Most people make the same predictable mistakes that turn this powerful exercise into an ineffective movement pattern.
The Overextension Trap
The biggest mistake you can make is thinking higher equals better.
When you thrust your hips as high as possible, you're actually shifting the load away from your glutes and onto your lower back.
This hyperextension puts your spine in a compromised position while reducing the very muscle activation you're trying to achieve.
The optimal peak position: Your hips should remain slightly lower than both your knees and shoulders at full extension.
Think straight line, not mountain peak. This positioning keeps the tension exactly where you want it—in your glutes.
Foot Positioning Failures
Your foot placement determines which muscles do the work, and most people get this wrong.
Too close to your glutes: Engages your adductors (inner thighs) and reduces glute activation Too far from your glutes: Shifts the work to your hamstrings instead of your glutes
The telltale sign of poor foot positioning is feeling the burn in the wrong muscles.
If your hamstrings are screaming while your glutes feel nothing, your feet are positioned too far from your body.
Adjust by moving your heels closer until you feel the work where it belongs.
Force Distribution Errors
Where you push from changes everything about this exercise.
Driving through your toes instead of your heels shifts your body into an anteriorly rotated position that activates your quads and calves while minimizing glute engagement.
The heel drive principle: Think about pushing the floor away through your heels. This simple cue automatically improves your pelvic position and maximizes glute activation.
Engagement and Execution Problems
Incomplete activation: Many people go through the motions without fully engaging their glutes at the peak position. You should actively squeeze and contract your glutes at the top of each rep, not just lift your hips and hope for the best.
Speed kills connection: Blasting through reps as quickly as possible prevents the mind-muscle connection that makes this exercise effective. Slow down, focus on the muscles you're working, and emphasize control throughout the entire range of motion.
The goal isn't to complete as many reps as possible—it's to perform quality reps that actually build strength where you need it.
Programming and Recovery Mistakes
Form vs. quantity: The moment your form starts breaking down, your set should end. Prioritizing rep count over movement quality turns strength training into junk volume that doesn't contribute to your goals.
Recovery neglect: When using glute bridges as a strength exercise, your muscles need 1-2 days between sessions to adapt and grow stronger. Ignore recovery, and you'll plateau quickly while increasing your injury risk.
Warning signs to watch for:
- Lower back pain during or after the exercise
- Feeling the work primarily in your hamstrings or calves
- Unable to maintain the peak position without arching your back
- Fatigue that prevents proper glute activation
These mistakes aren't just technical errors—they actively work against your goals by reinforcing poor movement patterns and training the wrong muscles.
Fix them, and you'll immediately feel the difference in muscle activation and exercise effectiveness.
Progressive Variations: Advancing Your Glute Bridge Journey
Once you've mastered the basic glute bridge, the real strength building begins.
Progressive variations allow you to continuously challenge your glutes while addressing specific weaknesses and imbalances that regular bridges can't touch.
Single-Leg Progressions: Unilateral Strength Development
The single-leg glute bridge represents the most logical next step from the basic variation.
Lift one foot a few inches off the floor while maintaining perfectly square hips throughout the movement.
This seemingly simple change doubles the workload on your supporting leg while exposing strength imbalances between sides.
The challenge multiplies with single-leg Kas bridges.
Add a resistance band around your thighs during single-leg work, and you've created a progression that demands exceptional glute strength and stability.
The band provides constant tension while the unilateral load tests your ability to maintain proper alignment under fatigue.
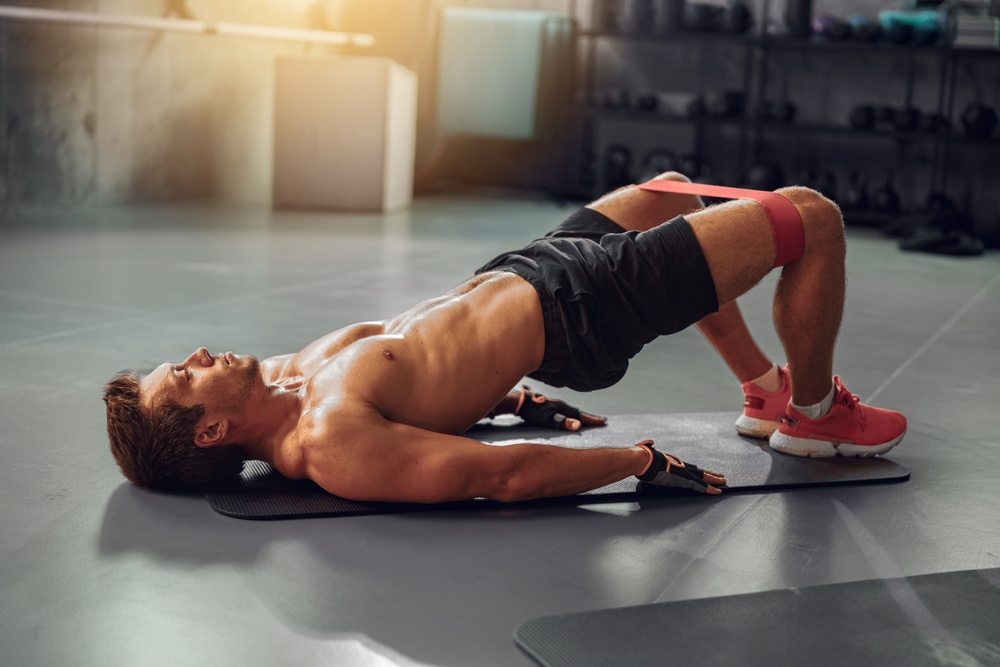
Band Integration: Targeting the Gluteus Medius
Standard glute bridges primarily work your gluteus maximus, but adding a resistance band above your knees brings your gluteus medius into the equation.
This smaller but critical muscle stabilizes your pelvis during walking, running, and single-leg movements.
Position the band slightly above your knees and focus on pushing your knees apart throughout the entire range of motion.
The band should provide moderate tension—enough to create resistance but not so much that it compromises your form or range of motion.
Weighted Progressions: Building Serious Strength
Starting load options:
- Single dumbbell: Place across your hips with a folded mat or towel underneath for comfort
- Sandbag: Distributes weight more evenly and conforms to your body shape
- Barbell: Advanced option that requires proper setup and safety considerations
The key with weighted progressions is comfort and positioning. Use a folded mat under any weight to prevent pressure on your hip bones.
Start light and focus on maintaining perfect form—the added resistance will challenge your glutes differently than bodyweight alone.
Accessibility and Modification Options
Not everyone can perform full range glute bridges immediately, and that's perfectly fine.
The half bridge option lets you work on glute activation and strength while staying within pain-free ranges of motion.
Half bridge execution: Lift your hips only partway off the ground—whatever range feels comfortable and allows proper glute engagement.
This modification works particularly well for people dealing with back, hip, or knee issues who still want to build glute strength.
This exercise serves as an excellent alternative for individuals who can't squat due to joint restrictions.
You get similar glute activation patterns while lying down and avoiding compressive forces on problematic joints.
Advanced Combination Strategies
Once individual variations become manageable, you can combine multiple challenges for increased training stimulus:
Banded single-leg bridges with isometric holds: Combines unilateral strength, gluteus medius activation, and time under tension
Weighted bridges with tempo manipulation: Add weight while controlling the speed of both the lifting and lowering phases
Circuit integration: Use different variations back-to-back to challenge your glutes from multiple angles within the same training session
Individualization Principles
Your progression should match your current capabilities and limitations.
Modify intensity and range of motion based on what your body can handle today, not what you think you should be doing.
Some days call for challenging progressions, while others require backing off to basic variations.
The beauty of these progressions lies in their scalability.
You can adjust difficulty through load, range of motion, stability challenges, or time under tension.
This flexibility means you'll never outgrow the glute bridge family of exercises—there's always another level to reach.
Conclusion
The glute bridge proves that the most effective exercises are often the simplest ones—no equipment needed, yet capable of addressing the widespread glute weakness that plagues our sitting-dominated society.
Whether you're dealing with lower back pain, looking to improve athletic performance, or simply want to build a strong foundation for other exercises, this movement delivers results that more complex exercises often can't match.
Start with the basic version today, focus on perfect form, and progressively challenge yourself as your strength improves.